
Chimney is in - well almost
- Thread starter beardley
- Start date
-
Active since 1995, Hearth.com is THE place on the internet for free information and advice about wood stoves, pellet stoves and other energy saving equipment.
We strive to provide opinions, articles, discussions and history related to Hearth Products and in a more general sense, energy issues.
We promote the EFFICIENT, RESPONSIBLE, CLEAN and SAFE use of all fuels, whether renewable or fossil.
You are using an out of date browser. It may not display this or other websites correctly.
You should upgrade or use an alternative browser.
You should upgrade or use an alternative browser.
- Status
- Not open for further replies.
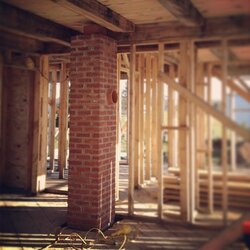

My Mason came and built the first floor section of our chimney the other day. Now I have to lug some blocks up to the 2nd floor for him to finish up. Looks good so far.

That is looking good. I take it this is a remodeling job and not new construction judging by the exposed beams and solid plank subfloor?
That is looking good. I take it this is a remodeling job and not new construction judging by the exposed beams and solid plank subfloor?
No sir, new construction. We're doing things the old fashion way. Rough cut full dim lumber as well.
oconnor
Minister of Fire
That's what I was wondering too. It's not too common to use a clay flue in a new house. A Class A flue system would perform much better and be way more durable. Or an insulated SS liner in place of the clay is also a good way to go. Is that a 12"x12" or 8"x8" clay? How far will it be from that beam? It looks like the brick will need to be notched around it. It's hard to tell from the pic.Is there a specific reason you are using clay liner instead of a stainless liner?
The liner is 8x12. We decided to go a very traditional route with this house. Given the overall height (approx 30') and that it is in the very middle of the house, it should still perform very well. Would steel perform better? Absolutely. The clay will certainly outlast me, along with the advantage of having the brick absorb some of the heat and act as a heat battery in the middle of the house.
Clearances are close but over the 2" requirement so we are good to go on that front. We'll be installing a Woodstock Keystone that we're hoping to pick up sometime after Thanksgiving.
Clearances are close but over the 2" requirement so we are good to go on that front. We'll be installing a Woodstock Keystone that we're hoping to pick up sometime after Thanksgiving.
oconnor
Minister of Fire
Cool. I like the look of the brick, but question how well clay performs compared to a stainless liner given the higher temps of EPA stoves.
In a chimney fire, clay will likely crack and then need to relined with stainless. That can be dealt with later.
Keep an eye on the clearance between the brick and adjacent combustibles. Local codes vary greatly, but here I needed to line and insulate to reduce the clearances to wood from the brick to zero inches.
Enjoy the build, must be really satisfying.
Last edited:
You might want to ask Woodstock if that little stove will perform OK on that big rectangular flue. They might prefer that you drop a 6" liner down that clay since it's so oversized.
Yea I gave them a call and they didn't seem to think it would be a problem. I had some concern as well, but according to the manual it's within spec of max cross section.
Good deal! They must have tested it like that, because that flue would be considered oversized with other 6" stoves.Yea I gave them a call and they didn't seem to think it would be a problem. I had some concern as well, but according to the manual it's within spec of max cross section.
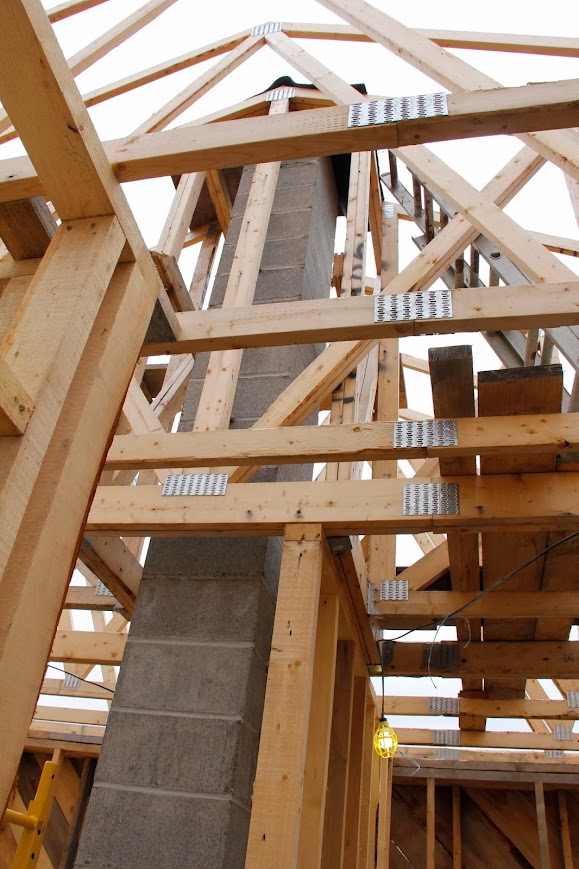
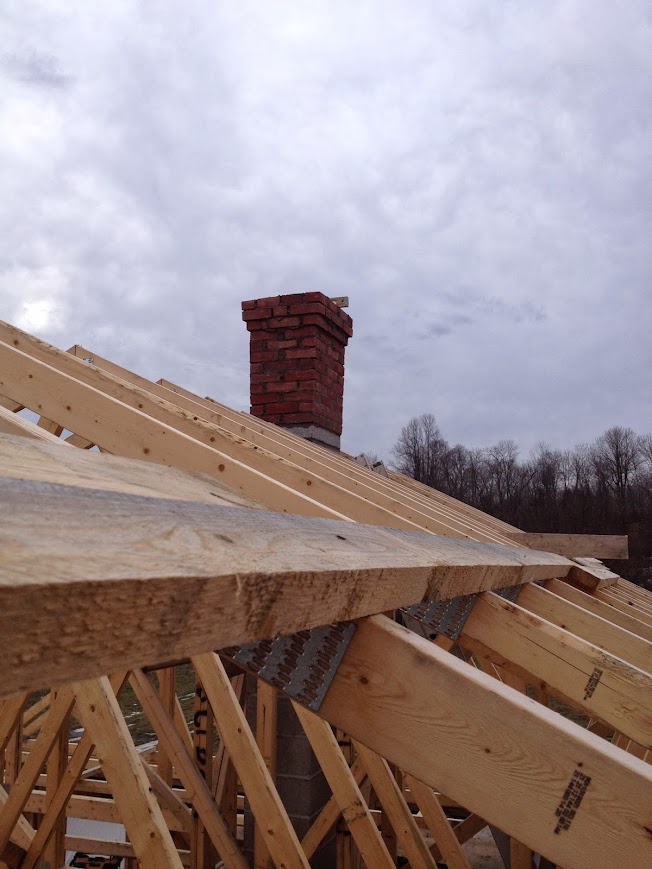
Chimney is finally done! Not that I can actually use it yet, or that it would do any good with no walls to speak of, but a big step none the less. It needs some time to cure, and we need to firestop each of the floors before we can get it inspected.

We also took a road trip and met the fine folks at Woodstock to pick up our keystone. Great service as was expected and it arrived home safely. Uploading the picture is the first that I noticed they changed the andirons. The old ones had a ring on the top, but mine looks like a candle flame. Hm. . .

Also an obligatory shot at the timber frame. It greyed pretty bad through construction, so we're going to spray the whole place down with bleach before we close it up, and make it nice and bright again.

We also took a road trip and met the fine folks at Woodstock to pick up our keystone. Great service as was expected and it arrived home safely. Uploading the picture is the first that I noticed they changed the andirons. The old ones had a ring on the top, but mine looks like a candle flame. Hm. . .
Also an obligatory shot at the timber frame. It greyed pretty bad through construction, so we're going to spray the whole place down with bleach before we close it up, and make it nice and bright again.
mol1jb
Feeling the Heat
Man those rough beams look absolutely georgous. Are you going to keep them visible or cover them up?
brenndatomu
Minister of Fire
bag of hammers
Minister of Fire
+1Man those rough beams look absolutely georgous. Are you going to keep them visible or cover them up?
Dakotas Dad
Minister of Fire
There's no way I'm coving that work up! That was all done the old fashion way with hand tools. We certainly want a "natural" look and don't plan on putting any sort of finish or seal on the timbers, but we don't want the gray. The bleach will restore the natural lightness of the hemlock so it will be a reboot of sorts. Now that it won't be exposed to direct sunlight it will develop a very nice petina over the years.
mol1jb
Feeling the Heat
")
Nick Mystic
Minister of Fire
Looks like you will have a nice set up when you finish. I have an old Woodstock Classic in the lower level of our home that is set up similar to what you will have. The Classic only has a rear flue option so I have a single wall 90 into three feet of single wall and then another 90 into a clay tile thimble into an 8x11" clay tile liner inside a huge masonry chimney that contains two other flues in the house. I have about a 28' vertical run up to the top of the chimney with no flex liner inside the clay tile liner. The stove drafts great with no smoke out the door on reloads. It burns nice and clean and I've yet to need to sweep the chimney in the ten years we've been in the house. I clean the lower pipe each season and scoop some creosote and ash out of the bottom of the clay tile liner that extends about a foot or down beyond the thimble opening. I think the creosote/ash that might build up inside the clay liner must just flake off the sides of the clay tiles as it expands and contracts with heating and cooling. You will have one less 90 in your set up, so you should burn even better. Good luck with the remainder of your project.

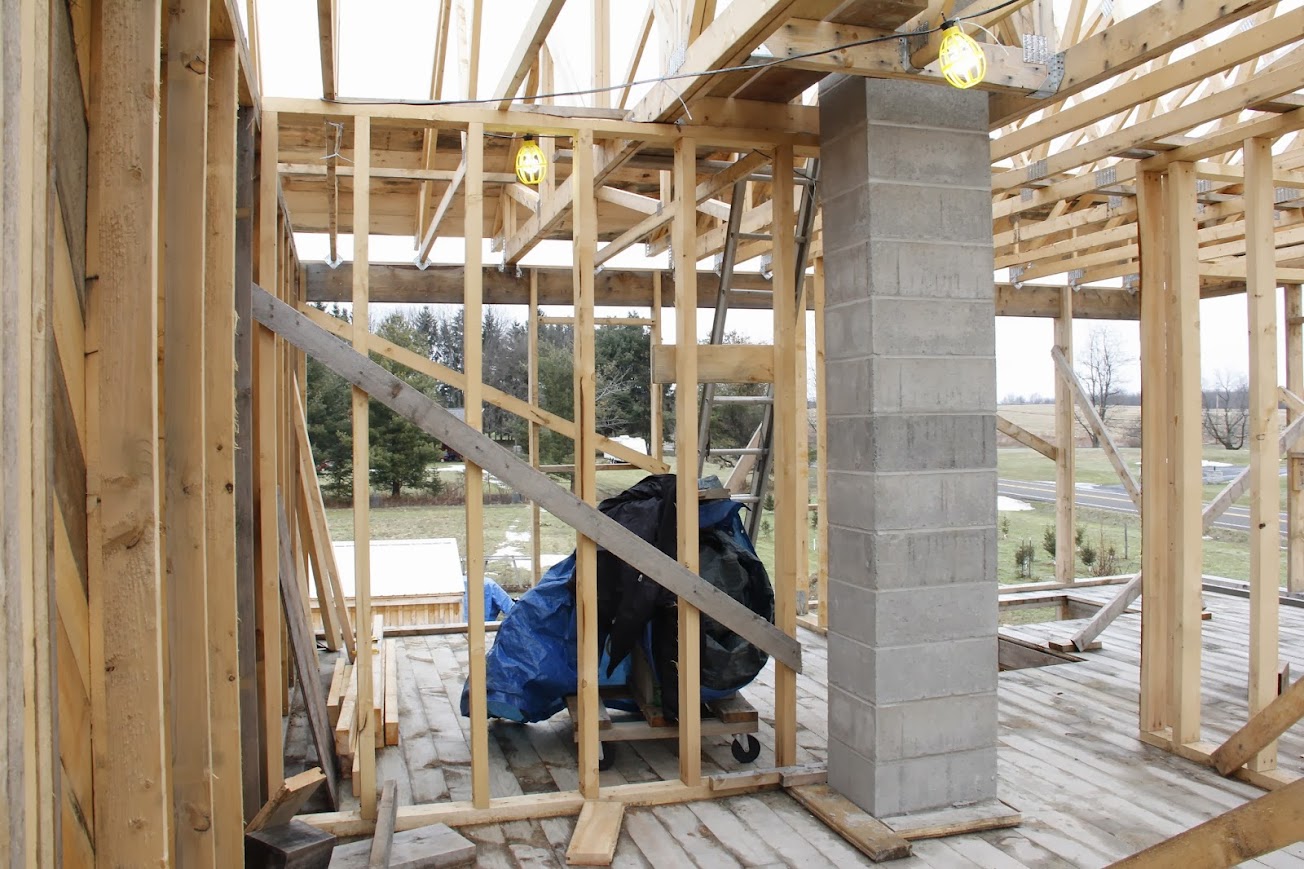
Ok question for the code guys. This build is a bit unconventional because there isn't a wall pass through for the thimble. The chimney is remaining 100% exposed on the first floor. We have our 2" clearance all the way around, but I'm stuck on the thimble. Based on my reading, I think I need 12" at the thimble. Right now I'm about 10" to the stud, so I think I'm going to need to protect the wall somehow. Is my thinking correct, or because it's not passing through a wall am I overthink this?
12" is the rule, but you will have to ask your inspector. Free air is a good insulator. Should be ok because it is not passing through a wall, but ask.Given the closeness to the wall, double-wall connector will be required.
What is the wood right up against the chimney? Is this temporary?
What is the wood right up against the chimney? Is this temporary?
Thanks, I plan on checking with our code officer, but it's nice to get some opinions.
The wood is not actually in contact with the chimney. Just a bad photo perspective. It's about 3 inches away for the brick. I was planning on double wall as I'm way under the 18" for single wall. Just stuck on this thimble problem. Clearly I want it to be a safe install, but I also don't want to throw money at a heir sheiks if it's not required.
The wood is not actually in contact with the chimney. Just a bad photo perspective. It's about 3 inches away for the brick. I was planning on double wall as I'm way under the 18" for single wall. Just stuck on this thimble problem. Clearly I want it to be a safe install, but I also don't want to throw money at a heir sheiks if it's not required.
- Status
- Not open for further replies.
Similar threads
- Replies
- 12
- Views
- 681
- Replies
- 10
- Views
- 1K
- Replies
- 19
- Views
- 612
- Replies
- 1
- Views
- 745