Cutting a Tee Snout to Length

  • Active since 1995, Hearth.com is THE place on the internet for free information and advice about wood stoves, pellet stoves and other energy saving equipment.

    We strive to provide opinions, articles, discussions and history related to Hearth Products and in a more general sense, energy issues.

    We promote the EFFICIENT, RESPONSIBLE, CLEAN and SAFE use of all fuels, whether renewable or fossil.

MaudSTL

Member
Jul 22, 2019
16
St. Louis, MO
I’m about to line and insulate my masonry chimney flue. I am setting up for a Blaze King Boxer 24, and have followed the criteria in its manual.

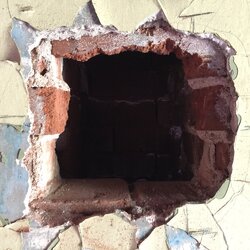
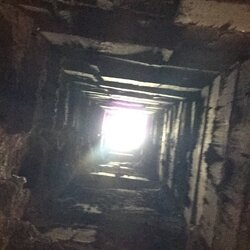
We have opened the flue at the correct height and will be using a two-part tee with a separate snout.

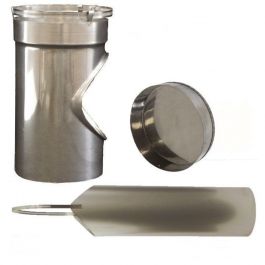
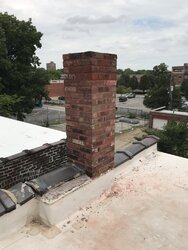
In a test fitting, the snout protrudes a long distance out of the chimney breast, which is not yet finished as the house is undergoing renovation.

What’s the best way to trim a tee snout to length? Should it be trimmed before or after installation? If after installation, how can it be trimmed without beating up the finished wall?

I had been assuming that my best time to trim the snout is after I finish the wall over the chimney breast, but now I am wondering if I’m wrong. The flue I’m using is off center in the chimney breast (which enables me to meet rooftop clearances required by code,) so I will be adding 1/2” Durock cement board behind the stove per Blaze King specs and then shingling with slate shingles. If I trim after slating, I’m worried that I won’t be able to trim close enough to the slate without breaking it.

Is it best to estimate the finished length and trim it before installation? If I trim it before, I will need to add 1/2” for the Durock plus whatever the thickness of the slate shingles will be.

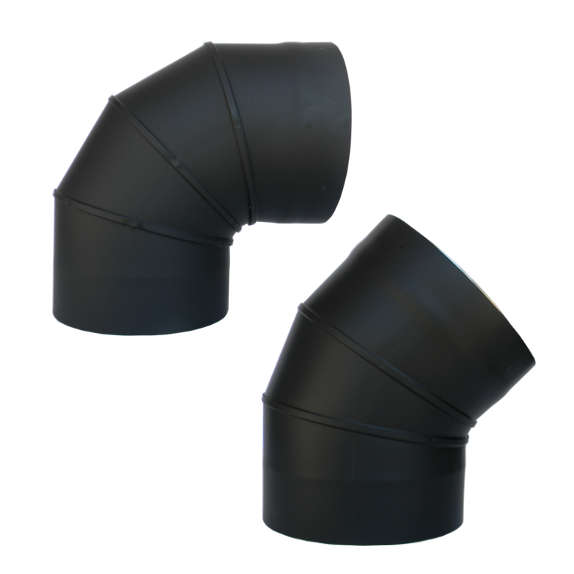
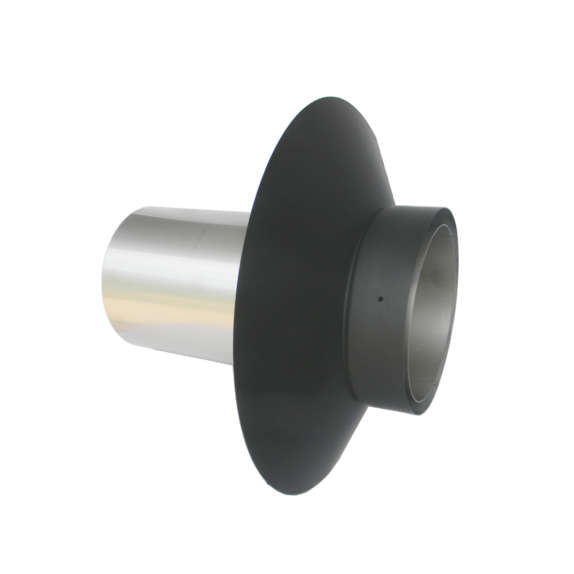
This is the adapter I am looking at. I am thinking it must slide into the snout of the tee, but I don’t know that for a fact.

Thanks in advance for your advice.

Maud
 
Trim it before the install. Just leave it a bit long and paint it Black. The get a simple trim collar to go around it after finished no need for that adapter
 
Thanks. The reason I thought I needed the adapter is because Blaze King specifies a double wall stovepipe and my chimney liner and tee are single wall. Blaze King recommends using two 45s instead of a 90, so I was looking at these.
 
Last edited:
Thanks. The reason I thought I needed the adapter is because Blaze King specifies a double wall stovepipe and my chimney liner and tee are single wall. Blaze King recommends using two 45s instead of a 90, so I was looking at these.
How tall is your chimney
 
The double wall 45 will fit over the Tee snout, sometimes it needs crimped. No need for an adaptor. Although, I really like the adaptor you mentioned above, it makes a nice positive connection, it’s not necessary though.
 
Is the wall pass through done correctly?
 
I’ll take some photos of the opening in the flue tomorrow and post them. I had previously posted the 10” x 10” flue itself after we opened it up.

We followed the Blaze King specs for the height of the flue opening, and opened up the flue I need to use, which is the right-most flue of the three in the original chimney. I needed to go with that flue to meet code...it’s 10’ from the back wall of the third floor.

The chimney breast is one layer of brick with 7/8” plaster on it. I will put 1/2” Durock on top of the plaster, and finish with the slate shingles I have on hand.

The masonry part of the chimney flue to the center of the opening in the chimney breast is 22’, and will be extended 4’ higher with a double wall stainless steel chimney pipe for a total of 26’ high. We will insulate the flexible liner to the tee with vermiculite slurry.

Beneath the tee we are using rigid SS chimney pipe to extend 8’7” to a basement clean-out. The pipe will be capped. We plan to jam as much fiberglass insulation around the clean-out pipe as we can before we pour in the vermiculite.

I had to get the flue rebuilt to the proper height. The chimney used to be a three flue chimney. I had taken it down a number of years ago to avoid having to rebuild the whole thing...it’s a 1903 house and that chimney was not in use. But now that I need a wood stove, I had a mason build just the one flue I need to the proper height.

Blaze King specifies a minimum 23’ tall chimney for the Boxer 24, and I have to go to 26’ to extend 2’ above my third floor roof. This chimney is on the second floor roof. The photo shows the masonry chimney as rebuilt with a single flue.
 

Attachments

  • 6178BDBF-DE56-4FE6-96BA-C64D9BA74CD8.jpeg
    6178BDBF-DE56-4FE6-96BA-C64D9BA74CD8.jpeg
    130 KB · Views: 110
Last edited:
Is the wall pass through done correctly?
Hi! Here’s a photo of the opening into the flue. I was planning to close it with mortar around the tee snout after completing the installation, and then sheathing the wall behind the stove with 1/2” Durock.
 

Attachments

  • 1A431338-18CA-4350-A442-CD868187E7DF.jpeg
    1A431338-18CA-4350-A442-CD868187E7DF.jpeg
    183.6 KB · Views: 102
Hi! Here’s a photo of the opening into the flue. I was planning to close it with mortar around the tee snout after completing the installation, and then sheathing the wall behind the stove with 1/2” Durock.
You need to cut the drywall back 18" around the crock and confirm that you have 12" of solid masonry surrounding the crock. If you do you are fine
 
You need to cut the drywall back 18" around the crock and confirm that you have 12" of solid masonry surrounding the crock. If you do you are fine

The chimney breast has no drywall. It is masonry (brick) with a 7/8” layer of plaster on it. In the photo you can see the layers, along with a layer of peeling yellow lead paint that I will be scraping off before I sheath it with 1/2” Durock.

Here is a photo of the 10” x 10” brick flue looking up.
 

Attachments

  • 0843A541-2CF5-4B81-BB8F-A213228444A3.jpeg
    0843A541-2CF5-4B81-BB8F-A213228444A3.jpeg
    158.8 KB · Views: 112
Last edited:
The chimney breast has no drywall. It is masonry (brick) with a 7/8” layer of plaster on it. In the photo you can see the layers, along with a layer of peeling yellow lead paint that I will be scraping off before I sheath it with 1/2” Durock.

Here is a photo of the 10” x 10” brick flue looking up.
Ok as long as there is 12" of solid masonry surrounding the crock in all directions you are fine.