
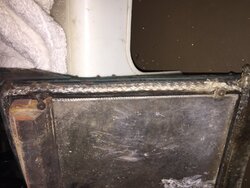
Replaced the gaskets sometime back, but didn't look closely enough when I removed the old ones. The gasket on the left door edge seats up against the right door, but the way I've done it there are two gaps near the top and bottom of the overlap. It's not obvious to me how I should've run the gasket in those areas. There are some notches at those spots to follow the contour of the right door.
I'd really like to seal this up and make it easier to control the stove temps.
Thanks in advance for your thoughts.
![IMG_20150123_105704673[1].jpg](https://www.hearth.com/talk/data/attachments/152/152192-6dfc42688db1ec16ba35e4b14bf8cd2d.jpg "IMG_20150123_105704673[1].jpg")
I'd really like to seal this up and make it easier to control the stove temps.
Thanks in advance for your thoughts.
Last edited by a moderator:


![IMG_20150202_080544773[1].jpg](https://www.hearth.com/talk/data/attachments/152/152387-01444b682294e3ffcd678d005dc107d7.jpg "IMG_20150202_080544773[1].jpg")
![IMG_20150202_080552058[1].jpg](https://www.hearth.com/talk/data/attachments/152/152389-923574ffb0cff680f59a98bb37d3cd46.jpg "IMG_20150202_080552058[1].jpg")
![IMG_20150202_214234275[1].jpg](https://www.hearth.com/talk/data/attachments/152/152476-6696a1c2c5387ba5ff098e652a354679.jpg "IMG_20150202_214234275[1].jpg")
![IMG_20150202_214223564[1].jpg](https://www.hearth.com/talk/data/attachments/152/152484-ab9218539ca585d846bf74b921a607d4.jpg "IMG_20150202_214223564[1].jpg")
![IMG_20150207_133520235[1].jpg](https://www.hearth.com/talk/data/attachments/152/152909-5de768c02a7131951ebac47f8288ea24.jpg "IMG_20150207_133520235[1].jpg")
![IMG_20150207_133542495[1].jpg](https://www.hearth.com/talk/data/attachments/152/152911-6ec7fa784883f6a8204305a618edd81e.jpg "IMG_20150207_133542495[1].jpg")