Hi all, I was googleing for info, and I kept seeing this forum come up so I figured I'd ask you guys. Apologies for joining and posting just for my one question!!
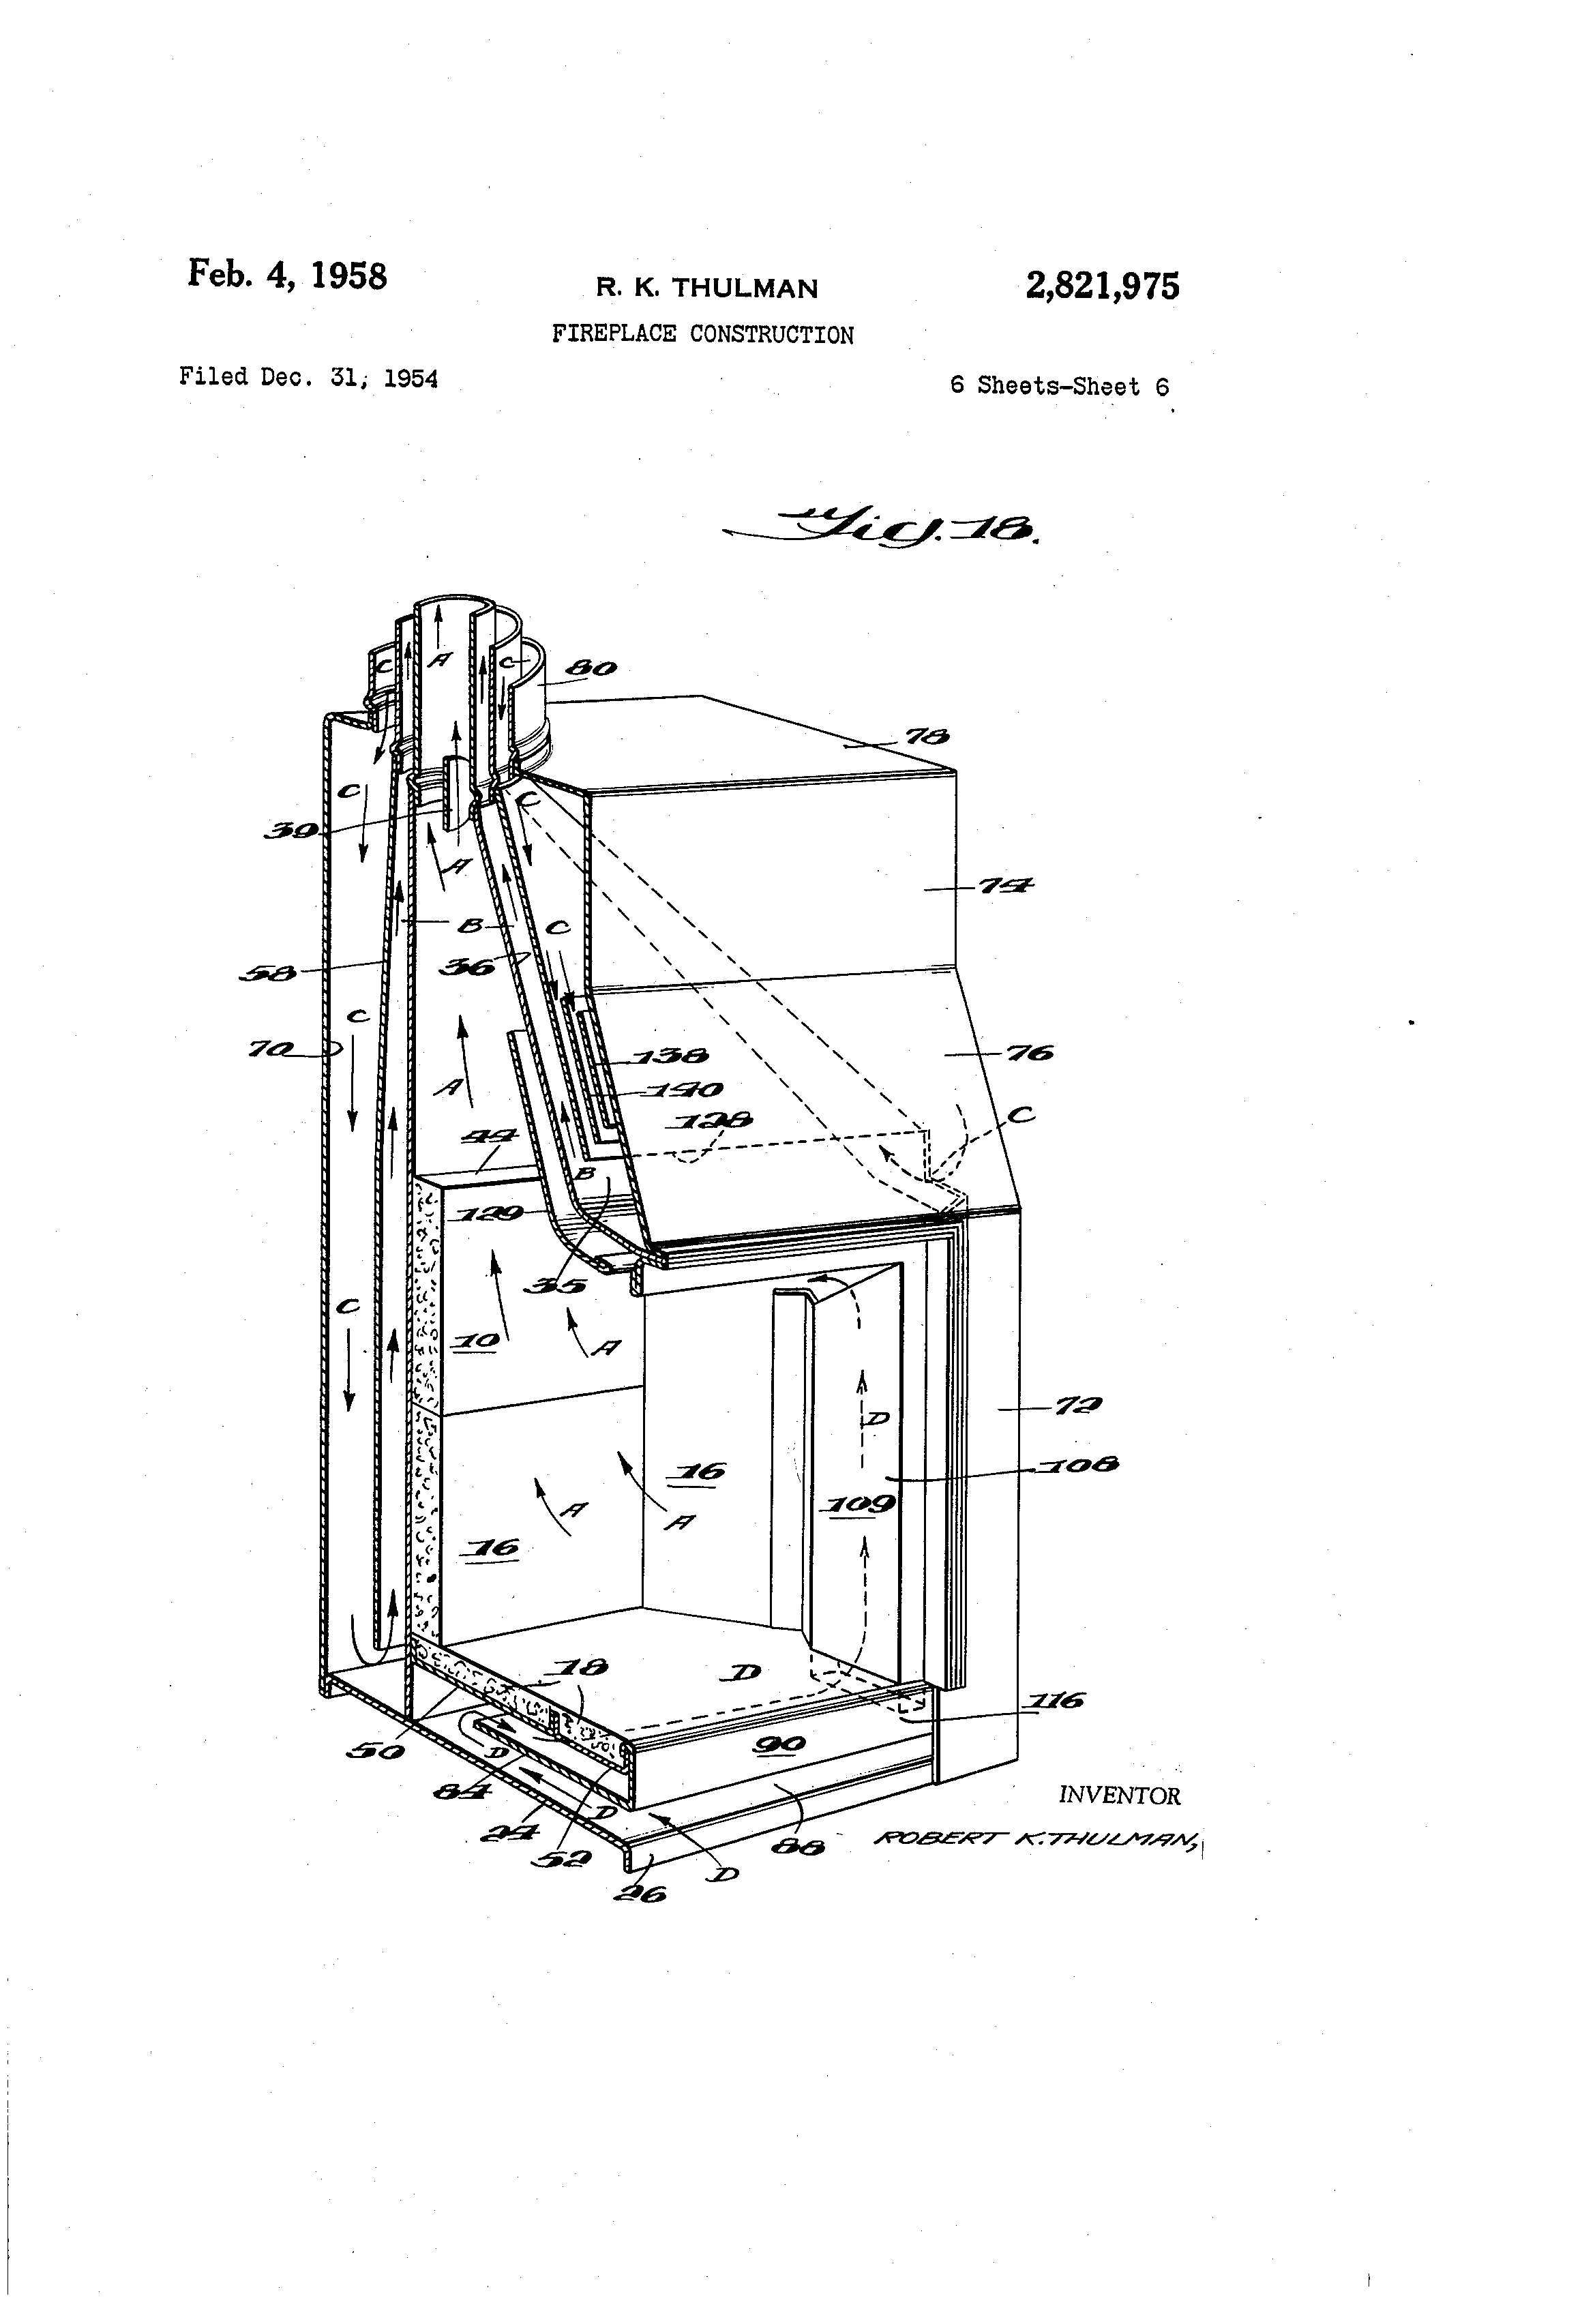
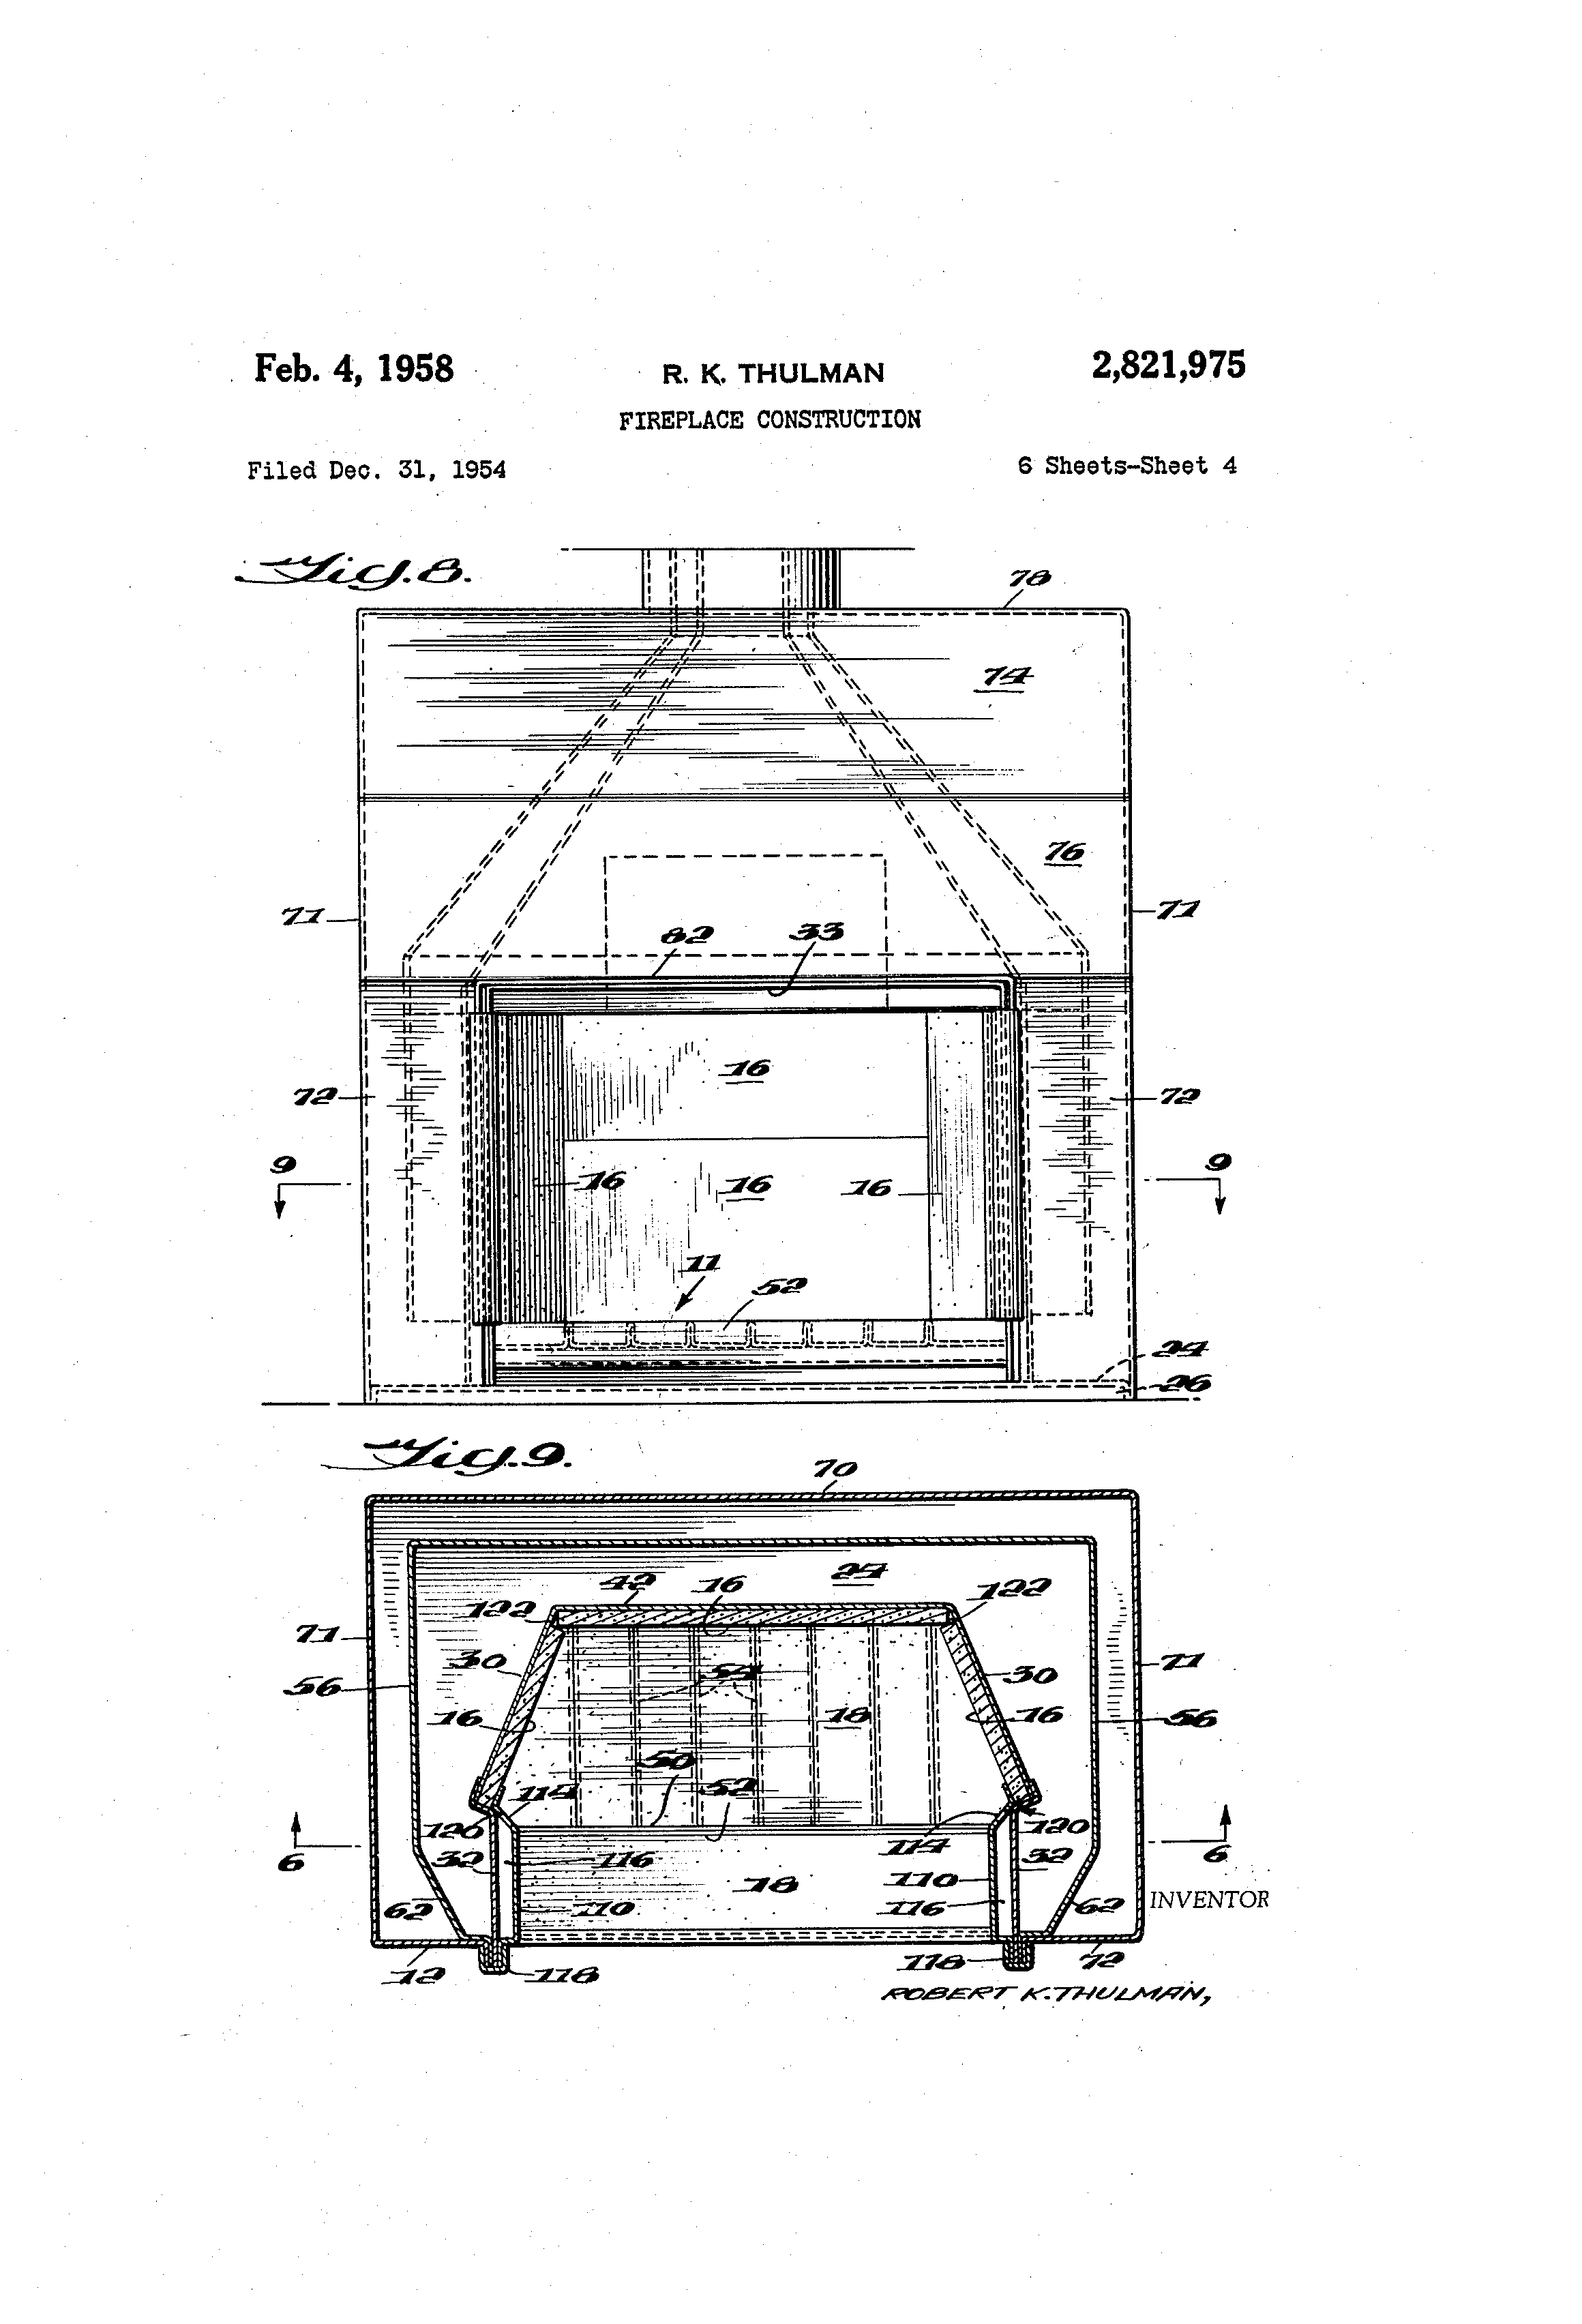
My house is a ranch-style built in 1970. The fireplace is cement block/brick and is 6' wide all the way from the basement to the chimney cap. It has two flues, one with the fireplace, a Majestic Thulman Model L36A, which is double or triple wall construction. Near the top of the chimney there are intake vents in the side and if you look in them you can see that the outer ~8-10" pipe terminates there so it can suck air from the vents. The inner ~6-8" pipe exits the top. The other flu used to be used for the furnace, but that has gotten replaced and now vents horizontally with PVC. The water heater does still use that flu though.
The guy who built the house must have used the gas log for about 1 hr, and then I did too, because everything is still shiny and new inside the chimney pipe. There was no point burning it because all the heat went straight up the chimney. Worthless.
So... I decided to install a gas insert so we could enjoy some warmth from the fireplace... which I know nothing about, so I called an expert. I looked in the local yellow pages, called the one guy listed under fireplaces/chimney-cleaning and bought from him what he recommended: An Enviro E20 with sealed 2" and 3" intake and exhaust tubes that'll run up the old chimney. I was hoping he'd install it but he doesn't, but he says local plumbers can or I could DIY it (I've installed shop heaters and in floor hydronic boilers a couple times).
Anyway, I have the gas line coming in through the fireplace walls that was used for the fire log, and looking through the old PDF docs I found online for the Thulman install, it does say "there is a 1 1/2 inch knockout to run the gas line through". But only 1.
BUT... I also need electricity. So somehow I need to get an outlet or some metal jacket wire coming in... I assume drilling a hole through the side of the 2 or 3 wall metal original "insert" wouldn't be recommended. The new insert did come with a metal plaque I can rivet on that says "this fireplace no longer can be used it was modified for an insert blah blah.".
I don't think there's room (or if it would be a good idea) to squeeze a power line in next to the gas line (which is flex copper).
So... how do I get power in there? My first impulse is to drill through all the walls, stick piece of copper pipe that fits tightly to the hold in there with tabs bent over and rivet it to the tin. This way there won't be too much cross contamination of air (no more than the way the gas entry looks). The run the nm or whatever through that. Or the fireplace floor has some cheap-looking cement blocks -- maybe the floor isn't triple walled and I could drill through it?
It seems such a waste, my old fireplace has a nice complex system for sucking in fresh air (from what I can tell) and here I am just running two new pipes up through it and not using any of that. It seems wrong.
My next step on Monday just may be to call in the local plumbers.
EDIT: I added some pics of the fireplace/chimney in question.
Thoughts?


 Thanks in advance!
My house is a ranch-style built in 1970. The fireplace is cement block/brick and is 6' wide all the way from the basement to the chimney cap. It has two flues, one with the fireplace, a Majestic Thulman Model L36A, which is double or triple wall construction. Near the top of the chimney there are intake vents in the side and if you look in them you can see that the outer ~8-10" pipe terminates there so it can suck air from the vents. The inner ~6-8" pipe exits the top. The other flu used to be used for the furnace, but that has gotten replaced and now vents horizontally with PVC. The water heater does still use that flu though.
The guy who built the house must have used the gas log for about 1 hr, and then I did too, because everything is still shiny and new inside the chimney pipe. There was no point burning it because all the heat went straight up the chimney. Worthless.
So... I decided to install a gas insert so we could enjoy some warmth from the fireplace... which I know nothing about, so I called an expert. I looked in the local yellow pages, called the one guy listed under fireplaces/chimney-cleaning and bought from him what he recommended: An Enviro E20 with sealed 2" and 3" intake and exhaust tubes that'll run up the old chimney. I was hoping he'd install it but he doesn't, but he says local plumbers can or I could DIY it (I've installed shop heaters and in floor hydronic boilers a couple times).
Anyway, I have the gas line coming in through the fireplace walls that was used for the fire log, and looking through the old PDF docs I found online for the Thulman install, it does say "there is a 1 1/2 inch knockout to run the gas line through". But only 1.
BUT... I also need electricity. So somehow I need to get an outlet or some metal jacket wire coming in... I assume drilling a hole through the side of the 2 or 3 wall metal original "insert" wouldn't be recommended. The new insert did come with a metal plaque I can rivet on that says "this fireplace no longer can be used it was modified for an insert blah blah.".
I don't think there's room (or if it would be a good idea) to squeeze a power line in next to the gas line (which is flex copper).
So... how do I get power in there? My first impulse is to drill through all the walls, stick piece of copper pipe that fits tightly to the hold in there with tabs bent over and rivet it to the tin. This way there won't be too much cross contamination of air (no more than the way the gas entry looks). The run the nm or whatever through that. Or the fireplace floor has some cheap-looking cement blocks -- maybe the floor isn't triple walled and I could drill through it?
It seems such a waste, my old fireplace has a nice complex system for sucking in fresh air (from what I can tell) and here I am just running two new pipes up through it and not using any of that. It seems wrong.
My next step on Monday just may be to call in the local plumbers.
EDIT: I added some pics of the fireplace/chimney in question.
Thoughts?
Thanks in advance!
Last edited: