Finally Some Stove Pics

  • Active since 1995, Hearth.com is THE place on the internet for free information and advice about wood stoves, pellet stoves and other energy saving equipment.

    We strive to provide opinions, articles, discussions and history related to Hearth Products and in a more general sense, energy issues.

    We promote the EFFICIENT, RESPONSIBLE, CLEAN and SAFE use of all fuels, whether renewable or fossil.
Status
Not open for further replies.

Brokenwing

Feeling the Heat
Feb 11, 2012
448
Northern Maryland
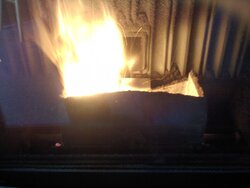
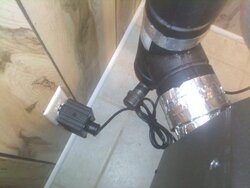
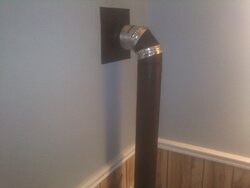
I do not think I ever posted some decent stove pics. So here is the beast that has given me some gray hair. Ignore the foil tape on the pipe, pipe is getting pulled this summer. Anyway I noramlly burn on setting 2 and the fire is barely above the burn pot. Well it got cold, and she is crankin so here you go, I hope you enjoy.


Attachments

  • regency gc60 2.jpg
    regency gc60 2.jpg
    116.3 KB · Views: 286
  • regency gc60 1.jpg
    regency gc60 1.jpg
    23.8 KB · Views: 295
  • regency gc60.jpg
    regency gc60.jpg
    19.4 KB · Views: 295
Nice stove. It's HOT!
 
very nice, enjoy
 
Well, now i see how someone else did a corner install. Very nice. Can you tell me what kind of connection is behind stove , a T for clean out or a just a plain 90 degree up. Also , what is outside the wall for termination of the pipe? Thank you
 
Thanks everyone, it has been a long road, with no support but with some Diy, foil tape, and RTV high temp sealant we have made it thus far. It is 3 degrees right now with the wind chill, and inside the house is 74 degrees. This is with the stove only running on setting 2. The stove is not centrally located, so we have a small heater upstairs. I am burning about a bag to a bag and half a day so not to bad.
 
Well, now i see how someone else did a corner install. Very nice. Can you tell me what kind of connection is behind stove , a T for clean out or a just a plain 90 degree up. Also , what is outside the wall for termination of the pipe? Thank you
A stove adapter comes off of the stove to a 90 degree cleanout tee, then up 3 ft to another 90 degree, and then straight out. I will post some pictures for you. As far as the hearth, I framed it with 2x3, then plywood, concrete board, and finally tile. I then skirted the whole thing in oak, after i ran it through the router to give it some character. I checked the prices on a hearth pad, and they were way to expensive. I built mine for under 100 dollars.
 

Attachments

  • pipe.jpg
    pipe.jpg
    20.7 KB · Views: 164
  • pipe 1.jpg
    pipe 1.jpg
    15 KB · Views: 159
  • install 4.jpg
    install 4.jpg
    20.7 KB · Views: 153
  • pipe 3.jpg
    pipe 3.jpg
    115.7 KB · Views: 175
Nice looking stove......don't forget the pics when the new pipe is installed. And make sure you seal the outside thimble/pipe with silicone.
 
Nice looking stove......don't forget the pics when the new pipe is installed. And make sure you seal the outside thimble/pipe with silicone.
the outside thimble is sealed, it was just to cold to go out and snap a pic last night, so I used a old pic from when i was doing this install, so he could see what it looks like lol.
 
Looking good!! Beautiful stove and Hearth. Glad your "issues" have finally been resolved :)

It was disheartening to read about the smoke problems, with the condition your family member has. A Happy Ending :)
 
  • Like
Reactions: Eatonpcat
Th
Looking good!! Beautiful stove and Hearth. Glad your "issues" have finally been resolved :)

It was disheartening to read about the smoke problems, with the condition your family member has. A Happy Ending :)
thanks Dexter, it has been a tough battle, but I think I may okay. Keeping my fingers crossed, and thanks for the support!
 
Status
Not open for further replies.