Got my insert today, have some questions

  • Active since 1995, Hearth.com is THE place on the internet for free information and advice about wood stoves, pellet stoves and other energy saving equipment.

    We strive to provide opinions, articles, discussions and history related to Hearth Products and in a more general sense, energy issues.

    We promote the EFFICIENT, RESPONSIBLE, CLEAN and SAFE use of all fuels, whether renewable or fossil.
Status
Not open for further replies.

Tom Wallace

Burning Hunk
Jan 20, 2013
204
Shoreline, WA
I got my Pacific Energy Super insert today. I've got a brand new chimney liner installed, just need to trim off the bottom foot or so, lift the insert into the hearth and attach the liner. My question is about that connection. The liner came with an appliance connector that slides into the slot on top of the stove and a screw clamp that attaches the liner to the clamp. Do I need some kind of sealant around the appliance connector where it connects to the stove? Or does it just sit in there snugly? Seems like this should be an airtight connection to prevent carbon monoxide from entering the home.

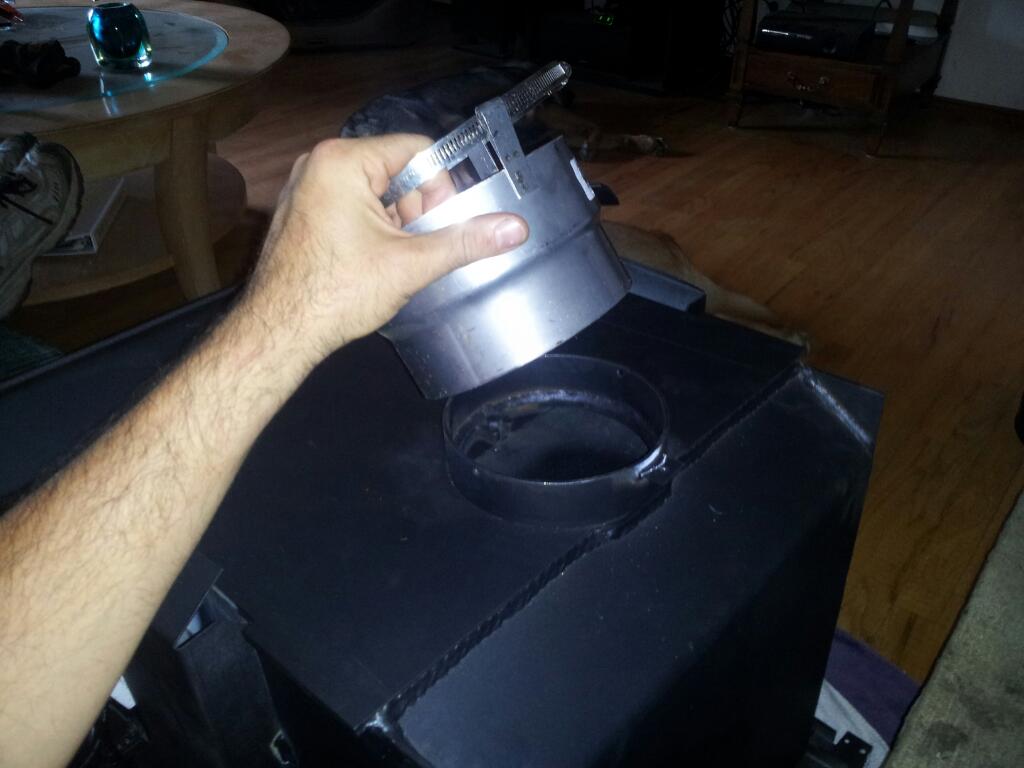
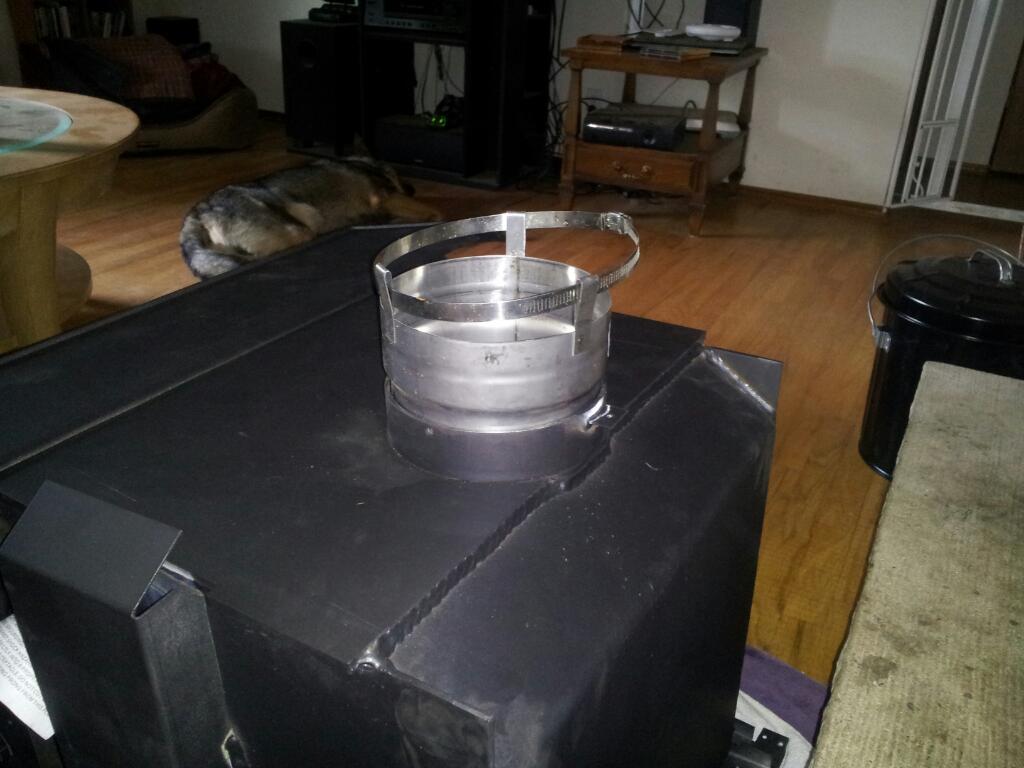
Here are some pics of the connection I'm talking about:

uTFMK1Q.jpg


veStPEJ.jpg
 
Some folks here like to seal it with a little furnace cement but that is not necessary. The connector usually fits pretty snugly and the draft pulls air in through any opening. If you have a draft you should have no problem attaching it without any additional sealing.

The collar usually has three screw holes to solidly attach the connector. On mine I also put three stainless rivets where the flexible slid into the connector in addition to the worm clamp.

KaptJaq
 
  • Like
Reactions: webby3650
Some folks here like to seal it with a little furnace cement but that is not necessary. The connector usually fits pretty snugly and the draft pulls air in through any opening. If you have a draft you should have no problem attaching it without any additional sealing.

The collar usually has three screw holes to solidly attach the connector. On mine I also put three stainless rivets where the flexible slid into the connector in addition to the worm clamp.

KaptJaq

That's exactly right. If you want to put some stove cement on there it won't hurt anything. But it's no different than a stove pipe connection, and there is no sealant used there.
 
Some folks here like to seal it with a little furnace cement but that is not necessary. The connector usually fits pretty snugly and the draft pulls air in through any opening. If you have a draft you should have no problem attaching it without any additional sealing.

The collar usually has three screw holes to solidly attach the connector. On mine I also put three stainless rivets where the flexible slid into the connector in addition to the worm clamp.

KaptJaq


I do see 3 holes in the insert's collar, though the insert did not come with any screws for this, and the connector has no holes to match up with those 3. I can drill holes in it, but not sure if I need to. The insert did come with 2 large black bolts, but I'm not sure what they're for. They're much too large for the holes in the collar. I'm not seeing any mention of those bolts in the manual either.
 
Unrelated but I bet your dog is going to have a new favorite spot to lay!
 
  • Like
Reactions: Dix and Tom Wallace
I do see 3 holes in the insert's collar, though the insert did not come with any screws for this, and the connector has no holes to match up with those 3. I can drill holes in it, but not sure if I need to. The insert did come with 2 large black bolts, but I'm not sure what they're for. They're much too large for the holes in the collar. I'm not seeing any mention of those bolts in the manual either.

Get some self tapping Stainless screws with 1/4" heads for the flue collar.
The large bolts are leveling bolts for the back of the unit.
 
Unrelated but I bet your dog is going to have a new favorite spot to lay!


I'm not sure. He's part Siberian Husky, he tends to like cooler places to lay down. We'll see come January.
 
Congrats to the new stove! I am sure you will love the Super. :)
 
Connection at the stove point should be air tight with the 3 screws, I used heat tape on the joint from the adapter to the ss liner, this sealed that connection very well....
 
Get some self tapping Stainless screws with 1/4 heads for the flue collar.
The large bolts are leveling bolts for the back of the unit.

Do they go into the underside of the unit? Seems like they'd be a pain to adjust if so. I may not need them anyway since I put a cement board into the fireplace to even out the floor with the hearth in front.
 
Do they go into the underside of the unit? Seems like they'd be a pain to adjust if so. I may not need them anyway since I put a cement board into the fireplace to even out the floor with the hearth in front.

That's where they go I'm pretty sure. I've not installed a PE insert, but many brands do it this way. Its a real pain sometimes. Lopi used to be this way, now the bolts are accessed from the inside under the bricks, and they even added rollers on the back of the unit to help slid it in!
 
Do they go into the underside of the unit? Seems like they'd be a pain to adjust if so. I may not need them anyway since I put a cement board into the fireplace to even out the floor with the hearth in front.

On page 8 of the online manual for the Pacific Energy Super insert they mention the leveling legs. Based on figure 4 on that same page they appear to screw into tabs near the bottom back corner of the side of the unit.

KaptJaq
 
On the connector, it is just me, but I dress the inside of the flue collar with furnace cement before installing them and then the same thing inside the adapter before slipping the liner into it. Sure it will pull air through any spaces. And give you a nice shiny creosote deposit where it does because the air coming in is colder than the flue gases. Been there.
 
On page 8 of the online manual for the Pacific Energy Super insert they mention the leveling legs. Based on figure 4 on that same page they appear to screw into tabs near the bottom back corner of the side of the unit.

KaptJaq


There are tabs on each side of the unit in back, but they have two screw holes in it, neither of which is nearly large enough for the leveling bolt. These tabs were used to screw the insert to the crate it was shipped on. It doesn't matter anyway though, once I got the insert into the hearth I checked the level and it's really close to perfectly level already. No need for the bolts.

The only step I have left now is getting the surround on. Seems like that would be an easy step, but the instructions are vague on this part, and the screws I have to attach the brackets to the surround are too big for the holes (barely). I must be missing something. I'll have to wait until after work today to figure it out.

I rented a PowerMate dolly for taking this up the stairs, but ended up not using it. My stairway was only 5 or 6 steps and the stove and dolly combined were only barely small enough to fit up it. I didn't want to risk scratching up the stove as I went up. So I got a 2"x10" board and laid it up the steps. Then we simply slid the insert up that board. Worked like a charm. Used the same board to lift the insert onto the hearth.
 
I rented a PowerMate dolly for taking this up the stairs, but ended up not using it. My stairway was only 5 or 6 steps and the stove and dolly combined were only barely small enough to fit up it. I didn't want to risk scratching up the stove as I went up. So I got a 2"x10" board and laid it up the steps. Then we simply slid the insert up that board. Worked like a charm. Used the same board to lift the insert onto the hearth

Heh ...........Would have liked to have heard how the dolly worked out for ya. But glad you had the ingenuity to get it moved ok.
 
Status
Not open for further replies.