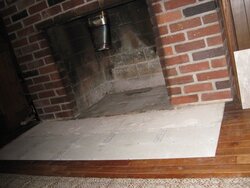
I want to extend my hearth this year so I don't have to use my old banged up portable hearth extension. I want to replace my existing hearth tiles and come out 26" from the front of my fireplace. That means cutting 12" of my 3/4" red oak floor. Circular saw I guess. Scary. I'd like to go with 12" slate gray tiles. My new size will be 26" x 64" and flush with the floor. I'm thinking I'll need some concrete board to bring the tiles up to the hardwood level? Any ideas or advice? Pictures of hearth designs? Because of the size, can I make up the 2" deep by 4" width by the gaps in the 12" tiles or do I need some thin outer tile trim. Lots of questions.
Thanks
Bud
Thanks
Bud
![DSCF1913[1].JPG](/talk/data/attachments/18/18579-2dee3d88143941770e5bb7ff5d7b3536.jpg)