Help - Need tips for removing the full damper housing

  • Active since 1995, Hearth.com is THE place on the internet for free information and advice about wood stoves, pellet stoves and other energy saving equipment.

    We strive to provide opinions, articles, discussions and history related to Hearth Products and in a more general sense, energy issues.

    We promote the EFFICIENT, RESPONSIBLE, CLEAN and SAFE use of all fuels, whether renewable or fossil.
Status
Not open for further replies.

fireberd350

New Member
Sep 7, 2014
27
pa
Photo Oct 01, 10 46 06 AM.jpg Photo Oct 01, 10 46 14 AM.jpg Photo Oct 01, 10 46 30 AM.jpg Photo Oct 01, 10 46 34 AM.jpg
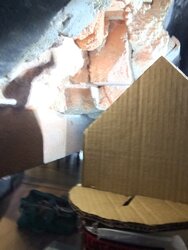
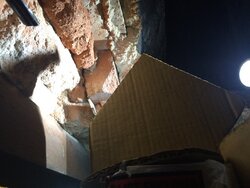
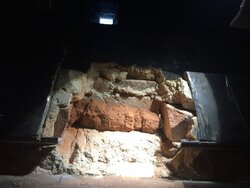
I need to remove this entire thing to get enough clearance for my install. I just spent an hour w/ a metal wheel and got one cut done. As I started going across the bottom I realized this was just not going to work. I'm open to any suggestions here.
 
Last edited by a moderator:
Curious as to why it all needs to come out? Is this for liner clearance or for the stove? If liner, it looks like just removing some smoke shelf brick might help more.
 
I dont have the vertical clearance to get the liner onto the stove outlet (which is top center of stove)

I mocked out the stove outlet and what a 45 would look like on it. It only fits if I push the stove outlet back further into the firebox (not an option), or lower it (possible option if I chop the pedestal).

Additionally I will need some additional clearance to install the pipe, it cant be a perfect fit.

Photo%20Oct%2001%2C%2011%2007%2042%20AM.jpg

Photo%20Oct%2001%2C%2011%2012%2034%20AM.jpg
 
I'm coming to the realization that I need to do away w/ the free standing stove and just get an insert :(

She looked so good in there too :(

Photo%20Sep%2027%2C%2012%2016%2011%20PM.jpg
 
We have taken them out before you just need to cut them up into pieces but that can be tough because there is almost always masonry right behind them which kills wheels. It usually takes 2 to 3 hours and allot of wheels
 
  • Like
Reactions: bholler
One possible option would be to remove the blower and remote mount it. You'd need to make a small offset plenum box so that a hose could be run under the stove body, but that might get those 2 precious inches.
 
Brute force prevails. after 3 hours of cutting wheel sparks flying all over me I got it cut out. I then took an air hammer and opened up the masonry on top of it. looks like i should have enough room now that I don't even need a 45 attachment. I think I can take flex right into the stove.
 

Attachments

  • Photo Oct 01, 5 05 31 PM.jpg
    Photo Oct 01, 5 05 31 PM.jpg
    87.1 KB · Views: 138
  • Photo Oct 01, 5 06 04 PM.jpg
    Photo Oct 01, 5 06 04 PM.jpg
    188.3 KB · Views: 148
  • Photo Oct 01, 5 06 22 PM.jpg
    Photo Oct 01, 5 06 22 PM.jpg
    189.5 KB · Views: 150
Aren't you glad you only have to do this once?

Before finishing, the fireplace will need a permanent plaque on the back wall stating that it's no longer suitable for use as a fireplace.
 
I just installed the same stove. I replaced a jotul f100. It sits in a fireplace similar set up as you....... my flex pipe wasn't lining up straight it was coming down at a slight angle to the connection on the stove so I removed 2 bricks from the back of the fireplace and cut an inch and a half off the legs and fit right in.
 
People keep just refusing to believe me how easy it is with a hacksaw. Easy and a lot less drama.
 
Status
Not open for further replies.