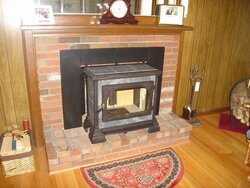
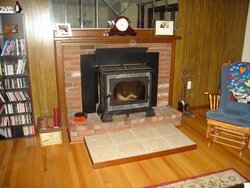
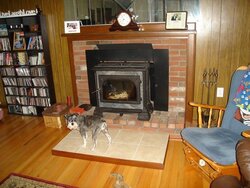
Final results pics of my hearth extension and mantle shield (before & after/Mini Schnauzer pup 'approving' it). Some info below. Thanks for all the help!
S
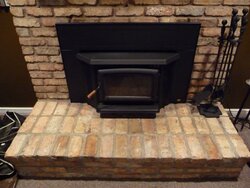
Stove
Hearthstone Homestead with surround, hearth mounted with stainless liner
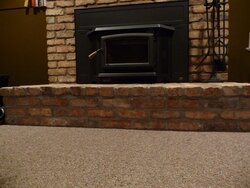
Hearth Extension (required R value = 2.5)
--2 Layers Durock (top and bottom, R.52)
--2 Layers Micore (middle, R2.06)
--1 Layer 12" tile (.002)
--Trimmed with oak base, held with liquid nails/brads, stained
Mantle Shield
--20 Gauge Steel (overkill, but piece was cut for me out of scrap=free!)
--Painted w/flat black stove paint
S
Stove
Hearthstone Homestead with surround, hearth mounted with stainless liner
Hearth Extension (required R value = 2.5)
--2 Layers Durock (top and bottom, R.52)
--2 Layers Micore (middle, R2.06)
--1 Layer 12" tile (.002)
--Trimmed with oak base, held with liquid nails/brads, stained
Mantle Shield
--20 Gauge Steel (overkill, but piece was cut for me out of scrap=free!)
--Painted w/flat black stove paint