How Much to Wire Small Bathroom
- Thread starter vinny11950
- Start date
-
Active since 1995, Hearth.com is THE place on the internet for free information and advice about wood stoves, pellet stoves and other energy saving equipment.
We strive to provide opinions, articles, discussions and history related to Hearth Products and in a more general sense, energy issues.
We promote the EFFICIENT, RESPONSIBLE, CLEAN and SAFE use of all fuels, whether renewable or fossil.
You are using an out of date browser. It may not display this or other websites correctly.
You should upgrade or use an alternative browser.
You should upgrade or use an alternative browser.
- Status
- Not open for further replies.
Buzz Saw
Minister of Fire
Just bought a bunch or Leviton recepticles and switches in the most "econimical" choice available. Everything is "Made in USA". It's even stamped in the receptical & switches.
fbelec
Minister of Fire
i've worked the stock from 70's 80's 90's and new. the old stuff from 10 years and back are problems. they don't hold a plug or the gfi outlets never get past 5 years and they're junk but i have installed new leviton stuff and they seem to be better but we'll have to wait and see how long they last. 20 amp stock is of course better but i can say pass and seymour's low grade is better than the rest i 've been installing this brand for years and not one device ever gave me a problem. had problems with leviton, eagle, and as far as those decora from leviton they are the original makers they do have their problems. normally you push the button and when you let go the light goes off. it won't stay on. pass and Seymour is better there too. just my experience with residential.
bag of hammers
Minister of Fire
Interesting. They do have manufacturing facilities all over the world (I think) - maybe luck of the draw? GFCI's made in China according to the box, I'll have to check for switches / stamps next time I'm out in the "spare parts from hell" room. They were definitely flimsier "feeling" than the old ones - but sanity check is in order.Just bought a bunch or Leviton recepticles and switches in the most "econimical" choice available. Everything is "Made in USA". It's even stamped in the receptical & switches.
fbelec
Minister of Fire
i've worked the stock from 70's 80's 90's and new. the old stuff from 10 years and back are problems. they don't hold a plug or the gfi outlets never get past 5 years and they're junk but i have installed new leviton stuff and they seem to be better but we'll have to wait and see how long they last. 20 amp stock is of course better but i can say pass and seymour's low grade is better than the rest i 've been installing this brand for years and not one device ever gave me a problem. had problems with leviton, eagle, and as far as those decora from leviton they are the original makers they do have their problems. normally you push the button and when you let go the light goes off. it won't stay on. pass and Seymour is better there too. just my experience with residential.
Okay, I must be the slowest DIY renovator ever.... But I keep hitting issues that I just can't let go and have to fix.
The latest is the floor joist under one of the bathroom walls, the wall between the master bedroom and the bathroom.
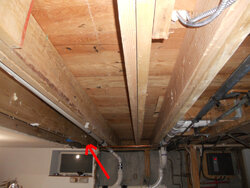
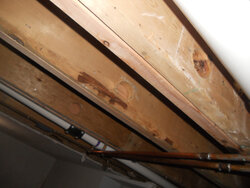
Below is a basement picture showing the floor joists under the bathroom being renovated. After pulling some more sheetrock close to this basement window, I realize the floor joist with the red arrow (which sits under and parallel to the bathroom wall between the master bedroom and bathroom) is resting over the window, on the sill plate.
I say to myself, what are the chances they put angle iron under the sill plate to better support the floor joists?
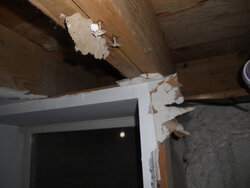
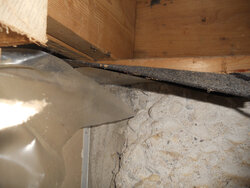
Sure doesn't look like it. I then measure the floor distance from bottom joist to floor, and it appears to be .25 inch lower than the other floor joists that sit over the concrete foundation wall. I also put a level on the joist and it shows a slope on that side. I will have to tear off more sheetrock and figure out what to do.
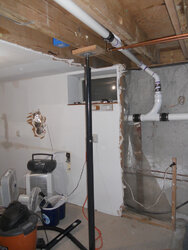
In the meantime, I put a support column under it.
I don't want to build the bathroom and then have that wall droop lower and create cracks in the tile walls.
Here are some pictures from earlier in the beginning when I sistered the other floor joists that had had holes put in them to run a plumbing line. The holes were too big and too close to the bottom edge and left alone would have flexed too much under the weight of the new bathroom.
The latest is the floor joist under one of the bathroom walls, the wall between the master bedroom and the bathroom.
Below is a basement picture showing the floor joists under the bathroom being renovated. After pulling some more sheetrock close to this basement window, I realize the floor joist with the red arrow (which sits under and parallel to the bathroom wall between the master bedroom and bathroom) is resting over the window, on the sill plate.

I say to myself, what are the chances they put angle iron under the sill plate to better support the floor joists?


Sure doesn't look like it. I then measure the floor distance from bottom joist to floor, and it appears to be .25 inch lower than the other floor joists that sit over the concrete foundation wall. I also put a level on the joist and it shows a slope on that side. I will have to tear off more sheetrock and figure out what to do.
In the meantime, I put a support column under it.

I don't want to build the bathroom and then have that wall droop lower and create cracks in the tile walls.
Here are some pictures from earlier in the beginning when I sistered the other floor joists that had had holes put in them to run a plumbing line. The holes were too big and too close to the bottom edge and left alone would have flexed too much under the weight of the new bathroom.

Last edited by a moderator:
I also fixed a self inflicted error when I put in 2 x 6 studs on the wall that were twisted and a bit too wide. I should have measure them better and inspected them more closely when purchasing them. But at the time I just wanted to get them installed so I threw them in there. Later I realized they didn't sit plumb with the other studs, so I had to shave them down a bit. Figure it would be faster then pulling them and finding new ones that would fit the rest.
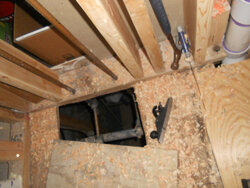
I also wanted to close the skylight before the arctic blast. Having pretty much finished the work in the attic for now, I started insulating around the skylight and installing the sheetrock.
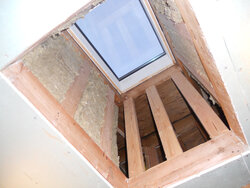
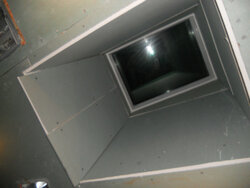
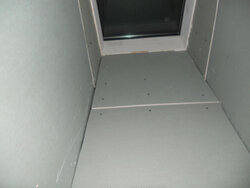
This thing was a PITA to sheetrock because of the weird angles and mismatched sizes from top to bottom. I figured out the wooden frame around the skylight (the white wood under the window) has a groove that you fit the sheetrock into. So I caulked the groove and then cut some angle pieces to fit into them. Took me a few tries to get the correct angle and shape of those pieces. All the while dangling on the ladder in a constricted space.
In the image below, you can kind of see the groove in the frame on the left edge. Notice the gaps in the sheetrock are a bit large in places. Best I could do.
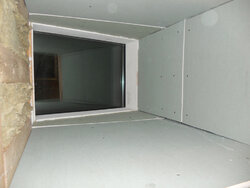
Anyway, learned a cool trick on Youtube. Instead of trying to get a perfect measure for the sheetrock, you let it go long, scores the extra edge and snap it off. It gives you are clean corner.
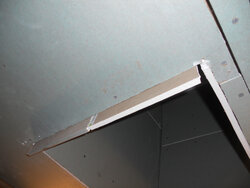

I also wanted to close the skylight before the arctic blast. Having pretty much finished the work in the attic for now, I started insulating around the skylight and installing the sheetrock.


This thing was a PITA to sheetrock because of the weird angles and mismatched sizes from top to bottom. I figured out the wooden frame around the skylight (the white wood under the window) has a groove that you fit the sheetrock into. So I caulked the groove and then cut some angle pieces to fit into them. Took me a few tries to get the correct angle and shape of those pieces. All the while dangling on the ladder in a constricted space.
In the image below, you can kind of see the groove in the frame on the left edge. Notice the gaps in the sheetrock are a bit large in places. Best I could do.

Anyway, learned a cool trick on Youtube. Instead of trying to get a perfect measure for the sheetrock, you let it go long, scores the extra edge and snap it off. It gives you are clean corner.

Last edited:
Buzz Saw
Minister of Fire
In the meantime, I put a support column under it.
If the stand doesn't get in the way could that be a permanent fix?
I am thinking of that, Buzz Saw. At least a long short term solution until I finish the bathroom and in the spring / summer I can take that window out, build a proper frame to support the joists. For now I don't need the space, but in the future I don't want that column in the middle of the basement. I think.
semipro
Minister of Fire
Believe me, you're not. I know of at least one person who's slower.Okay, I must be the slowest DIY renovator ever...

I appreciate your detailed post BTW. Keeps me inspired.
bag of hammers
Minister of Fire
Make that at least 2 others. My old house has beat me up pretty good....Believe me, you're not. I know of at least one person who's slower.
I appreciate your detailed post BTW. Keeps me inspired.
Buzz Saw
Minister of Fire
My last house took me about 7 years to remodel inside and out. I ended up hiring the siding and trim work. I just out of "go" to get stuff done, plus two little boys slow me down too.
Well, I am building this and life goes on around me. Had to serve jury duty for a couple of days, then my arthritis kicked in and it was slower going as my wrists were shooting pains while the big storm system came through.
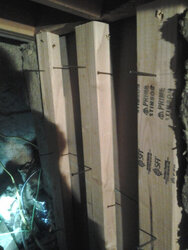
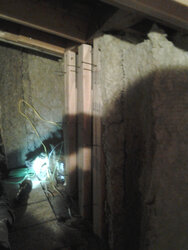
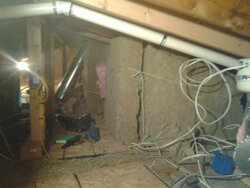
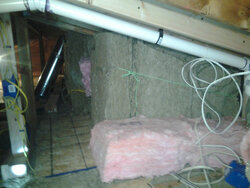
Went back into the attic to put the finishing touches on the skylight/bathroom ceiling insulation.
Since the skylight is framed unevenly and with the studs facing flat, I had to figure out a way to secure the insulation. I decided to use nails sticking out to act as hooks to hold the Roxul. Worked pretty well. Then I tied the green rope around it all as another mechanical force to lock it into place so it doesn't fall down over time. I then added some R30 fiberglass on the sides to cover the wire gaps and the top of the ceiling joists.


Last edited by a moderator:
Back on ground level, I wanted to bring some more functionality to the small bathroom next to the big bathroom. So I went about installing the wall hung sink.
The first sink I ordered arrived cracked. Amazon was great about taking it back, just went to the website, pushed a couple of buttons and UPS came to pick it up and take it away the next day. No issue. While cracked, though, I mocked it up and saw how much bigger it was (bumping out the doorway a bit).
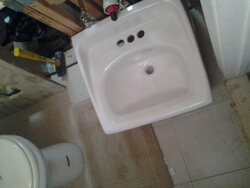
So I ordered a different, smaller model. By the way, I did try to source these locally in an effort to give local businesses some business and thinking there was a better chance of getting undamaged porcelain. However, the wait time on these was like 3 weeks. So it was back to Amazon. This time I bought the Penlyn at double the price of the other one but the right size. It arrived in 2 days. So I went about installing it.
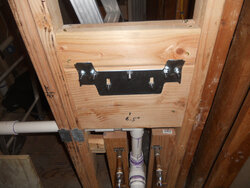
It comes with a bracket that gets attached to the wall and the sink then just slides and locks onto the tabs that stick out. I had to go to HD to find the right screw/stud to secure the bracket and I decided on studs so I can easily remove the nuts to take off the bracket when I build out the wall (which will be much later after I finish the main bathroom).
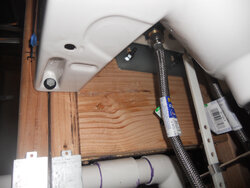
The screw below with the rubber washer holds the sink from moving up. So the bracket holds the weight pushing down, and the screw below locks in whatever force may come up if the sink gets bumped.
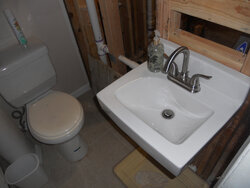
I had never fully installed a sink before so it was a learning curve. At first I planned on installing a pedestal sink, so I plumbed the drain hole standard distance from floor, which is low for a wall hung sink - I had to get an extension to reach the p trap, and I had to use the cheap looking plastic/adjustable p trap too. Not happy with how it looks, but I can live with it until I finish it.
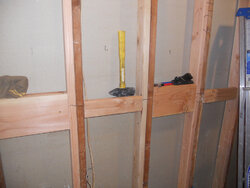
I also have been adding studs and blocking the walls for the seams in the cement board/drywall boards, whatever grab bar, towel bar I will install.
The first sink I ordered arrived cracked. Amazon was great about taking it back, just went to the website, pushed a couple of buttons and UPS came to pick it up and take it away the next day. No issue. While cracked, though, I mocked it up and saw how much bigger it was (bumping out the doorway a bit).

So I ordered a different, smaller model. By the way, I did try to source these locally in an effort to give local businesses some business and thinking there was a better chance of getting undamaged porcelain. However, the wait time on these was like 3 weeks. So it was back to Amazon. This time I bought the Penlyn at double the price of the other one but the right size. It arrived in 2 days. So I went about installing it.
It comes with a bracket that gets attached to the wall and the sink then just slides and locks onto the tabs that stick out. I had to go to HD to find the right screw/stud to secure the bracket and I decided on studs so I can easily remove the nuts to take off the bracket when I build out the wall (which will be much later after I finish the main bathroom).

The screw below with the rubber washer holds the sink from moving up. So the bracket holds the weight pushing down, and the screw below locks in whatever force may come up if the sink gets bumped.


I had never fully installed a sink before so it was a learning curve. At first I planned on installing a pedestal sink, so I plumbed the drain hole standard distance from floor, which is low for a wall hung sink - I had to get an extension to reach the p trap, and I had to use the cheap looking plastic/adjustable p trap too. Not happy with how it looks, but I can live with it until I finish it.
I also have been adding studs and blocking the walls for the seams in the cement board/drywall boards, whatever grab bar, towel bar I will install.

Last edited by a moderator:
Mudding the skylight was (again) a PITA. I set the corners with paper tape and the joints with fiber tape mudded in Durabond 90. The Durabond is good stuff, sets really hard.
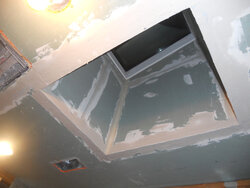
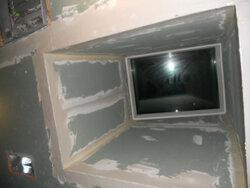
The Durabond sets hard pretty fast (90 minutes) and you can then layer on more, which is what I did over everything. I did this to smooth out all the angles, and also because of the hard surface quality and moisture resistance once it sets. Feels like plaster.
Then I gave it 2 coats of Easysand 90, until I could get close to smooth walls. Later on I will sand it down a bit, and apply a premixed topping mud finish.
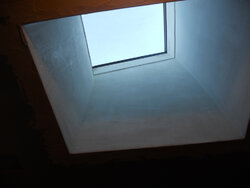

I have new found respect for drywall professionals that make it look so easy. I was dangling on the ladder trying to get smooth lines all the while keeping my shoulders tight so I wouldn't elbow the other sides and ruin that work while still wet.
Also, you definitely want to mud while the room is stripped down, because it makes a mess. I couldn't see doing this with the tiles on and the fixtures in place.


The Durabond sets hard pretty fast (90 minutes) and you can then layer on more, which is what I did over everything. I did this to smooth out all the angles, and also because of the hard surface quality and moisture resistance once it sets. Feels like plaster.
Then I gave it 2 coats of Easysand 90, until I could get close to smooth walls. Later on I will sand it down a bit, and apply a premixed topping mud finish.


I have new found respect for drywall professionals that make it look so easy. I was dangling on the ladder trying to get smooth lines all the while keeping my shoulders tight so I wouldn't elbow the other sides and ruin that work while still wet.
Also, you definitely want to mud while the room is stripped down, because it makes a mess. I couldn't see doing this with the tiles on and the fixtures in place.
Last edited by a moderator:
A couple of questions for the electricians:
1) Should junction boxes in the attic be metal or plastic? I used plastic for some splices but the HD clerk said they should be metal.
2) In the picture below, is the way the yellow wire is run into the metal box correct? Could it be done better (I tried from the top but the wire really fought me)?
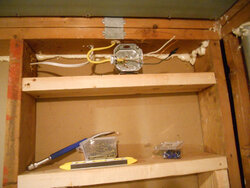
1) Should junction boxes in the attic be metal or plastic? I used plastic for some splices but the HD clerk said they should be metal.
2) In the picture below, is the way the yellow wire is run into the metal box correct? Could it be done better (I tried from the top but the wire really fought me)?

Last edited by a moderator:
fbelec
Minister of Fire
you are ok. if it were being inspected you would have to put in a knock out seal in the top of the box and the inspectors around here love to see staples. it would need a staple within 6 inches of wire out of the box. used to be a foot but i was told otherwise. like i said they are staple crazy round here. the wire fought you because you used 12 gauge wire. normally we use 14 gauge. you must of come off a 20 amp circuit. and the edges of the box has to be no more than 1/8 inch from the finish wall. your fine the way it is. i have had guys call me on the 1/8 inch rule. that's one of those codes they call you on when they can't find anything else.
Thanks, Frank. I bought the knockout seal anyway.
And yes, I did come off a 20 amp dedicated circuit for the bathroom.
And yes, I did come off a 20 amp dedicated circuit for the bathroom.
Last edited:
hockeypuck
Feeling the Heat
Been reading this with popcorn in hand. Couple of things here.
It rarely benefits you (home owner) to buy the materials and find someone to do the labor. I do not bring toothpaste to my dentist. The contractors who are busy.. are busy for a reason. They do good work. Getting someone to bite on a job where you buy your own materials, unless they are a good friend, should set off alarm bells. Even "friends" have risks.. the jobs I used to have to clean up done by "friends" end up costing more sometime. Also, giving a contractor parts that they are not used to working with will slow them down.. thus they will jack up the price. Also they will figure that some materials will be missing and will also add labor for lost time.
Looks like the bathroom is coming along great. I just finished one last year. It is amazing how all the costs add up. I did a 3/4 bath, stripped down to studs and dropped almost 4k in materials. Looks like you learned a skill to move on to the electrical project. Congrats.
Sorry I haven't updated this in a while.
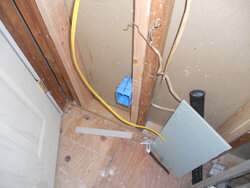
I decided to add another outlet to the bathroom, so I had to run wires from the outlet to the GFI.
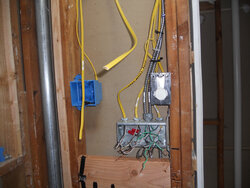
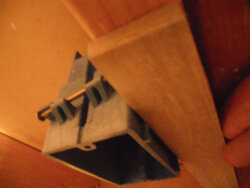
Added the tile width to the electrical box distance from wall markers.
Here was something cool. While in the attic, mid-day, the sun shinning on the main, pvc vent stack.
With flash:
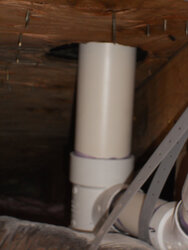 No flash:

I decided to add another outlet to the bathroom, so I had to run wires from the outlet to the GFI.


Added the tile width to the electrical box distance from wall markers.

Here was something cool. While in the attic, mid-day, the sun shinning on the main, pvc vent stack.
With flash:
 No flash:
Last edited by a moderator:
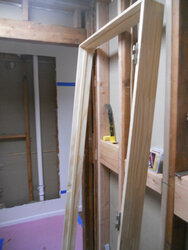
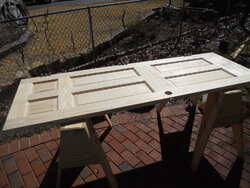
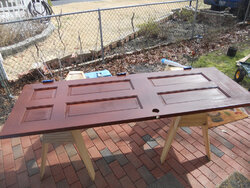
Decided to do a new door because the old one was some sort of composite that was pretty beat up and was swelling at the edges beyond repair.
So I bought a Jeld Wen pre hung pine door.
I got lucky with a 62 degree sunny day which allowed me to stain it and poly it in one day. It's a long process - 1 layer of staining and 3 layers of polyurethane. I used the Varathena brand for the faster drying times. To apply the poly all around at the same time, I hung the door on a tree branch. It worked great until I went to undo the rope and let it fall! Doh! Scratched an edge but nothing bad.


Last edited by a moderator:
So now I am racing to hang all the drywall so I can mud it all at once and leave it ready for painting.
This meant hanging the drywall on the door side wall. I wanted to do one big piece with cutouts for 4 electrical boxes and the doorway. I was dreading getting all the cuts right. First try was with the Roto Zip. Didn't go well - had trouble finding the outside edges of the electrical boxes and the bit kept drifting. After 5 minutes, the drywall had cut beyond repair. Decided to start again with a new sheet.
This time I figured I needed to make a template of some sort. Tried cardboard, but could not find a piece big enough to cover the area. Looked around some more and thought of the Rosin paper I have been using to cover the floors. Perfect. First I cut the big piece of sheetrock, then I lay the rosin paper on the side of the sheetrock that will have all the electrical boxes cuts. Make sure to line up the long edge so the pieces will match up later on. I also made 2 pen marks between the paper and the sheetrock as reference points when laying the paper back on the sheetrock to make the cuts.
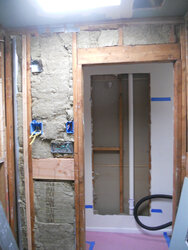
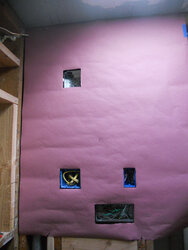
I left the 4 gang box recessed to make more room for the fat dimmer switches (I have a big 4 gang extension sleeve) so I expected it to be behind the wall surface, however the two blue boxes, I used the wall markers on the boxes and still they seem too far back.
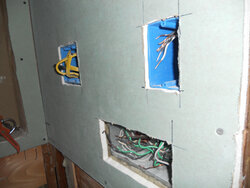
Anyway, as I was placing the drywall on, I remembered to apply a thick bead of caulk to the top plate to better seal the air movement into the attic space. And those marker lines on the ceiling let me know the stud locations when hanging the drywall on the walls.
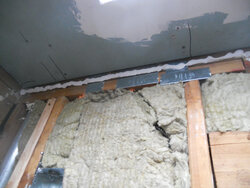
As you can see, I am applying some Safe and Sound in the walls to keep those embarrassing noises from leaving the room....
Finally, I really should take away the Rotozip from myself as I almost screwed up this board too.
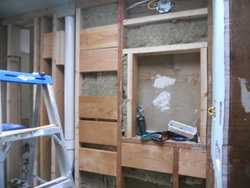
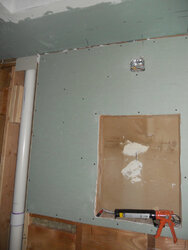
This meant hanging the drywall on the door side wall. I wanted to do one big piece with cutouts for 4 electrical boxes and the doorway. I was dreading getting all the cuts right. First try was with the Roto Zip. Didn't go well - had trouble finding the outside edges of the electrical boxes and the bit kept drifting. After 5 minutes, the drywall had cut beyond repair. Decided to start again with a new sheet.
This time I figured I needed to make a template of some sort. Tried cardboard, but could not find a piece big enough to cover the area. Looked around some more and thought of the Rosin paper I have been using to cover the floors. Perfect. First I cut the big piece of sheetrock, then I lay the rosin paper on the side of the sheetrock that will have all the electrical boxes cuts. Make sure to line up the long edge so the pieces will match up later on. I also made 2 pen marks between the paper and the sheetrock as reference points when laying the paper back on the sheetrock to make the cuts.


I left the 4 gang box recessed to make more room for the fat dimmer switches (I have a big 4 gang extension sleeve) so I expected it to be behind the wall surface, however the two blue boxes, I used the wall markers on the boxes and still they seem too far back.

Anyway, as I was placing the drywall on, I remembered to apply a thick bead of caulk to the top plate to better seal the air movement into the attic space. And those marker lines on the ceiling let me know the stud locations when hanging the drywall on the walls.

As you can see, I am applying some Safe and Sound in the walls to keep those embarrassing noises from leaving the room....
Finally, I really should take away the Rotozip from myself as I almost screwed up this board too.


Last edited by a moderator:
!@#$%^&&#
That moment when you go back to the basement to turn on the house water supply after doing some plumbing work in the bathroom remodel and you realize you left a water supply valve (in the same bathroom) open (the water drops falling from the first floor gave the first hint).
Doh !! I could have kicked myself.
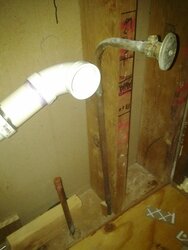
That moment when you go back to the basement to turn on the house water supply after doing some plumbing work in the bathroom remodel and you realize you left a water supply valve (in the same bathroom) open (the water drops falling from the first floor gave the first hint).
Doh
 !! I could have kicked myself.
fbelec
Minister of Fire
again you are doing a awesome job. don't feel bad about the rotozip. it's not easy getting use to that thing. it all in remembering that it cuts in one direction semi straight and will cut in the other direction but not as fast and it walks. i use mine so seldom that i forget.
- Status
- Not open for further replies.
Similar threads
- Replies
- 8
- Views
- 578
- Replies
- 36
- Views
- 2K
- Replies
- 17
- Views
- 2K

