How to Get SootEater Access to Flue and Chimney

  • Active since 1995, Hearth.com is THE place on the internet for free information and advice about wood stoves, pellet stoves and other energy saving equipment.

    We strive to provide opinions, articles, discussions and history related to Hearth Products and in a more general sense, energy issues.

    We promote the EFFICIENT, RESPONSIBLE, CLEAN and SAFE use of all fuels, whether renewable or fossil.
Status
Not open for further replies.

DanCorcoran

Minister of Fire
Jan 5, 2010
2,205
Richmond, VA
Attached is a photo of my setup taken the day it was installed. As I recall (can't find paperwork at the moment), the parts are all 6" Selkirk Metalbestos, with single-wall flue and double-wall chimney. When I bought the stove, the dealer said something about a telescoping piece of the flue that would allow access from below for cleaning (it's a 12-12 pitch roof). What do I do...just remove screws around the collar at the top of the stove, twist the flue, and lift? If so, how high should I expect it to go? How do you hold it up, so you can use a SootEater? (I'm alone at the cabin, so this'll need to be a one-man operation).

Thanks in advance for any info or tips.
 

Attachments

  • DSCF3577 (600x800).jpg
    DSCF3577 (600x800).jpg
    56.6 KB · Views: 471
Dan, Can you tell which piece might be the telescoping piece? (Sorry for the dumb question)
This looks to be a pretty straight shot, so I would think that just some regular rods and a brush would work ok.
Actually, ordered a soot eater last week, so I will post some pics and the process when I get to it.
BTW, nice cabin....love your place.
 
Thanks...I'm looking forward to some cooler weather so I can fire up the stove again. As to cleaning, whether sooteater or rods and brush, I still don't know how the telescoping bit works, or even which piece it is.
 
With the SootEater you shouldn't need to disconnect the pipe. The rods flex so you remove the stove baffle and run that sucker up the pipe from inside the stove.
 
Dan, if you take a look at the first section of pipe directly above the stove, I would suspect it is the telescopic piece (or at least that's the way I do installs). There should be three screws attaching the pipe to the stove collar, and then at the next section, there should be another three. Look somewhere in between these two points, and you should see a point where the inner and outer piece of the pipe slides inside itself. There should also be screws there.

Take the screws out at this point, and also those where the pipe is attached to the stove collar. You should be able to slide the lower section up from the stove.

As mentioned, you may want to take the time to see if you can get the sooteater directly up by moving the baffle in the stove instead. The upside of doing it this way is that you can contain the soot/creosote from the chimney much easier.

Hope this helps!
 
Yes you should be able to just remove the baffles and go straight up with the sooteater. You take the door off and put plastic around the opening. Poke a hole in the plastic and feed it up one section at a time. Should be a piece of cake in you setup. My only problem is I can't really tell if and when I reach the top.
 
I'm considering one of these too. I'm sort of surprised that Gardus has not posted a video of one of these in action. I looked... as I have an insert I don't really want to disconnect, and I'm not sure if I would use this thing to go upwards or downwards. There are a dozen threads on here about the sooteater, it seems ripe for a how-to vid on youtube! (from the manufacturer, I mean, though I know a hearth.com member would make a good'un too!)
 
tickbitty said:
I'm considering one of these too. I'm sort of surprised that Gardus has not posted a video of one of these in action. I looked... as I have an insert I don't really want to disconnect, and I'm not sure if I would use this thing to go upwards or downwards. There are a dozen threads on here about the sooteater, it seems ripe for a how-to vid on youtube! (from the manufacturer, I mean, though I know a hearth.com member would make a good'un too!)

Not really a "how to" but a sales video here.

http://www.youtube.com/watch?v=ulrEYBKsHKc
 
Ok, Dan...so I got the soot eater on Friday, so I was able clean the chimney yesterday (Sunday) with it...very impressed.
Just some details on my setup:

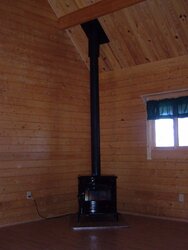
I have a pretty straight shot from the insert to the top...have a 6" liner, and it was appx 26 feet to the cap.
I was going to order a regular kit and some replacement rods, but the cost was better to just buy 2 kits...so I spent about $125 including shipping, and now have enough poles and a spare soot eater just in case mine bites the bullet.

So, I tackled the sweeping by myself, and really had no problems with it. Basically, I had to take the burn tubes and and firebricks off my stove to give me a clear shot to the liner.

When you buy the kit, there is a little guide that tells you how long to cut the bristles on the cleaning head...I kept mine a tad on the long side as I didn't want to be short. So, once I got the cleaning head cut to the right size, I was ready to go.

Basically, once you have the head trimmed to the right length, you just put the head on the first rod and are ready to go. After the head is on the rod, you just use the drill adapter and place it on your drill...and then you are off.

The rods are very flexible, and what seemed to work well is that I used both the high and low speed on the drill, and then kinda worked the drill with the rods to the left and right while working it up and down...kinda like churning butter with a drill, lol (I hope this post does not come off as a porn innuendo, lol) Before I was working it with a sideways motion, I wasn't getting too much soot...but once I got towards the last 10 feet or so it really started coming down...and I think it walso helped by working the rods to the left and right to make sure the cleaning head got to all portions of the liner.

Anyway, I would spend a minute or so on each 3 foot section of rod, and then insert another and work my way to the top. Had no problems cetting caught/jammed, and it was very easy to use even when I was 26 feet up. Once I got closer to the top, I stopped and went outside with my binoculars to see if I could see the cleaning head near the cap...my eyes are not that good, so my wonderful wife was my spotter, and she let m know when she could see the cleaning head, and I knew not to go any further.

Anyway, the actual cleaning only took about 30 minutes....I really took my time, and like other posters have said it would have taken me a lot less time except that it did take me some time to disconnect the rods on the way down. I think the key to disconnecting the rods is that you must have the male/female section pretty straight...so I found it easier to pull more rod out of the liner and disconnect when the male and female rod parts were on a parallel plane. (Again, this seems like porn verbiage with all the rods, heads, femail/male, etc...lol)

So, I got back to the bottom, and overall I am very very happy with the results of the sooteater. I think I got appx 1/3rd to 1/2 of a gallon of very powdery soot, so overall I think that was good as some of my wood wasn't as seasoned as I would have liked...burned about 2 cords last year.

Throughout the process, I had just basically laid down an old blanket in front of the insert, and had the shop vac hose inside the firebox. I did not have a HEPA filter, so I would get one next time. Also, next time I think I am going to pick up another 10 feet of shop vac hose, and this would allow me to keep the entire shop vac outside vs being on the screen porch, and I think that would help a bit.

One item I will do next time but didn't. I will use the plastic that they give you can cut the rectangle and tape off the whole front side of the insert. I would then cut a small hole and then perhaps tape around the hole for a little added protection. (Think about the insert portion of a vaccuum cleaner bag) I could then just run the rods through the hole, trapping the soot in the firebox, and then just vaccuum when done.

Its funny, I never thought that I would actually enjoy sweeping a chimney, but I have to say I did somewhat enjoy it. With the sooteater, I have better confidence knowing that if some ofmy wood isn't where it should be, I can perform a mid winter cleaning when its convenient for me. My sweep charges $155 for a bottom up clean, so I have already made the money back. I had no problems with it being just myself doing the cleaning, so just take your time and plan it out and things will go well for you. If you lived closer to me, hell...I would just let you borrow it to check it out. Good luck Dan
 
Thanks! Now I just need to get up to the cabin and see if I can figure out how to access the flue from the bottom...telescoping sections or up through the Shelburne.
 
I'd probably go up through the shelburn, that way most of the soot will kep inside the firebox. You might have to remove a few parts, but will also give you a good chance to inspect the inside of the stove.
 
Status
Not open for further replies.