Im a new convert

  • Active since 1995, Hearth.com is THE place on the internet for free information and advice about wood stoves, pellet stoves and other energy saving equipment.

    We strive to provide opinions, articles, discussions and history related to Hearth Products and in a more general sense, energy issues.

    We promote the EFFICIENT, RESPONSIBLE, CLEAN and SAFE use of all fuels, whether renewable or fossil.
Status
Not open for further replies.

bluewoo

New Member
Apr 19, 2016
13
Greensburg Pa
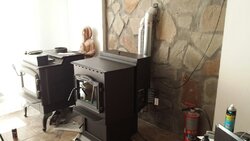
Hi everybody, I'm going from a wood stove F2400s to a P61a pellet stove. I will be connecting to existing 6" stove pipe and I need the proper way to measure the pipe length I need without to little or too much.

I know the back of the pellet stove exhaust center is 10" from ground (I don't have the stove yet) and the center of my existing chimney connect (on wall) from center pellet stove to center chimney will be approx 62 1/2".
I'm going thru NorthlineExpress.com and will be using the Selkirk VP piping. Here is my list so far.....

Thanks
pellet stove install.JPG
 
Connecting to stove pipe not allowed . You need double wall pellet vent pipe . You can connect to a masonry chimney but not to single wall wood stove pipe.
 
You're going to need a cleanout tee at the very bottom of your venting. Also please clarify the type of existing chimney you are connecting to.
 
Unless the existing wood stove vent is Selkirk then why Selkirk ? I assume just from your OP your existing wood stove vent is class A multi wall ? As mentioned by others , please clarify. Or at least call the company you are dealing with and make sure what you are trying to couple up is allowed and will work well.

Meanwhile you can get the manual to your stove from Harman's web site. I got mine in PDF 3 months before I bought the stove ! In there will be diagrams of Harman's allowed setups for venting.
 
Sorry for the lack of info: 6 inch single wall pipe (all foundation block) that gets reduced to a 5 inch T (clean out) inside chimney then is connected to a 5 inch SS flex pipe with a single insulated liner around it since my existing chimney was not going to fit a 6in pipe without making it oval. Installed by a professional for my regency wood stove.
Harmon does show a tap in to chimney. Pic#7
http://www.manualslib.com/manual/256723/Harman-Pellet-P61a.html?page=12#manual

My house chimney is clay liner with exterior red brick

I do have the option of going straight through house chimney and exit out side also with help of a core drill using the hole from 6 inch stove pipe.
 
Last edited:
Picked up my new Harman p61 this week end so I have a lot of time to work on exhaust options.
1. Try to use existing chimney - too many variables to use old pipe* not safe
2. Cut new hole and exhaust straight out (vertical) via chimney clean out - I think this will work better and a lot more simpler since the old wood stove was plumbed in about 16 inches above outside clean out access door.

Picture below shows old 6 inch wood stove pipe. I'm going to drill out approx 16 inches below the old pipe and this will come out thru the clean out door for the brick exterior chimney .
20160424_151629_resized.jpg
20160424_151641_resized.jpg

20160424_145217_resized.jpg
 
Boring the hole will make things far easier in the future and probably cheaper as you can use less pipe and expensive elbows. Trim off the old pipe and get a cap so always have the option of wood stove again and find a nice picture or art piece to cover.
 
Boring the hole will make things far easier in the future and probably cheaper as you can use less pipe and expensive elbows. Trim off the old pipe and get a cap so always have the option of wood stove again and find a nice picture or art piece to cover.
Thanks for the input Bioburner.
Do you think just buying the pellet pipe by piece vs a kit would work work better? I know to get the stove adapter and a T with clean out to start and really dont need the thimbul since its all brick. I would go straight up to a 90 the straight out side.
Pic in middle as an example minus thimbul
td_g4bfrdutwb5ljhk-xwd8mysgmyyx171jab43ob9te_d2ebxnyvebt_cdbf8nrxg-cnp0alksz2alaqfsfa-jpg.164991.jpg
 
I don't like kits as they usually have short pieces and I like to keep the joints to a minimum. Many have been able to go straight out the back of their stove and out and attach a hood without issues. The recommended rise is to help vent the stove if there is a power outage and will help naturally draft the stove outside without getting some smoke inside. Put a roll of self bonding silicone tape on the list to seal the joints. Will make removal easier in future and it stretches to seal the outside of a joint better than tube silicone so you won't be chasing minor smoke leaks. Looks neat and professional too.
 
  • Like
Reactions: Lake Girl
Ya three years ago almost now since my install and I used tube silicone not even knowing there was tape silicone at that time. Well that and I had the tubes anyway. But I had a couple of leaks too. I used pieces for my vent and glad I did because I needed a really short straight to extend my horizontal run a little so to step my stove away from the fireplace 5-6"or so. no thimble in my install either but I used a good part of a roll of flex. I bought local, the guy handed me the roll and charged for what I used when I returned the unused portion.
 
Ok here it is. Works great need to paint pipe black and finish out side.
The drilling was very straight forward with no hick ups. 5" core bit with hammer drill.
I am amazed of the amount of heat this puts out vs wood stove - fast and all the heat goes to the room vs wood stove has refractory brick designed to hold a lot of the heat in to cook the wood then use secondary burn for heat.
Hammers are $209 a ton right now !!!
I'm very very happy......
Thanks everybody for your help
 

Attachments

  • 20160512_175436_resized.jpg
    20160512_175436_resized.jpg
    75.6 KB · Views: 288
  • 20160512_175520_resized.jpg
    20160512_175520_resized.jpg
    191.7 KB · Views: 237
  • Like
Reactions: Lake Girl
Nice, looks good and glad it's working for you !
 
  • Like
Reactions: bluewoo
Looks good.
 
  • Like
Reactions: bluewoo
I have a question about the three refractory bricks in my stove - they lean forward - is this normal?


Wow this baby pumps out way more than my regency 2400 wood stove ever did. Very impressed with these hammers pellets too!
 
I had the same question when my installer came over. He bent the metal holder a little with some vise grips, just use a rag so you don't damage the metal. Now the bricks stand up but still slide out. I took them out for the first time a couple weeks ago to clean behind them. As far as heat, I had a hard time in the fall running the stove because it would get too warm too quick, I think I will try room temp in the fall and let the stove cycle on and off. I had several discussions trying to regulate the heat lower and was not able to. This also contributed to the fact that I burned three tons of pellets ver the very mild winter, I thought that was a lot based on my supplementing with oil. This stove does put out the heat, but is does burn through the pellets!
 
Last edited:
  • Like
Reactions: bluewoo
ton of pellets and Im still not on bump stops! LOL

Last two pics are my truck loaded with osage orange (monkey ball tree) It was on bump stops so I cut /loaded/umloaded and spilt over 2k of wood??? No wonder Im so worn out!
At least with pellets I only have to unload them...............Better
 

Attachments

  • 20160516_171503_2_resized.jpg
    20160516_171503_2_resized.jpg
    125.7 KB · Views: 191
  • 20160516_180357_resized.jpg
    20160516_180357_resized.jpg
    75 KB · Views: 195
  • 20140712_133633.jpg
    20140712_133633.jpg
    200 KB · Views: 214
  • 20140712_134851.jpg
    20140712_134851.jpg
    166.9 KB · Views: 204
Status
Not open for further replies.