Insulating Greenwood, Greenfire, Steaton,

  • Active since 1995, Hearth.com is THE place on the internet for free information and advice about wood stoves, pellet stoves and other energy saving equipment.

    We strive to provide opinions, articles, discussions and history related to Hearth Products and in a more general sense, energy issues.

    We promote the EFFICIENT, RESPONSIBLE, CLEAN and SAFE use of all fuels, whether renewable or fossil.
Status
Not open for further replies.
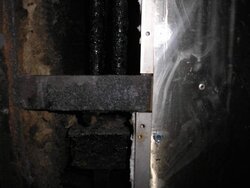
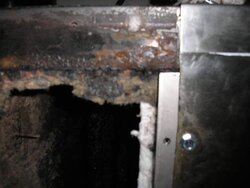
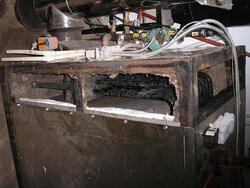
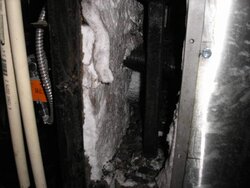
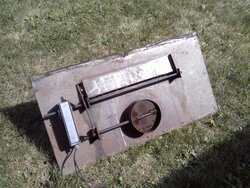
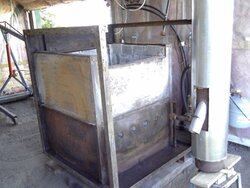
Now you guys are getting close to what I've got under way.....


Does anybody know what this is thats being advertised on the new Setons? " stainless steel evaporative condensate system "


Jesse, any Pics you could share?
 
Trzebs13 said:
Jesse, any Pics you could share?

I'm still working on the insulation.......but here are a few of what I just finished, covering another topic/problem I had.
Didn't want to take a chance with another season on these nipples. Actually after I got them off, I checked to see how much material was left in the deteriorated area............could have made it another season.


Hey Jess, any fear of a reaction between the iron and the SS causing deterioration?

2 nd question . . . Were BOTH nipples corroding, or only the top one?

Jimbo
 
How many years service on the nipples before you replced them?
 
As Tom in Maine stated in the other thread, maybe nonmetalic is the way to go. Sure stainless in just about any grade would probably work much longer than regular sheet steel, or you could do the whole thing in 5/16" 316, but not if I'm paying even scrap price for the material.

13, if you want to try out some firebrick, get ahold of me, I've got a ton and could get them to you in parts of Central WI for a small cost. The biggest problem would be making it easy to take apart to clean.
 
My unit has only been through two complete seasons but all of the nipple damage was done during the first season. The combination of inexperience, and pour choice of some materials used, resulted in the deterioration of these parts. ( both in and out nipples where effected almost the same amount ) Most of witch was discussed last year in a thread about Huffing. I have since been able to make changes and improvements to combat this. All of which would really suck had I not been the builder and consequently re-builder of this unit.

I don't have any concerns about the stainless sleeves around the nipples....there is approximately 1/16" gap between the sleeve and the pipe which is filled with high temp silicone. There will also be 1/16" gap between the sleeve and the outer skin, which will be filled with silicone. ( I've had very good luck with silicone in this application )

The ceramic coating idea is very intriguing to me, I see a lot of possibilities for such a product in my unit............will research this more
 
I cut my side panel today to make it easier to clean. In doing so, as expected I ruined the insulation on that pc. A freind of mine owns an insulation business that said he could hook me up with some material to redo that pc. I will ask him about some type of spray type that could handle these temps. If you guy's happen to get this and have another question he will probably know the answer. Just let me know.

Jesse. I got to say I really like your idea there with the nipple. I think one of the problems right from the get go is that there is hardly any gap there. I actually ground mine slightly to get a sealent around it before I started having problems. I think that it not rubbing and the sealent has some give in it to take some movment. Well done!
 
The only reason I wish I had the boiler in the house would be for the standby heat. There is plenty of heat loss, my boiler room will get to 120* plus, however it does dry the wood nicely.
 
Trzebs13 said:
I cut my side panel today to make it easier to clean. . . .

Pictures please! I am getting ready to cut my old skin to get the access holes exactly where I want them b4 cutting my new panel(s). We wanna see your ideas.


Trzebs13 said:
Jesse. I got to say I really like your idea there with the nipple. I think one of the problems right from the get go is that there is hardly any gap there. I actually ground mine slightly to get a sealent around it before I started having problems. I think that it not rubbing and the sealent has some give in it to take some movment. Well done!

When I put the new, larger nipple on last year, I just chipped the rusted skin back so it didn't touch the iron. I think you can see from this year's pics there is no corrosion, just a bit of surface rust below the skin-line. I never even bothered to put ANY sealant between the skin and nipple. Maybe inside the residence you should, I don't know.

Jimbo
 
Mine came with a access panel from the top. So I didn't have to cut that one but here is the side views. If you measrued from the back of the unit to where I cut down it mearues 10". Got some stainless flat stock (which was a bear to drill and tap) and fatened it on both sides of the cut.
 

Attachments

  • P1220163.jpg
    P1220163.jpg
    50.3 KB · Views: 488
  • P1220164.jpg
    P1220164.jpg
    29.1 KB · Views: 464
  • P1220165.jpg
    P1220165.jpg
    27.2 KB · Views: 487
  • P1220166.jpg
    P1220166.jpg
    57.7 KB · Views: 477
13, I like what you did with the side. I have the stock GW pieces, which had no access side NOR top. So, I was thinking . . . it seems to me that the best way to clean the tubes along the top would be from the side. Run a brush between the top and bottom row. Seems like this would keep the insulation on top of the tubes undesturbed. Any thoughts??
 
Back to the OP discussion . . .

Why could we not have the rfractory continue up the sides then across the top above the tubes. As I see it this would make the combustion chamber have only two openings

1) Existing door opening, and

2) Full width opening approx 5" tall where the tubes would exit at the top rear of the combustion chamber . . .
 
As far as the clean out goes. Like I mentioned the top was already there which does offer a good opening to clean the tubes. But is a poor way to get the junk that you scrap off the tubes out. Other than un hooking your chimney. The side cut out will be a good place not only to clean and scrape the tubes but then you can scoop the crap out as well. Im glad I have both but if I had only one I would most defiantly take the side access.


As far as something over the top of the tubes. This is exactly what I was saying earlier. The thing is you would have to get it thick enough so the heat doesn't end up warping it to the point where it would be resting on the tubes. I think as long as I have got it apart I'm going to line the back chamber with another layer of insulation and have steel panels made up for it as well. My theory is to Line the inside and cover up the insulation, close to air tight and try to get the moisture to either burn off or go out the chimney. And not give it a chance to soak up in the insulation. Not positive that it will work but I think it's worth a try.
 
Jimbo I have my sides off. I cut the panel and made a brace and fastened it to the boiler. I will post pics tomorrow of what I did with mine to give ya idea.Basically cut a big L shaped piece from the stock panel. Using all stainless to fasten the panels to the brace I made.I just have to track down some insulation and reassemble now.
 
love the pics! im leaning toward a side clead out as well. McMaster-carr was the place for me to get insulation part #s 9328K43 and 93315K74.
 
L-shape is what it works out to, but . . . . seems to me that insulation attached to an L-shaped panel will be a nightmare. So I am thinking two separate panels, with enough 'meat' in between to give the skin rigidity.

Question for at least 13 and Deere . . . why you guys using SS for the frame? The angle iron is obviously not SS, and are you not concerned about metallurgic reaction between the Shanghai steel skin and the SS frame?

Jimbo
 
Well my skins are Stainless to start with. When I went to my buddies machine shop to look for some flat stock to do this with. I saw some stainless in the rack so that's what I grabbed. The angle Iron is indeed carbon steel so I'm not saying that you would have to go with stainless. I just did cuz it was there.

Deere Were you going to post some pics? I'm courouse what you guy's are talking about with the hole L shape.
 
Trzebs13 said:
Well my skins are Stainless to start with. . . .

Damn, man, I been askin about SS and you been quiet. . . .

1)What type?

2)How thick?

3)How much corrosion when you pulled it apart?

Jimbo
 
ISeeDeadBTUs said:
Trzebs13 said:
Well my skins are Stainless to start with. . . .

Damn, man, I been askin about SS and you been quiet. . . .

1)What type?

2)How thick?

3)How much corrosion when you pulled it apart?

Jimbo

I must have posted 10+ pictures on this forum of my unit. Thought you could tell.
In response to your questions:

1) Dont know what type of SS. the Greenfire comes with SS sides. I'm not really sure that it would mater what type of SS you'd go with. But I'm not a metallurgist.

2) .048"

3) None on the side panles. That's the beauty of Stainless Steel. The angle iron inside the unit looks much like the Hx tubes.

Just a side note that I always use antiseze on any fasteners. Has a much higher melt temp than most lubes.

If your thinking of having new sides made. I would not even consider any carbon steel. Unless you like rebuilding these things.
 
I've been staring at this thing for a while now and I think I have got a plan of what I'm going to try.

1) Put another layer of insulation on the top sides, above the fire chamber. And then line that with a row of that fire brick, that I had pictured earlier in this post.

2) I noticed that the very back bottom, where the intake and chimney outlet has no insulation. So I plan on insulating that back part.

3) I also noticed that the floor of the back chamber is not insulated. So I am going to insulate that.

4) I'm going to have steel plates sheared up to line the entire back chamber, sides and bottom.

5) Some how insulate the entire bottom of the boiler. I'm thinking of using a couple of layers of Rboard, that is often used on the exterior of houses. (But need to look in to make sure this stuff is not flammable, not sure about this product yet.)

The first year that I burned I had single wall pipe exiting the boiler and I got an extreme amount of dripping down that pipe. Last year I purchased insulated SS pipe and do not get any dripping out of the chimney now. My theory here is that by getting this better insulated from the inside is where the problem lies. The steel sheeting is more to just protect the insulation. Be cause Moisture could still condensate on the other side, but I would think that it should act as a vapor barrier as well and not let the steam soak in.

Any thoughts, suggestions?
 
Trzebs13 said:
2) I noticed that the very back bottom, where the intake and chimney outlet has no insulation. So I plan on insulating that back part.

3) I also noticed that the floor of the back chamber is not insulated. So I am going to insulate that.

Likewise here, I am curious about complete lack of insulation or brick in the exit chamber.

One other potential problem I think I see . . . the air inlet tubes . . . lets say they develop a leak. Seems likely due to corrosion. seems like smoke will then be drawn back into the combustion chamber. Not good. But also not sure how to replace the tubes without replacing the combustion chamber.

Jimbo
 
From what I learned the draft tube are supose to be watched and replaced as needed. It would be fairly simple to do that on mine just unbolt the draft door assembly and they slide out the back. 2" car exhaust i beleive was what we used.

J
 
I think your right on Jorz mine seems to be some kind of flex style tubing. But after all the work Ive been doing back there they really don't seem that extremely tight in the refractory. Changing them wouldn't be the biggest deal.

And I have now finished insulating the rear exhaust chamber. Here's a picture of it. The bottom is also insulated but there was a bunch of crud that fell off and is sitting ontop of the insulation at the moment. Tomorrow off to the fab shop to have the interior plating sheared up for it. I think not having this part insulated really does promote the dripping we get. I always did notice that most of the dripping came from the back. Not all but most. And I wonder Jimbo if that's why your insulation was never damp. Maybe it was coming from back there and it starts puddling and then finds its way out along the seam. Just a thought.
 

Attachments

  • P1240167.jpg
    P1240167.jpg
    36.5 KB · Views: 485
I insulated mine from head to toe. I believe most of my water seepage was due to burning green wood. Insulating the boiler barn helped as well. The second season was all around better for me. With the barn insulated, and the outside temp at 30...I would be about 60 inside. I wouldn't be to concerned about the intake tubes, If you where to get a leak you would just be cycling hot air ( remember we don't produce smoke ) which will only help the burn. If you did need to replace them, it wouldn't be very hard. I've got mine just sticking into the fire box, not really sealed at all. Took the whole rig out for the rebuild....here's a pic

Made some progress on the insulation isolation today......pic of that soon
 

Attachments

  • 0904101151-00.jpg
    0904101151-00.jpg
    91.5 KB · Views: 462
  • 0904101151-01.jpg
    0904101151-01.jpg
    89.5 KB · Views: 450
  • 0904101532-00.jpg
    0904101532-00.jpg
    51 KB · Views: 482
Status
Not open for further replies.