Last Minute Install Checklist

  • Active since 1995, Hearth.com is THE place on the internet for free information and advice about wood stoves, pellet stoves and other energy saving equipment.

    We strive to provide opinions, articles, discussions and history related to Hearth Products and in a more general sense, energy issues.

    We promote the EFFICIENT, RESPONSIBLE, CLEAN and SAFE use of all fuels, whether renewable or fossil.
Status
Not open for further replies.

jeffesonm

Minister of Fire
May 29, 2012
862
central NJ
Assuming the UPS man delivers my 5' flex section today, I hope to be installing my Osburn insert tonight. I wanted to make a quick list of things to try and avoid and mid-install trips to the store. Here's what I've got:

  • Osburn Matrix insert
  • Several sections of 6" DuraVent rigid pipe, 6" round stove connector, extend-a-cap, 5' insulation sleeve, and *soon* 5 foot 6" flex section
  • Pop rivet gun and stainless steel rivets that came with rigid pipe
  • Some sheet metal screws for attaching stove connector to insert, and flex section to stove connector
  • Furnace cement for sealing stove connector to insert
  • High temp silicon for sealing extend-a-cap base plate to top of chimney
  • Roxul for behind blockoff plate
  • 24 gauge sheet metal for fabricating blockoff plate
  • High temp spraypaint for blockoff plate
  • Outside air kit for insert, including stove flange, vent for outside, 8' of 5" aluminum ducting and clamps
  • Foil tape to seal around both ends of OAK ducting
  • Silicon for sealing vent to siding
What am I missing?
 
You're off to a good start, but definitely do this when the hardware store is open. Murphy's Law says there's bound to be something else you need. Angle grinder for damper opening? Tapcons for securing block-off plate?

PS: Why are you painting the block-off plate? Will it be visible?
 
I know, I know... projects always take 1-3 extra trips to the store but the closest one is 25 mins away so I'm trying to avoid it this time. Good call on the tapcons... was planning to secure blockoff plate to existing heatform but if I decide to put it up higher in the chimney the tapcons will be needed. Not sure why I was going to paint the block off plate other than it seems like it's generally a good idea to paint bare steel... but I guess it's not really necessary.

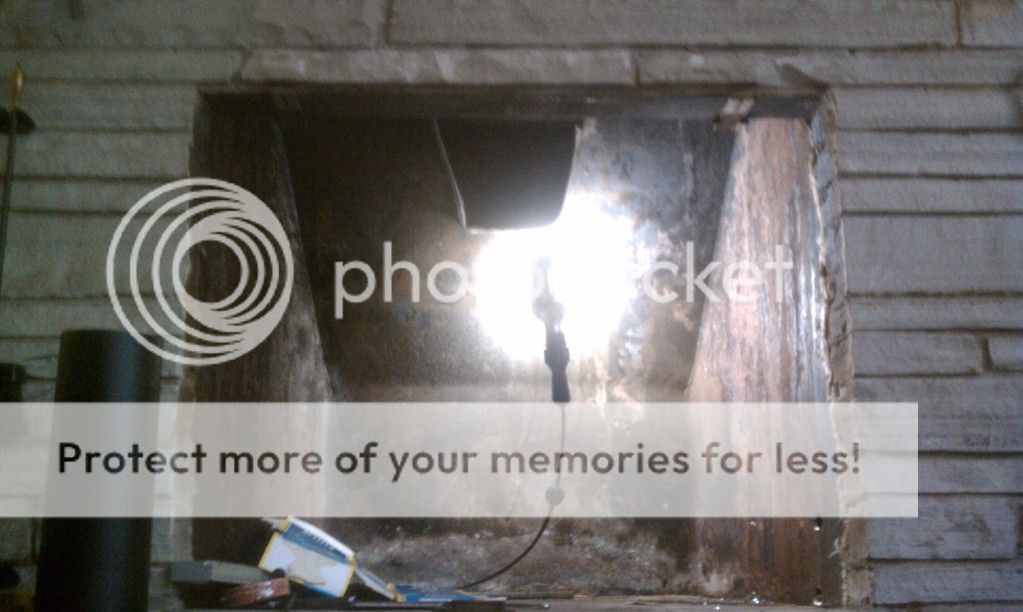
I spent a few hours drilling/sawzalling an opening through the smoke shelf/dampener area in the 1/4" steel heatform earlier this week so it should be a straight shot for the liner. I have to give a mention to this Diablo sawzall blade as it did a damn fine job cutting through some pretty thick steel. Here is a preview of the hack job... will post a detailed thread once it's all done. The holes in the lower right side are the start of where the OAK will be run.

IMAG1519.jpg
 
Is this liner going to be fully insulated? That gaping hole makes me a bit nervous. Is this an exterior wall fireplace & chimney?

Also, was the chimney fully cleaned?
 
Band Aids, Tetanus shot, and some beer.
Check, check, check.
s this liner going to be fully insulated? That gaping hole makes me a bit nervous. Is this an exterior wall fireplace & chimney?

Also, was the chimney fully cleaned?
Interior fireplace/chimney. Rigid DuraLiner is factory insulated and the flex section will be as well. It was tough enough cutting straight lines into the smoke shelf, I wasn't about to try and cut a 6 1/2" diameter circle. Not sure whether it's best to build the blockoff plate right at the smoke shelf area I just cut out, or higher up in the chimney a bit.
 
Status
Not open for further replies.