
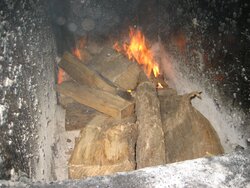
Since I was doing my mid-season ash cleanout and had to do a minor repair, I figured I'd snap some pictures showing what I did to the bottom of my Vigas 80LC before I started using it a couple years ago.
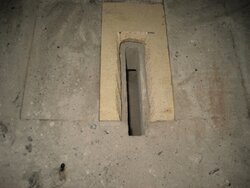
After reading all the posts about nozzle erosion and all the problems with replacing them, I figured for about $30 I can prevent ever having to replace mine. I lined the bottom with standard 1" thick firebrick before it's first burn, cutting slots in a couple bricks with my Partner saw to match up with the nozzle openings. After a couple years use, there is absolutely NO wear on the factory nozzles.
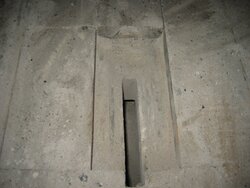
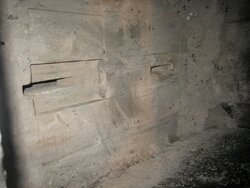
The brick in the front is prone to cracking - this is the 2nd time I've had to cut a new one and install it. I tend not to poke around too much in my nozzles. One needs to be careful not to get ahold of the brick edge and pull it up accidentally ( they are snug enough that you have to tug pretty good to move them.
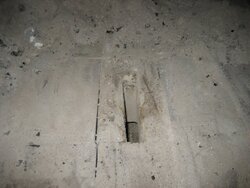
Here are pics of the bottom with the front brick removed, closeup of the rear brick after 2 years use, and the new cut front in place. I'm experimenting this time with a wider cut on the front nozzle brick. For some reason my front nozzle doesn't gasify as well as the rear and I'm seeing if this will help.
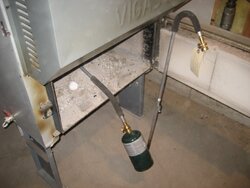
I also included a picture of my fire starter. I use a "magna torch" and ease out the factory bend in the tube ( compare to an un-altered one leaning against the door in the photo ). It's just the right length to reach the rear nozzle ( or front ). The flame gets sucked up the nozzle and I have the start of a fire in about 90 seconds each nozzle.
After reading all the posts about nozzle erosion and all the problems with replacing them, I figured for about $30 I can prevent ever having to replace mine. I lined the bottom with standard 1" thick firebrick before it's first burn, cutting slots in a couple bricks with my Partner saw to match up with the nozzle openings. After a couple years use, there is absolutely NO wear on the factory nozzles.
The brick in the front is prone to cracking - this is the 2nd time I've had to cut a new one and install it. I tend not to poke around too much in my nozzles. One needs to be careful not to get ahold of the brick edge and pull it up accidentally ( they are snug enough that you have to tug pretty good to move them.
Here are pics of the bottom with the front brick removed, closeup of the rear brick after 2 years use, and the new cut front in place. I'm experimenting this time with a wider cut on the front nozzle brick. For some reason my front nozzle doesn't gasify as well as the rear and I'm seeing if this will help.
I also included a picture of my fire starter. I use a "magna torch" and ease out the factory bend in the tube ( compare to an un-altered one leaning against the door in the photo ). It's just the right length to reach the rear nozzle ( or front ). The flame gets sucked up the nozzle and I have the start of a fire in about 90 seconds each nozzle.
Attachments
Last edited: