Long term install plan - Vedolux 37 - Chimney questions

  • Active since 1995, Hearth.com is THE place on the internet for free information and advice about wood stoves, pellet stoves and other energy saving equipment.

    We strive to provide opinions, articles, discussions and history related to Hearth Products and in a more general sense, energy issues.

    We promote the EFFICIENT, RESPONSIBLE, CLEAN and SAFE use of all fuels, whether renewable or fossil.
Status
Not open for further replies.

Quebexico

New Member
Oct 8, 2015
12
West Quebec Canada
Hello all,

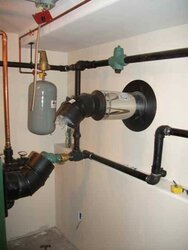
I've been reading this site for years while putting together a long-term plan to change our house over from electric baseboard and a high efficiency wood insert fireplace to in-floor radiant and an indoor gasifier boiler with storage. I've read nearly every thread on the subject and I think I've settled on a Vedolux with a built-in fan, although the final size of the unit is still up for some debate (37 or 55). Since the unit will be in the basement, the pull-through design seems like a good idea, and Dean at Smokeless Heat has been a great resource.

We are hoping to do the install in stages to make it less of a shock to the pocketbook. The plan for this year is to install the chimney (6" CSA B-629, 2 inch insulated, through the foundation and up the side of the house) with a temporary wood stove, and prep the storage tank area, then install the Pex, and next year install the tanks and the boiler (and pull out the wood stove). We are in Canada and the dollar has tanked in the last year, and I am hoping it rebounds a bit before we have to buy the unit (it could work out to a couple thousand bucks with the tanks)

My question relates to the location of the chimney install. The basement is drywalled with bare concrete floors and has a walk-out garage door. There are two possible locations for the boiler/chimney. One seems to be a better fit for the interior space we have, one I believe is better for the chimney. I am wondering if there are any opinions or insight as to what will perform better. I am not sure if the draft matters much since the Vedos we are looking at have a draft fan, but we would like to use the chimney temporarily with an EPA wood stove, to cut down on electricity use, until we install the boiler.

Here is a photo of the house that shows the roof line. The chimney will either be on the back wall of the right section of the house, or the right side wall (see pictures below)

house front.jpg

house back.jpg

This is the back wall install. It would put the boiler in a great spot in the basement. The roof is a 6/12 pitch so I would be looking at 8 feet stickout, maybe more, but this would not extend beyond the roof lines of the house (I would get my 10 feet in all directions with 8 feet). I am worried abut poor draft in this location, and damage to the chimney due to the long stickout. Any opinions? This is the "wife preferred" location as well...

house side.jpg

This is the side wall install. I would only need 4 feet stickout to get my distances, and the chimney would be much more protected, but it puts the boiler in the middle of the basement (which is a home workshop) and the chimney is much more visible. I think this location would be better for a draft but it is less practical.

In both cases, I end up with a fair length of chimney, around 24 feet or 20 feet depending on the option. Going through the house is impossible due to the floor plan.

I know that the chimney style I am installing (through wall 90, no framed chase, cold chimney) will work poorly with the temporary wood stove, but I figure two fires is better than one, at least until we get the boiler set up. My thought is to go for the rear install and put up with temporary poor stove performance, so that the boiler is in the opportune spot in the future... But I wanted to make sure that the rear chimney is not an issue for the boiler as well...

I should also mention that we are on top of a hill and get a lot of wind, draft has never been an issue with our insert (a 70,000 BTU Nordica Everest).

Thanks for any input!

Quebexico - Hailing from West Quebec.
 
My .02 cents is the side wall. Less vertical run and the drip edge (or snow slide) won't rip it off the building. Having the top of the vent near the peak also helps keep the cap in free air.

No way to penetrate the overhang thus reducing the vertical run on the outside?
 
In both cases, I should be able to run through the overhang, on the side it is 22 inches wide, on the back it's over two feet. Sorry if that wasn't clear from my "drawings"!

I think the vertical run in both cases would be about the same, maybe a bit less on the back of the house, but the back would be much less protected, which is my main concern, along with poor draft.
 
I don't think draft would be a concern. The Vedo only specs 0.04", which isn't much. And you can run a couple of stays from the top of the chimney back to the roof to alleviate damage concerns (that might be a 'must do' anyway from chimney manufacturer instructions/guidelines?). So as long as it's also firmly anchored at the overhang it should be good. Might not be quite as pretty as up the end wall, but I don't think it is a functional concern.
 
Stays for sure, they are required by the chimney manufacturer (Security Chimneys from Montreal). I agree that it looks less finished, but you won't see it from the front of the house, and we have access between the house and garage so it would be in the way for backing up trailers etc. If it was for long-term use with a wood stove I would probably put it on the end despite the downsides to ensure I got a good draft.

Is there a good thread on prevailing winds and the effect on draft? We usually have winds that come from the west, and the chimney would be a little sheltered from that direction. Then again, wind would pass over the roof as well... Maybe I need to put a mockup of my house in a wind tunnel _g;lol
 
There's a garage door, but is it still used as a garage? There might be some building code prohibiting a heating appliance. On the other hand, what a great place to load in the tanks!
 
The garage door is only 5 feet wide and is for getting wood in etc. I have a small workshop in the basement, but no flammable liquids etc.

It's great because I can drop a skid of wood into the basement with my tractor, and the tanks will sure be easy to get inside! Moving them into position in the basement will be a lot tougher though...
 
The end wall might make it easier to clean from the top too.
 
The garage door is only 5 feet wide and is for getting wood in etc. I have a small workshop in the basement, but no flammable liquids etc.

It's great because I can drop a skid of wood into the basement with my tractor, and the tanks will sure be easy to get inside! Moving them into position in the basement will be a lot tougher though...
Sounds ideal!
 
The garage door is only 5 feet wide and is for getting wood in etc. I have a small workshop in the basement, but no flammable liquids etc.

It's great because I can drop a skid of wood into the basement with my tractor, and the tanks will sure be easy to get inside! Moving them into position in the basement will be a lot tougher though...

Dollies are the ticket for that. Or a combo of dollies & pallet jack.

Every basement should have a pallet jack. :)
 
"Every basement should have a pallet jack"

I agree! Handiest thing ever.

I had another chimney question I am hoping you guys can help with. I am self-installing it and it's pretty straightforward, except for one detail where I am not sure how to proceed. The foundation is poured concrete and the inside wall is framed with 2X4 and spray foam insulated. I need to go through the wall and I am wondering if it is best to bore a large hole right through and use a thimble for the entire thickness, or to bore a 10" hole in the concrete (non-combustible) and install a thimble for the combustible portion of the thickness. From what I have seen and what was confirmed by the chimney mfg, both are permissible, but I'm not sure what is best. The partial thimble has an advantage since I think it would be easier to air-seal the hole with hydraulic cement, but I could see the full-thickness thimble being more fireproof, maybe. Also a 10 inch hole (with a core drill) is going to be a lot easier than a 14+" one.

Also, you guys that self-installed, did you buy a copy of the CSA code to ensure compliance or follow the instructions of the chimney only? The CSA code is nearly 200 bucks, and I'd like to save myself the expense if I can. This should be pretty textbook as an install...

Thanks!
 
I'd vote for the partial thimble. Why would you need hydraulic cement? The pipe is insulated going through the wall. Couldn't high temperature silicone caulk (the red stuff) do the trick?

I core drilled a couple of 4" holes and it wasn't bad. For a 10" hole, just to lift up the equipment and bolt it to the wall must take several guys.
 
I have pretty much the exact chimney setup as your first proposed design. No issues or complaints.


The end wall might make it easier to clean from the top too.
With a through the wall install you can clean the chimney through the T from the ground.
 
"Every basement should have a pallet jack"

I agree! Handiest thing ever.

I had another chimney question I am hoping you guys can help with. I am self-installing it and it's pretty straightforward, except for one detail where I am not sure how to proceed. The foundation is poured concrete and the inside wall is framed with 2X4 and spray foam insulated. I need to go through the wall and I am wondering if it is best to bore a large hole right through and use a thimble for the entire thickness, or to bore a 10" hole in the concrete (non-combustible) and install a thimble for the combustible portion of the thickness. From what I have seen and what was confirmed by the chimney mfg, both are permissible, but I'm not sure what is best. The partial thimble has an advantage since I think it would be easier to air-seal the hole with hydraulic cement, but I could see the full-thickness thimble being more fireproof, maybe. Also a 10 inch hole (with a core drill) is going to be a lot easier than a 14+" one.

Also, you guys that self-installed, did you buy a copy of the CSA code to ensure compliance or follow the instructions of the chimney only? The CSA code is nearly 200 bucks, and I'd like to save myself the expense if I can. This should be pretty textbook as an install...

Thanks!
I'd do as small a hole in the concrete as possible... Just because it will look better and with grout/hydraulic cement it will be a more permanent weather/bug/rodent proof install. (As long as it's code compliant)

One thing to keep in mind with the boiler and chimney placement is that there is a max horizontal distance allowed by the chimney manufacturer before entering the outside T. Usually around 2'.
 
My plan was actually to bore the hole at the same height as the centerline of the Vedolux 55 horizontal outlet, so I could avoid an elbow indoors (other than the factory elbow/outlet). I would go straight out to the exterior 90, and could likely connect the boiler outlet to the insulated piece passing through the wall directly. The boiler installation distance from the back wall is fairly short. It also means I could clean the horizontal run with the factory cleanout, and the exterior chimney through the bottom cleanout. Easy peasy.

Of course, the Vedolux 55 is a tad bit taller than the 37 (one inch), so if we go for the 37, I could just raise the base by the inch. Is this a good plan?
 
  • Like
Reactions: Mike Fromme
  • Like
Reactions: Mike Fromme
Now that I think of it, what if you wanted to change out units at some point in the future? Maybe higher on the wall would be better?
 
I'd rather have the direct access for cleaning through the boiler then having the chimney higher on the off chance he replaces the boiler with a taller one in the future.
 
I need all the advice I can get - This is great. Thanks all.

Good point on containing the slurry - I think my spray foam might save me on that one, I should be able to bore through the concrete and still leave the foam intact (to contain the mess) and then cut it out afterwards... It may not work out that way though _g

The height is a worry, for sure. I thought about just going 6 inches above optimal and either extending the base, or extending the factory elbow upwards. I think I'll look at some other boilers and see if the heights are similar. The VB ones seem pretty tall with the bases. I think the hole was going to end up around 70 inches from the floor, which is pretty high up there. I like the idea of running it there, so I have lots of separation with the ceiling, and the exterior elbow clean-out is at a reasonable height. Plus lower is probably easier to load...
 
The core drill is only a certain length as well, as far as drilling through the wall and foam.

It probably pays to think about the hole options, since you probably WON'T want to drill another one!
The holes I drilled for an oil tank pipes had some extra clearance, but I still agonized over getting it right. With, like, an 8" thick wall and if the boiler is not far from the wall, I don't know how much you can angle the pipe, plus the joint might not like the slant either. I'm just saying there'd be more flexibility if you didn't try to go straight out. This is just me, with not much experience, thinking out loud.
 
I completely agree, I'm definitely trying to take everything into account so it's perfect. I would rather go a bit higher and have a taller base than lower (where you're pretty much hooped).

I looked around at a few boilers (TARN, Froling) and the smaller model S4 Turbo Frolings have an outlet height of 73 inches. It's the tallest I can find. I think I might go a bit higher than what I planned (maybe that 73) and I can always raise the base a bit. Then again, that extra four inches might just be enough to make life harder for cleanouts, and if I needed to move the chimney up a bit in 15 years, that might not be the end of the world...
 
Here's mine. I made it higher then the boiler outlet. It's a PIA to clean the connector pipe. Anything you do to make cleaning easier is worth it.


Don't forget to factor in clearance above the boiler if you are thinking about raising the base.
 

Attachments

  • image.jpg
    image.jpg
    21.2 KB · Views: 184
  • Like
Reactions: Quebexico
Status
Not open for further replies.