- Jan 31, 2007
- 79
[quote author="Gooserider" date="1171951609"][quote author="Starter" date="1171910427"]Thanks for the information BeGreen and Gooserider.
[quote author="UncleRich" date="1171873523"]Man am I curious. I would really like to see that construction project. Any chance you could do a photo journalist documentation of the project? I am fascinated to see the differences and similarities. Don't want to put pressure on you, but it would be a real education to see the blend of the Old World skills, new (at least to us, 'mercans) products and techniques. Some European technologies are way ahead of the States.
Please, please, please?????[/quote]
Sure! I was planning to take some photos through the installation (if the guys installing wouldn't mind of course). I was going to ask if it was ok to make a thread about my installation, uploading the photos and you can see what material is used and how.
I'm glad I can sort of contribute something as well!") [/quote]
[/quote]
It would be great to either start a new thread, or keep adding onto this one, whichever is easier... (If you do start a new thread, it would be good to put a link from this thread to the new one and vice versa, so that people can follow the entire story)
Seeing a good batch of pictures of the installation and so forth is a great way to contribute to our knowledge - this has been a fun project for us as well since we've had to look at how things are done outside the areas we are used to,
Gooserider[/quote]
So, here's the stuff I posted about with reference to this thread: https://www.hearth.com/econtent/index.php/forums/viewthread/6287/ , and this thread: https://www.hearth.com/econtent/index.php/forums/viewthread/6827/ .
In this first post I will illustrate the flue pipes, before they were installed.
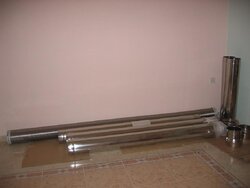
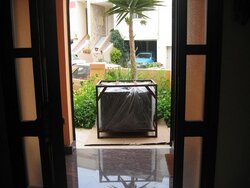
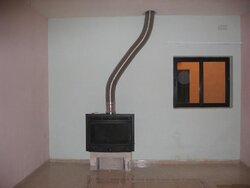
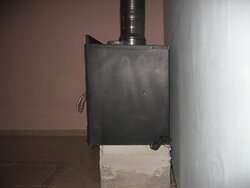
In the first picture you'll see all the flues. The flexible 3 meter one at the back, plus the solid stainless stuff and other connections for a total of three storeys of flue.
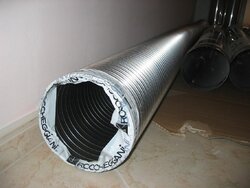
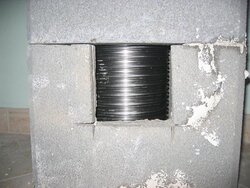
The second picture is a close-up of the stainless 3 meter flexible flue.
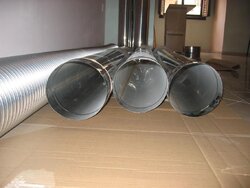
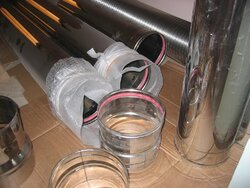
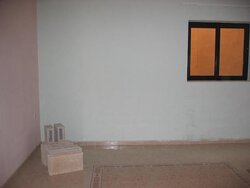
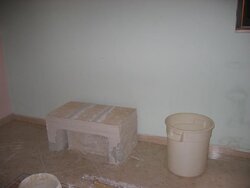
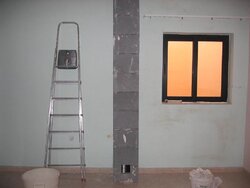
The third and fourth pictures are a close-up of the remainder.
The flue is 8" if I remember correctly.
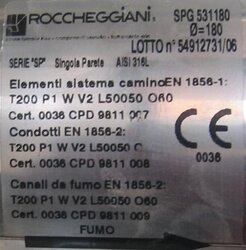
The last fifth picture is the written specifications on the flue pipe. Since I'm not in the USA there's no talk of class A and what I heard about here. But this is supposed to be OK for the EU.
I'll follow this up with more posts of the installation.
[quote author="UncleRich" date="1171873523"]Man am I curious. I would really like to see that construction project. Any chance you could do a photo journalist documentation of the project? I am fascinated to see the differences and similarities. Don't want to put pressure on you, but it would be a real education to see the blend of the Old World skills, new (at least to us, 'mercans) products and techniques. Some European technologies are way ahead of the States.
Please, please, please?????[/quote]
Sure! I was planning to take some photos through the installation (if the guys installing wouldn't mind of course). I was going to ask if it was ok to make a thread about my installation, uploading the photos and you can see what material is used and how.
I'm glad I can sort of contribute something as well!
[/quote]It would be great to either start a new thread, or keep adding onto this one, whichever is easier... (If you do start a new thread, it would be good to put a link from this thread to the new one and vice versa, so that people can follow the entire story)
Seeing a good batch of pictures of the installation and so forth is a great way to contribute to our knowledge - this has been a fun project for us as well since we've had to look at how things are done outside the areas we are used to,
Gooserider[/quote]
So, here's the stuff I posted about with reference to this thread: https://www.hearth.com/econtent/index.php/forums/viewthread/6287/ , and this thread: https://www.hearth.com/econtent/index.php/forums/viewthread/6827/ .
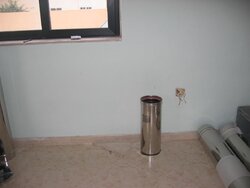
In this first post I will illustrate the flue pipes, before they were installed.
In the first picture you'll see all the flues. The flexible 3 meter one at the back, plus the solid stainless stuff and other connections for a total of three storeys of flue.
The second picture is a close-up of the stainless 3 meter flexible flue.
The third and fourth pictures are a close-up of the remainder.
The flue is 8" if I remember correctly.
The last fifth picture is the written specifications on the flue pipe. Since I'm not in the USA there's no talk of class A and what I heard about here. But this is supposed to be OK for the EU.
I'll follow this up with more posts of the installation.