I've been a lurker for a little while here and I finally pulled the trigger on the 52i  This gem throws out some incredible heat. My search for a stove started a few months back when realizing how much money we spent on propane over the last 12 months....$4400. I told my wife I would NEVER do that again. So here I am, trying to supplement as much as I can in our 3400 sq ft rambler.
The insert is in my sunroom/living room with vaulted ceilings. Using my IR thermometer the air appears to pocket in the ceiling apprx 5-10* hotter than the ambient temp in the majority of the living area. Most of the house is an open floor plan but unfortunately for airflow the bedrooms are a little more secluded and suffer because of it. With the 52i set on 75-80*, these rooms are nearly 62-65* in the late night/early morning.
This delta prompted me try a few things:
-First was running furnace fan only, which produced no positive results (likely because 2 of my 3 air returns are in colder areas).
-Second option was to add a duct in the ceiling of the sunroom with a fan sucking the air into the two kids rooms. I'm EXTREMELY happy to report that it works and might I add it works incredibly well. With the stove set on 75* the two kids rooms hover at 75* with the doors shut or 71-72* with the doors open. In addition to evenly heating the kids rooms, the rest of the living space is much more comfortable. No longer is there a "wall of heat" when walking into our living area.
I'll post pics below with a brief explanation of each under the picture.
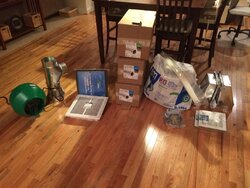
Materials prior to start. This was about $350-400 in materials. There were a few items not pictured I had to buy locally.
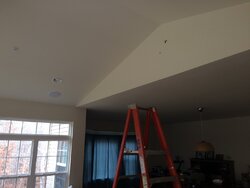 .
.
Location determined and punched nail through attic side so I could cut from this side. Unfortunately I couldn't center the duct 100% due to a structural support.
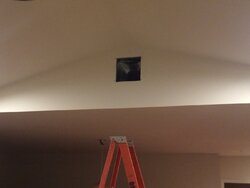
8" flex duct and inlet mounted.
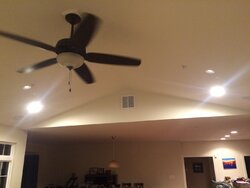
Finished view of duct inlet. I need to pick up a filter for it but it looks great.
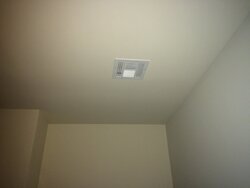
6" flex duct to 8"x8" vent in bedroom 1. Bedroom 2 looks similar so I wont bother with a pic.
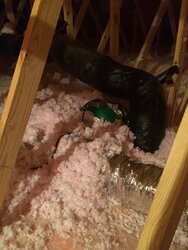
Attic installation. The black duct is an existing return duct, the foil covered ones are new for this project.On this side of the fan there is the y-duct splitting to the two rooms.
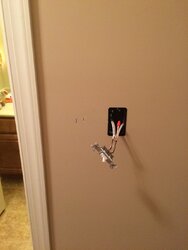
Ignore the two marks on the left. Slight mistake on measuring that I need to patch now. Wiring up the switch for the new outlet for the fan in the attic. I used a remodel box here (don't shoot me code police ....) to avoid cutting a huge hole in the wall. On the opposite side of this was is the bathroom light and fan switch. I pulled power from here and ran switched power directly up into the attic.
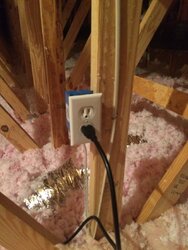
New switched outlet in attic. If I ever get to phase II (my bedroom) of this effort this plug will be ready for me.
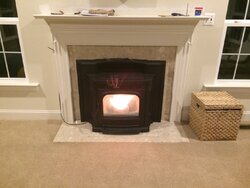
My newly installed 52i cranking out some heat. The mantel is still loose and I'm still playing with the temp probe. Although the apprx location seems to be perfect right now.
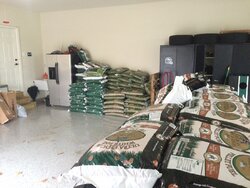
My winters stash of pellets. 1 ton of North American blend (meh at best, tons of ash), 1 ton of AWF hardwood, and 3 tons of AWF pine softwood (excited to try these )
)
I'd like to give a shout out to the forums for helping me make my stove choice and sparking my love for pellet stoves. Let me know if anyone has any questions.
Travis
 This gem throws out some incredible heat. My search for a stove started a few months back when realizing how much money we spent on propane over the last 12 months....$4400. I told my wife I would NEVER do that again. So here I am, trying to supplement as much as I can in our 3400 sq ft rambler.
The insert is in my sunroom/living room with vaulted ceilings. Using my IR thermometer the air appears to pocket in the ceiling apprx 5-10* hotter than the ambient temp in the majority of the living area. Most of the house is an open floor plan but unfortunately for airflow the bedrooms are a little more secluded and suffer because of it. With the 52i set on 75-80*, these rooms are nearly 62-65* in the late night/early morning.
This delta prompted me try a few things:
-First was running furnace fan only, which produced no positive results (likely because 2 of my 3 air returns are in colder areas).
-Second option was to add a duct in the ceiling of the sunroom with a fan sucking the air into the two kids rooms. I'm EXTREMELY happy to report that it works and might I add it works incredibly well. With the stove set on 75* the two kids rooms hover at 75* with the doors shut or 71-72* with the doors open. In addition to evenly heating the kids rooms, the rest of the living space is much more comfortable. No longer is there a "wall of heat" when walking into our living area.
I'll post pics below with a brief explanation of each under the picture.

Materials prior to start. This was about $350-400 in materials. There were a few items not pictured I had to buy locally.
 .
.Location determined and punched nail through attic side so I could cut from this side. Unfortunately I couldn't center the duct 100% due to a structural support.

8" flex duct and inlet mounted.

Finished view of duct inlet. I need to pick up a filter for it but it looks great.

6" flex duct to 8"x8" vent in bedroom 1. Bedroom 2 looks similar so I wont bother with a pic.

Attic installation. The black duct is an existing return duct, the foil covered ones are new for this project.On this side of the fan there is the y-duct splitting to the two rooms.

Ignore the two marks on the left. Slight mistake on measuring that I need to patch now. Wiring up the switch for the new outlet for the fan in the attic. I used a remodel box here (don't shoot me code police
 ....) to avoid cutting a huge hole in the wall. On the opposite side of this was is the bathroom light and fan switch. I pulled power from here and ran switched power directly up into the attic.
New switched outlet in attic. If I ever get to phase II (my bedroom) of this effort this plug will be ready for me.

My newly installed 52i cranking out some heat. The mantel is still loose and I'm still playing with the temp probe. Although the apprx location seems to be perfect right now.

My winters stash of pellets. 1 ton of North American blend (meh at best, tons of ash), 1 ton of AWF hardwood, and 3 tons of AWF pine softwood (excited to try these
 )
)I'd like to give a shout out to the forums for helping me make my stove choice and sparking my love for pellet stoves. Let me know if anyone has any questions.
Travis

