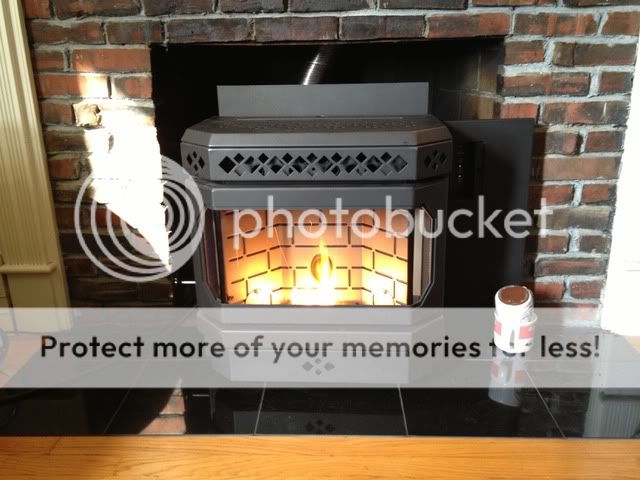
I just installed my new Vistaflame VF100 insert this morning ") Fired her up and seems to work great . the manual states to warm the stove up and then run it on high for another 20 mins . set the first stop collar on the damper rod for .12 WC . then run the stove on low for another 20 mins and set the other stop coller for .10 WC .
Fired her up and seems to work great . the manual states to warm the stove up and then run it on high for another 20 mins . set the first stop collar on the damper rod for .12 WC . then run the stove on low for another 20 mins and set the other stop coller for .10 WC .
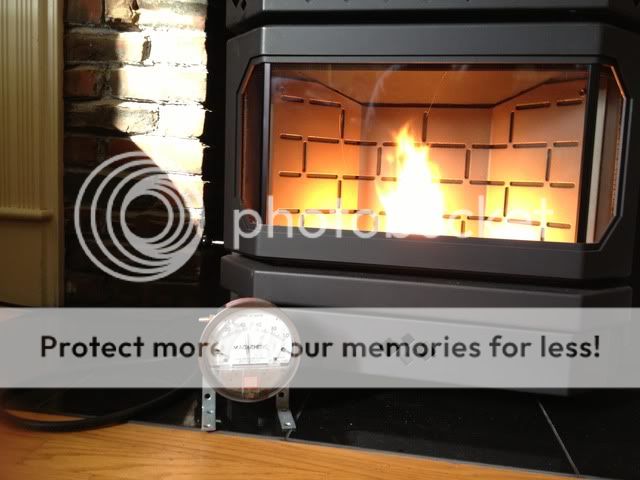
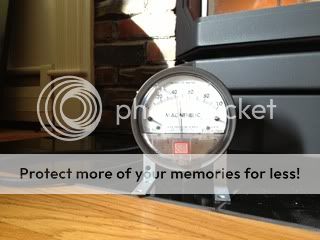
Doing so the lowest readings i can get to are .40 high / .38 low damper fully open (assuming fully open since i can't actually see it but the rod is fully out ) .
I'm using fireside ultras , haven't yet played with or ordered any yet just using what HD had .
Install is standard 3" T , 12' of flex relatively straight up to this cap http://www.rockfordchimneysupply.com/pic.php?pic=quickCap-lg.jpg&cap=Round Rain Cap&hgt=300 and i'm thinking that maybe it might be too restrictive ? in person it looks like it's got a reasonable amount of flow area but ....
also cold stove and cooled stove reads .60 .
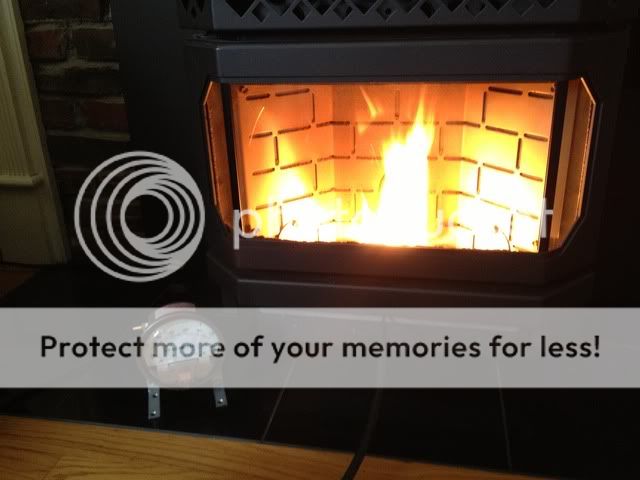
i've got pics of the stove running on high and meter reading but the upload file is NOT working !!
!!
Thanx in advance , Greg
Fired her up and seems to work great . the manual states to warm the stove up and then run it on high for another 20 mins . set the first stop collar on the damper rod for .12 WC . then run the stove on low for another 20 mins and set the other stop coller for .10 WC . Doing so the lowest readings i can get to are .40 high / .38 low damper fully open (assuming fully open since i can't actually see it but the rod is fully out ) .
I'm using fireside ultras , haven't yet played with or ordered any yet just using what HD had .
Install is standard 3" T , 12' of flex relatively straight up to this cap http://www.rockfordchimneysupply.com/pic.php?pic=quickCap-lg.jpg&cap=Round Rain Cap&hgt=300 and i'm thinking that maybe it might be too restrictive ? in person it looks like it's got a reasonable amount of flow area but ....
also cold stove and cooled stove reads .60 .
i've got pics of the stove running on high and meter reading but the upload file is NOT working
!!Thanx in advance , Greg