New Stove Delivered Defective

  • Active since 1995, Hearth.com is THE place on the internet for free information and advice about wood stoves, pellet stoves and other energy saving equipment.

    We strive to provide opinions, articles, discussions and history related to Hearth Products and in a more general sense, energy issues.

    We promote the EFFICIENT, RESPONSIBLE, CLEAN and SAFE use of all fuels, whether renewable or fossil.
Status
Not open for further replies.
Myself I'd just confirm that the factory gasket is there and then just leave it for now. It's new and will be fine as long as it's there.

I get that making your own replacement will be much more durable and presumably seal better. But seeing these stoves daily(I serviced two PE's today) the air is going to flow through to the tubes/baffle which is the path of least resistance.

Sucks the wrong levelling bolts were included. Makes me think possibly they weren't the originals being a display model?
 
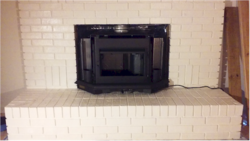
It was quite a job but we got the stove into the fireplace.
The biggest challenge was aligning the stove liner pipe connector and getting that flush in the stove.
We had a lot of difficulty.
The insulation wrapped flu liner was hanging up and I just could not get it flush because the original chimney flu is not straight but angles down.

upload_2016-11-17_17-18-44.png

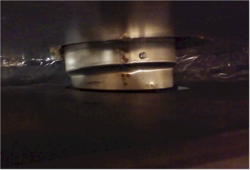
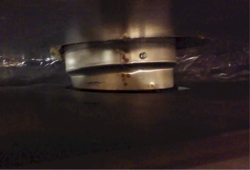
For the most part the connector is pretty tight. I do plan to caulk around it with 3M Fire Block Sealant

The sheet metal screw will attach the thermocouple washer for the temperature monitor.

BTW I found some 1" foil faced Roxul Mineral Wool Board and lined the fireplace and the block off plate with it.
It was $9.50 for a 2' x 4' sheet.

upload_2016-11-17_17-15-33.png
 

Attachments

  • upload_2016-11-17_17-18-4.png
    upload_2016-11-17_17-18-4.png
    237.7 KB · Views: 109
Last edited by a moderator:
Myself I'd just confirm that the factory gasket is there and then just leave it for now. It's new and will be fine as long as it's there.

I get that making your own replacement will be much more durable and presumably seal better. But seeing these stoves daily(I serviced two PE's today) the air is going to flow through to the tubes/baffle which is the path of least resistance.

Sucks the wrong levelling bolts were included. Makes me think possibly they weren't the originals being a display model?

I found the factory gasket as you describe and it is in good shape so I will stick with it for this Winter.
 
If you removed the baffle you could use a flashlight and mirror to see how the adapter is fitting in the flue collar. You could also reach up in there and manipulate it from the inside too.

Looks great sitting in the fireplace. Congrats.
 
  • Like
Reactions: begreen
the 3m fire stop caulk should not be used between the flue collar and liner (unless I'm miss reading this, it's early) the caulk will smoke up and make a foul smell.
The fire stop caulk is make for applications that don't get normally hot like walls with fusible link vents, the caulk is made to go between the vent and wood.
 
  • Like
Reactions: Squisher
the 3m fire stop caulk should not be used between the flue collar and liner (unless I'm miss reading this, it's early) the caulk will smoke up and make a foul smell.
The fire stop caulk is make for applications that don't get normally hot like walls with fusible link vents, the caulk is made to go between the vent and wood.

Oh my!
Well that smell I have, which I thought was the stove paint curing, was then likely that caulk :confused:

I guess I have to figure out how to get it off.
Stove cement would have been the stuff to use right?

Any suggestions Kenny on how to get that stuff off?
 
Well Here is the new stove installed.

It burns great without smoke (more windy than normal today) besides the smell...


Attachments

  • Stove Firing.mp4
    4.4 MB · Views: 117
Great to see you burning. Next fire, double the quantity of wood and load it N/S. Once it is burning well turn down the air to at least 25% if not all the way (as long as it doesn't snuff out the flames). That should get it hot enough to bake in the paint. Open nearby windows a put a fan in one to exhaust paint fumes.
 
Looks good, burn that thing hotter next time to cure the paint, remember every time a new hotter temp is reached you will get a new paint burning smell, until the stove hits 650deg.
As far as removing the caulk, you can try to scrape it off. To get the liner to fit right there's a kit with a reversible collar that attaches to the liner than the inside of your stove, remember there should be 3 metal screws that attach the liner to the stove. You shouldn't need any type of cement or caulk to aide in the liner attachment.
 
the 3m fire stop caulk should not be used between the flue collar and liner (unless I'm miss reading this, it's early) the caulk will smoke up and make a foul smell.
The fire stop caulk is make for applications that don't get normally hot like walls with fusible link vents, the caulk is made to go between the vent and wood.

My third firing this morning took the flu to 725°F and I think this finally cured the paint as I am now running around 300° with very little smell left.
The 3M136 caulk cured and hardened like cement during the first burn and as its rated to 1380°F, I do not think it will be a problem, as you suggest, decomposing because of heat.

What do you wood burners generally go by to measure your stove heat?
I have an Auber digital thermometer reading off a flu thermocouple.
So when Kenny says fire to 650 does he mean flu temp or stove body temp?
 
725ºF on the flue is high, especially if this is surface reading and not a probe. It could be that you are not shutting down the air soon enough or far enough. Ideally the flue temps will be a bit lower than the stove top temps but taking the stove top temp is hard with a blower going and under a convective lid. Therefore most people put a thermometer on the face of the insert in the upper right or left corner.
 
Begreen, I hear you.
What generally is the difference between surface temp on the flu and surface temp on the insert face?
 
Surface temp on the insert face is relative to the stove body temp. The surface temp on the flue is a measurement of flue gas temps leaving the stove. Surface flue temps will be lower than the actual gas temp inside the flue. Normally the surface flue temp is taken about 12-18" above the stove body with a free-standing stove. A surface temp of 300F could have an interior temp of 450F. With double-wall stove pipe a probe can be used to get an accurate flue gas temp. But in an insert you have a challenge because the liner is usually too fragile to mount the sensor on. If you are measuring the surface temp at the flue collar I am not sure how that correlates to the flue gas temps. It's greatest value could be for an alarm setting. You don't want the flue collar to get over about 850F.
 
Thanks Begreen,

To get to 725F I loaded the stove and purposely brought it up to cure the paint before shutting down the combustion air.
850F flu temp sounds like a good limit. I will set my alarm for 700F FWIW, LOL.

Earlier I took a temp of the insert face and the flu collar.
The flu collar (digital thermocouple) read 350F while the Condar magnetic stove thermometer read 320F or so.
 
The stove body will actually get much hotter with the air closed than with it open. Closing down the air encourages secondary combustion for a hotter burn in the firebox.
 
The stove body will actually get much hotter with the air closed than with it open. Closing down the air encourages secondary combustion for a hotter burn in the firebox.

Well then the stove was already peaking at 725F.
 
And that was with the air all the way closed, right? If so you may be closing down the air too late. Try shutting it down sooner.
 
The stove body will actually get much hotter with the air closed than with it open.
Seems counter intuitive, but that's a fact. The higher the primary air flow, the more you lose up the chimney. Turning the primary air down actually increases the secondary air and burning as long as the firebox is kept above 1100F. This comment is for the PE Super models. Not sure about other designs. Keeping the flue temps moderately low and still have secondary burning is what to aim for.

Just for fun, get a good, hot fire going on "high" and then turn it down and watch the secondary flames above. It can be quite spectacular, and that's where the efficiency is, burning all that gas and smoke otherwise escaping. For normal use, it's a matter of monitoring the fire, and experience will tell you when to start turning it down.

The best indicator is when the smoke disappears from the chimney. It can be quite sudden sometimes, and that's when you know the secondaries are doing the job.
 
Status
Not open for further replies.