New to me Jotul 602

  • Active since 1995, Hearth.com is THE place on the internet for free information and advice about wood stoves, pellet stoves and other energy saving equipment.

    We strive to provide opinions, articles, discussions and history related to Hearth Products and in a more general sense, energy issues.

    We promote the EFFICIENT, RESPONSIBLE, CLEAN and SAFE use of all fuels, whether renewable or fossil.
Status
Not open for further replies.

mattg1970

Member
Apr 14, 2007
64
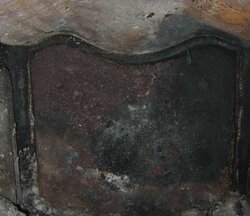
I went to get my free Jotul 602 from a friend of a friend and it was beat. The owner said the stove had a crack on the front of the stove but they still uesd it and it was fine. When I saw the crack it was huge 1/4 of an inch wide by 4 inches long. I don't know how they used it. Plus the back had a 8 inch long crack across it. I told the woman thanks but no thanks. She understood. When I was walking to my car she said We have another one just like it we might want to get rid of. She showed it to me and it was the same stove but in perfect condition. It looked like it had never been used. I said I would be interested and how much. She called her husband at work and he said $50.00. I paid her and went home with a new stove. Does anyone know where I can get parts for this Jotul 602. I am looking for the glass front door like on the Jotul website picture of the 602. Any other info on this stove would be great.
 
The older stoves were not made for the glass front. I'm not sure if you can swap out the old door with a newer one.

How is the interior of the stove? Post some pics!

PS: If you plan on using this a lot and for a long time, add a rear, interior heat shield. It will help keep the back of the stove from cracking.
 
I don't have a digital cam to post pictures. I was surprised to see the bottom inside of the stove is also enameled. The stove is green enamel. I'm not crazy about the color but I can't complain. How would I attach a rear heat shield to the stove? How thick steel should I use?
 
Wow, that sounds great if you can still see the enameling on the interior bottom.

I made my back plate out of I think #10 steel. It was a small scrap lying around. First I made a cardboard template that fit nicely the back of the stove with about 1/8" clearance on the edges. A friend cut out the steel and ground down the edges smooth. Next I test fitted the new steel piece and ground down any high spots until it went in easily and fit snug to the upper baffle. Then I taped the cardboard template back onto the metal back plate and drilled four holes, one in each corner to clear a #10 machine screw. I can't remember the length screws I used but I think they were 10-24 x 1". Remove the cardboard template and then marked the two bottom holes on the back of the stove. With the screw head on the interior side, I put a screw in each hole and a nut on the back side. The nut acts as a spacer. Then I drilled out the two bottom holes. (It may be easier if the top baffle plate is temporarily removed.) Then align the template with the holes on the outside of the stove and drill the two top ones. (If the template is not exactly symmetrical be sure to keep track of the front and back of the template.) If you removed the upper baffle plate, replace it now. Be sure it is seated correctly. It should go all the way to the back and fit snuggly flush to the side plates. Now insert the steel plate in the stove and bolt it in with 4 more nuts on the back of the stove. When firing up the stove be sure to do a few break in fires first. The 602 works best with about a 1" bed of ash.

I was concerned about warping of the plate, but after 1.5 seasons, there was no sign of this. The downside is that you lose about 1/2" in log length. But the stove will last longer. It works really well and I could feel the difference in back temperature. It stayed much cooler. I rebuilt ours when it was about 20 years old, though from what I've learned on the forum, I should have done it 5 years earlier. My camera batteries need charging, but I will post a shot later if I can get a decent one of the inside of the stove.
 
Thanks if you could post a couple of pictures that would be great. You said 1 inch of ash works great. What about 1inch of sand instead? Iv been told sand works great.
 
A 1/2" bed of sand is fine. Then let the ash build up on top of that. Clean the stove when it gets hard to fit a split in it. ;-)
 
Here's the interior shot. Not too much to see. The stove has been stored in the garage for a couple years and the back plate has begun to rust. After looking at it again, it looks like I put the screws in from the outside and have nuts on the interior.
 

Attachments

  • 602-rear-baffle.jpg
    602-rear-baffle.jpg
    28.4 KB · Views: 582
Status
Not open for further replies.