Out with the old.. in with the new

  • Active since 1995, Hearth.com is THE place on the internet for free information and advice about wood stoves, pellet stoves and other energy saving equipment.

    We strive to provide opinions, articles, discussions and history related to Hearth Products and in a more general sense, energy issues.

    We promote the EFFICIENT, RESPONSIBLE, CLEAN and SAFE use of all fuels, whether renewable or fossil.
Status
Not open for further replies.

DorazioJ

New Member
Jan 12, 2011
21
Western Ma
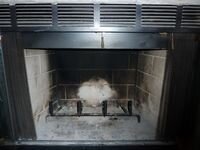
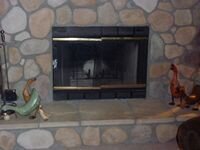
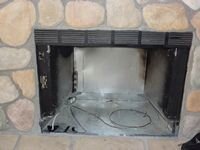
So due to get my M55 insert next week. The dealer stopped by today to do a pre inspection check to make sure everything was good. They said it will be more difficult than anticipated as I have a factory installed fireplace that will need to be removed first. The current fireplace is a Superior BCF 3885 (tried to attach pictures but the size was too big and it rejected it). They will then put the pellet insert in it's place once removed. I thought it would be a much easier install.. but I really don't like the waste the current factory fireplace is, so I'm planning on moving forward. They said additional labor for the install would run a couple hundred dollars. I will keep the forum up to date. Anyone else go through this process of having to remove an existing factory fireplace to put in a pellet insert? Any watch outs I should mention to the installers?

Thanks!
 

Attachments

  • tn_P1000710.jpg
    tn_P1000710.jpg
    6.1 KB · Views: 782
  • tn_P1000713.jpg
    tn_P1000713.jpg
    6.1 KB · Views: 784
Tips on posting pictures are sticked above the threads in the Announcement. I found setting the camera to a smaller size is the easiest thing. 800x600 works fine as the site is set to 1100x1100 as max size. Any setting below the 1100x1100 works dandy!
 
Take lots of pictures of the install or it didn't happen. We like pictures.
 
Good Luck,

For Pictures I down size them using the Built in Picture and Scanner wizard in Windows XP with Office

First I download the pictures into a folder on my PC.
Then I open that folder up and view the thumbnails there. I delete the out of focus/over exposed ones.
Then I Right click on any of the pictures and select Edit.
This will bring up the MS Office Picture editor.
On the left side near the top is the view buttons. Use that to display all of the pictures in the folder.
Next I Right Click and select all of the pictures.
On the right side there is a Re-size button.
Press that and select Pre-defined width x height
I select Web-Large 640x480 for postings.
Then save them to change the size.

This does all of the pictures at once.

After that use the forum instructions for attach a picture and the preview button to attach more than one.

Good Luck,
---Nailer---
 

Attachments

  • Smiley.jpg
    Smiley.jpg
    5.1 KB · Views: 830
If by "factory fireplace" you mean a gas fireplace insert built into a wooden enclosure...I did just that in November with my M55 cast insert.

Things to watch for...make sure they build a hearth with metal studs layered with 1/2" durock and then tile. Standard 1/2" durock laying on the wooden subfloor is not sufficient. You need the air gap and metal studs. I am amazed at how hot the tiles are under my stove after it goes thru it's shutdown cycle and I pull it out for maintenance. Even though it has had 30min or more to cool down, the tile is still almost too hot to touch directly underneath the burnpot area. It's all spelled out in the technical manual, so make sure they follow that. Of course if you have a brick fireplace, you're good to go.

So far, I really like my M55. My wife likes it even more. Our living room is usually 77-80F :cheese:
Flynfrfun

Edit: Googled your fireplace and it's wood burning. My comments probably don't apply above. Enjoy your stove!
 
thanks everyone for the tips. I'll play around with your suggestions for sizing the pictures this weekend.. so I can get some before views loaded in. It is actuall a wood buring insert (as flyn noted above) - it's not a masonary fireplace. There is an 8" (I think) metal piping up through the roof now, so they will insert the new 4" piping inside the existing 8" pipe. The installers that were here today said after the remove/cut out the current insert they will be puttin in a layer of cement for the base. They are also going to install the electrical in the fireplace so there will be no exposed power cords. The guy said he has done this retro fit before so I have trust in him. Because we are having a superbowl party at our house and we don't want the living room under repair (they said it would take at least two trips to complete the install) they have pushed the install date to the tuesday after the superbowl. I'll post finished product pictures as well. Hate to lose these weeks that I could be heating with pellets.. but there are plenty of cold days ahead in the coming years so I'll be patient, as hard as it is.
 
m55 cast man said:
Easy thumbnais did the job.. added a couple pics to the OP.. after pictures to come in a few weeks.

I'm glad you like Easy Thumbnails! I size my pictures to 640 x 480 for here so you can blow them up by clicking on them.
I was shocked to see your fireplace because it looks IDENTICAL to my son's! He's been thinking about upgrading also. This will be very interesting to him AND ME, since I will end up doing the work, me thinks. :) He's in a manufactured home. Are you?
 
Hey TJ.. nope.. not a manufactured home, but after some research I learned that the builder in this area used these factory fireplaces in most of his homes in the late 90's early 00's. I'll keep you up to date on how this process goes and if it works out.
 
Thanks! Good luck.
 
Ok.. progress on the install.. attached are a few pictures of my fireplace after they took out portions of the factory insert so the pellet stove would fit. Also I had an electrical box run into the space so I could hide the cords. The other wire is for the thermostat. Cutting up the old fireplace was not as bad of a job as I thought it would be. Took about 90 min.. they used a sawsall to cut the sheet metal off the walls, floor and a metal baffle that came down from the top front. That was all that was needed for the M55 to fit into this space. Mess was minimal.. I used my ash vac to clean up after each step. I will post more pictures later as they install the new unit.
 

Attachments

  • tn_P1000717.jpg
    tn_P1000717.jpg
    5.3 KB · Views: 572
  • tn_P1000722.jpg
    tn_P1000722.jpg
    5.8 KB · Views: 575
  • tn_P1000723.jpg
    tn_P1000723.jpg
    6.2 KB · Views: 547
I'm enjoying the pictures! Very, very interesting. When you Easy Thumbnail the next batch, set it for 640 x 480 so they blow up. OK? I was at my son's house yesterday scoping out his fireplace for the same conversion. I wondered how you were going to attack the fact that the stone and mortar actually cover over the exterior lip of the metal 'box' but it appears that it will just stay there and be covered by the pellet stove surround. Can't wait to see the final outcome!
 
It is DONE!!! 
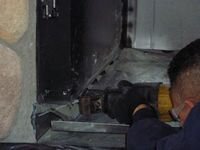
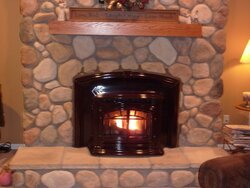
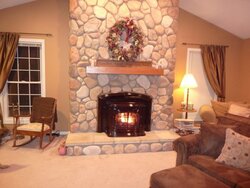
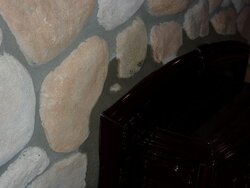
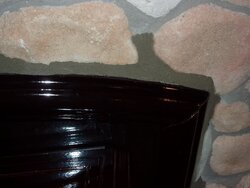
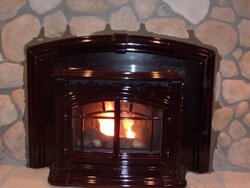
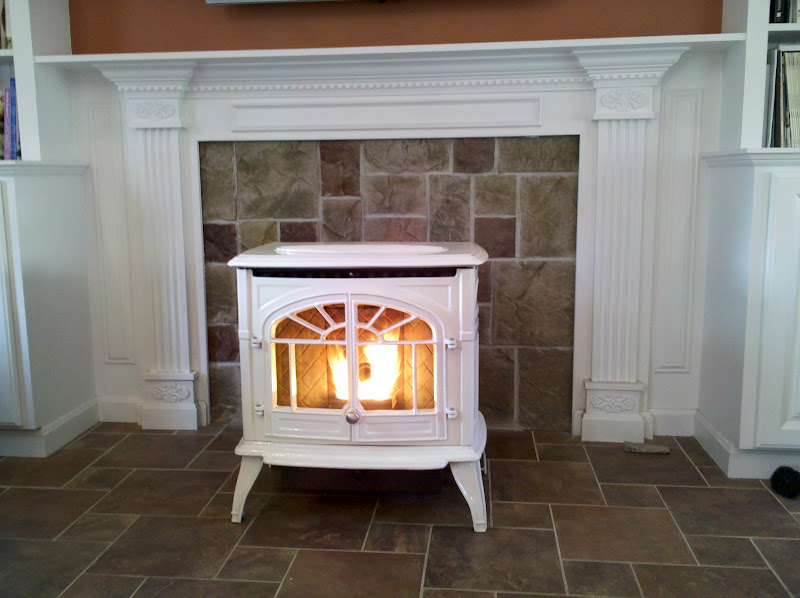
So PUmped. Here is a picture of the stove being wheeled into the house.. (M55 is a monster). Also the finished product. They put mortar around the surround.. it's still wet they said it will continue to dry lighter and lighter and will blend in very well with the existing color cement. Working like a champion. I have the decoritive logs in right now.. just while I show it off to everyone but I plan to pull them out and only use them in the summer as I've read in this forum that they can make it a pain to clean. Enjoy the pics.... I'm going to enjoy the heat (just in time for a 50 degree weekend).
 

Attachments

  • tn_P1000725.jpg
    tn_P1000725.jpg
    44.7 KB · Views: 478
  • tn_P1000726.jpg
    tn_P1000726.jpg
    45.3 KB · Views: 483
  • tn_P1000727.jpg
    tn_P1000727.jpg
    49.1 KB · Views: 489
  • tn_P1000728.jpg
    tn_P1000728.jpg
    32 KB · Views: 473
  • tn_P1000730.jpg
    tn_P1000730.jpg
    36.9 KB · Views: 451
  • tn_P1000731.jpg
    tn_P1000731.jpg
    42 KB · Views: 461
That's beautiful!!! That extra touch of the mortar around the surround is a real plus as long as it will still slide out for servicing and cleaning. I imagine it will and it will give you a good location when you put it back in. Enjoy!
 
m55 cast man That's one sweet looking installation!!!
 
Thanks All.. feels like a whole new house.. had to turn the feed rate to 2 because I was getting blasted out of my living room! Already notice some soot collecting on the glass.. but in reading this forum that was to be expected. I have it running on premium pellets right now.. looking through the manual on how to adjust to regular pellets to see if that helps the soot collection. I'm pushing the fuel type button but it isn't changing the selection.. with some nightime reading I should figure it out.

As for servicing and the impact of using mortar on the surround.. the unit slides out on a track.. so the surround will not have to be touched to mess with any cleaning or repairs.. so the mortar is safe.
 
m55 cast man said:
As for servicing and the impact of using mortar on the surround.. the unit slides out on a track.. so the surround will not have to be touched to mess with any cleaning or repairs.. so the mortar is safe.

Wow, that's great about the track! I wonder if we can retrofit our Castiles to do that! It's a real PITA for us to get the inserts out. AND back in!
 
m55 cast man said:
thanks everyone for the tips. I'll play around with your suggestions for sizing the pictures this weekend.. so I can get some before views loaded in. It is actuall a wood buring insert (as flyn noted above) - it's not a masonary fireplace. There is an 8" (I think) metal piping up through the roof now, so they will insert the new 4" piping inside the existing 8" pipe. The installers that were here today said after the remove/cut out the current insert they will be puttin in a layer of cement for the base. They are also going to install the electrical in the fireplace so there will be no exposed power cords. The guy said he has done this retro fit before so I have trust in him. Because we are having a superbowl party at our house and we don't want the living room under repair (they said it would take at least two trips to complete the install) they have pushed the install date to the tuesday after the superbowl. I'll post finished product pictures as well. Hate to lose these weeks that I could be heating with pellets.. but there are plenty of cold days ahead in the coming years so I'll be patient, as hard as it is.

When I post pictures, I upload them to Google's Picassa. If you navigate to picassa and find the picture you can go to the right and select "link to this photo" by checking the box. Select the the size you want (I use the large format), Check the box that says "image only (no link), and cut (control C) the code from the embed image box. Next, within your post select the <img> code box and paste (control P) the embed code in between the open and closed <img> tags. See below, here is a photo of an Empress I installed back in November
IMG_20100924_153830.jpg
 
Status
Not open for further replies.