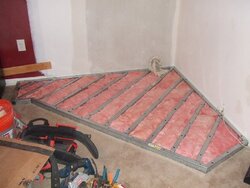
Thanks alot Gooserider for the input. I actually had the same concern with the steel studs after feeling them today. I decided to get twice as many and pair them up to make a virtual hollow 2x4. They seem so much stronger. I was going to do 12" centers, with a few even closer directly under the stove area. As far as laminating them together, can I use the normal versabond thinset mortar to do that? I have plenty of it, and it sounds like a good idea. You will have plenty of R-value for certain - you'll get R-0.26 from each layer of Durock, plus R-0.97 an inch for dead air or R-3.33 per inch for the fiberglass bats, so you will have something between R-4 and R-12 on the hearth pad - MAJOR overkill...
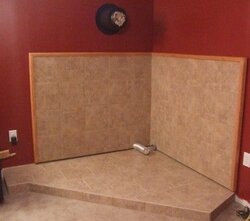
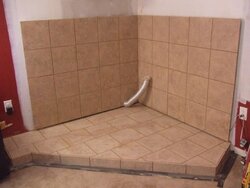
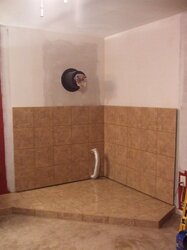
So they way it is now, I have 2x4 metal studs on the plywood floor, I will have 2 inches of uncompressed, unfaced fiberglass bat inside that area. I will then lay 2 layers of 1/2" Durock on top, each layer only secured to the layer beneath it (staggered screws). Probably going to place mortar between Durock sheets now. I will also be sure to stagger the joints on the Durock sheets. Then another layer of mortar with my 1/4" ceramic tile on top. This should, from what I can find, more than cover my needed R-value of 2. On the wall, I am still unsure if I want to go direct to the sheetrock with the Durock, then tile, or if I want to mess with a ventilated airspace. I think (and will double, triple check) that the stove will fit comfortably within limits even if I don't space it.
This is the plan. Won't be actually doing it for a while, as I am off to the Caribbean in 2 days, but I willl tackle it upon my return to the cold. Any further insight is most appreciated.

 )
)

 !
!
")