Before I jump into the install, I'd like to thank Craig, BG, the Mods, Dennis & members of this site for helping me learn about wood stoves, dry wood and the like. Thank you for making this possible. I'm gonna try to keep it to 4 parts, it may go to 5.
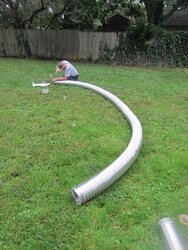
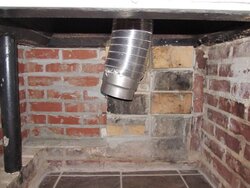
The first pice is my older brother attaching the stove connector to the liner. Magnaflex sent me a 20 ft. liner. I order 15 ft of it. We had to cut it down to 13.5 (length to top plate) and use a 1.5' flue extender (second pic).
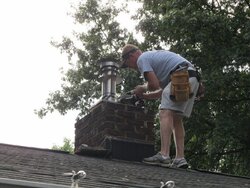
It's through (pic 3). Wasn't too hard. Me and older bro on roof feeding it through. Pops at bottom, tugging on it. We had to trim some more. Guess my damn measurements were off.
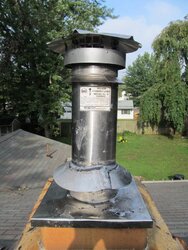
Pic 4 is older bro on roof securing liner and flue extender to top plate as well as rain cap and storm collar. We originally sealed with Rutland furnance cement (mistake) and removed next day and replaced with GE Silicone II.
Pic 5 is stack that needs to be cleaned and polished.
Pic 6, another view of stack.
Lessoned learned, a lot of sweating, elbow grease and arguing with father and brother.
The first pice is my older brother attaching the stove connector to the liner. Magnaflex sent me a 20 ft. liner. I order 15 ft of it. We had to cut it down to 13.5 (length to top plate) and use a 1.5' flue extender (second pic).
It's through (pic 3). Wasn't too hard. Me and older bro on roof feeding it through. Pops at bottom, tugging on it. We had to trim some more. Guess my damn measurements were off.
Pic 4 is older bro on roof securing liner and flue extender to top plate as well as rain cap and storm collar. We originally sealed with Rutland furnance cement (mistake) and removed next day and replaced with GE Silicone II.
Pic 5 is stack that needs to be cleaned and polished.
Pic 6, another view of stack.
Lessoned learned, a lot of sweating, elbow grease and arguing with father and brother.