Sharpening Depth Gauges

  • Active since 1995, Hearth.com is THE place on the internet for free information and advice about wood stoves, pellet stoves and other energy saving equipment.

    We strive to provide opinions, articles, discussions and history related to Hearth Products and in a more general sense, energy issues.

    We promote the EFFICIENT, RESPONSIBLE, CLEAN and SAFE use of all fuels, whether renewable or fossil.
Status
Not open for further replies.

WarmGuy

Minister of Fire
Jan 30, 2006
519
Far Northern Calif. Coast
I've now been through about 8 tanks of gas on my current chain (Craftsman 18"), and have been sharpening the blades regularly.

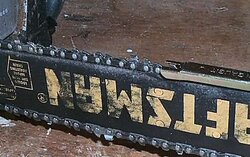
I'm now considering sharpening the depth gauges. I have the doohickey shown in the attachment. Please give me advice on how to use it for sharpening.

Thanks,
 

Attachments

  • P0001321.JPG
    P0001321.JPG
    34.7 KB · Views: 389
You need a small flat file to use the gauge. Just takes the depth gauge down to the level of the teeth to get the proper cut. I do mine every few tankfuls, rarely have to take much off at one time.
 
This is what I was just taught - FIRST sharpen the cutters. Position the guage over each tooth so the "step" falls in the gap between the raker and the cutter. Slide the file edge back and forth across the gap, if it clears and you don't feel the raker hitting the file, you're fine and don't need to do anything. If it does hit, the raker is to high and needs to be taken down, remove the guage and take a couple hits on the raker with the file, filing towards the outside of the chain. Put the guage back in place and repeat the slide test to see if you took off enough - repeat as needed, go to the next tooth when done...

Gooserider
 
Thanks for the help. I also found the article below.

http://www.motherearthnews.com/DIY/2002-10-01/Keeping-Your-Chainsaw-Sharp.aspx

FILE THE DEPTH GAUGES

This part of the job is easier than filing cutters for two reasons. First, you only need to adjust depth-gauge height every three or four sharpenings. And even then, the job takes little time. Simply set the depth-gauge guide on the chain so it straddles the top of two neighboring cutters, with the depth gauge poking out the opening in the middle of the guide (see top photo on Page 96). Next, with a small, flat file made for the job, remove any part of the depth gauge that extends above the slot in the guide. It usually takes just a few strokes of the file biting into the depth gauge before the excess is gone. Since the guide is made of very hard steel, the file doesn't remove any metal from it. When the file seems to slide over the guide easily, it's time to move on to the next depth gauge. After filing the whole chain like this, remove the guide and round-over the now-flattened top of each depth gauge with a few more strokes of the flat file. Direct your efforts along the leading edge of each gauge. You don't want to reduce their height, just ease their travel over the wood by rounding the leading edges.
 
Status
Not open for further replies.