Starting my PE Super 27 install

  • Active since 1995, Hearth.com is THE place on the internet for free information and advice about wood stoves, pellet stoves and other energy saving equipment.

    We strive to provide opinions, articles, discussions and history related to Hearth Products and in a more general sense, energy issues.

    We promote the EFFICIENT, RESPONSIBLE, CLEAN and SAFE use of all fuels, whether renewable or fossil.
Status
Not open for further replies.

mol1jb

Feeling the Heat
Jan 8, 2014
379
Central IL
image.jpeg image.jpeg Hey all,

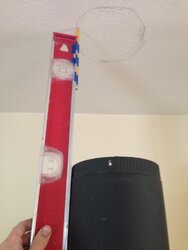
We have finalized what we want to do with the hearth and are ready to start the install. Pulled my permit earlier this week. The photos show the location in the house. The far back pic I took I am standing in the living room with the dining room on the right. The front door is left of the stove in the living room. The opening past the stove area is the hallway.

We decided to go with a permanent hearth that will be flush with the hardwood floor when it is finished. That way we could make a large hearth without creating an obstacle since the stove area experiences traffic. Also when holidays come around and we have more people in our house, we expand the dining area into the living room to seat everyone.

So after the wood floor is removed in the stove area I will put down cement board then thinset then black slate tile. The overall size of the hearth is 54" wide and 48" deep. My wife and I really like the look of a black on black stove area. The walls beside and behind will be left bare.

For venting we will go straight up to the attic and then through the roof. I will be using Selkirk Supervent from Menards. I have used it several times before and enjoyed each past install with that pipe.

I will post more pictures as progress is made.
 
  • Like
Reactions: PA Fire Bug
Keep up the good work and keep us posted on every step of the process. I really enjoy other peoples install as much as my own.

I am getting ready to start my install of an Alderlea T5 into an existing fireplace. Gonna try and document with pics the entire install to include lining the flue with SS liner.
 
image.jpeg
Whelp, now Im commited.
 
  • Like
Reactions: Sprinter
Cute helper!
 
image.jpeg
Cement board down
 
image.jpeg
Tiled the first half. The angled cuts were a bit tricky especially since it isn't easy to draw a line on a black tile. After the first 2 rows it was smooth sailing.
 
image.jpeg
Rest of the slate laid last night
 
Looking good!
 
image.jpeg
Happy day! Finished grouting yesterday and placed the stove in this morning. Starting to take shape :) Now time to start working on the chimney
. image.jpeg
 
  • Like
Reactions: firefighterjake
image.jpeg
Luckily when I bought this stove some double wall pipe was included. So to keep things moving I set the pipe I had on the stove and projected a circle onto the ceiling with a pencil taped on a level.
 

Attachments

  • image.jpeg
    image.jpeg
    65.1 KB · Views: 119
  • image.jpeg
    image.jpeg
    63.3 KB · Views: 139
Next step is getting into the attic to see how the chimney location is going to work with the ceiling and roof framing. I have some work to do before that as you can see in the pic. Last year we blew in 10" insulation so I'll need to rake a path through it about 20' into the attic.
image.jpeg
 
image.jpeg
So it was a good day today. After parting the red sea of insulation, I did my framing work (thanks for the input btw). I also talked to the inspector about it and he wanted to see it before I proceeded. He came and said it looked good and keep going. After he left I cut the hole in my ceiling and attached the ceiling supportimage.jpeg
After that I attached one piece of class A to the chimney adapter and dropped it in the ceiling support. I placed the insulation shield in place but didnt fasten it down incase the inspector wants to see the final clearances if the chimney pipe underneath it.
image.jpeg
As you can see there was a wire that had just enough play to move out of the way. Thankful for that. Next I left the attic to install double wall stove pipe from the chimney adapter to the stove.
image.jpeg
All in all very pleased how the install is going. Next on the list is cutting a hole through the roof and finishing installing chimney pipe and flashing.
 
It's looking great.
 
Got all the chimney installed earlier this week. Plumbed a mark up to the roof and cut a 13 inch hole because I like wiggle room with clearances. I then dry fit the chimney pipe and on top of the roof and put the roof flashing over it. After plumbing thr chimney pipe, I traced the corners of the flashing to mark its position when the chimney is plumb. I then removed the chimney pipe and trimmed the shingles so the flashing could slide up properly. Nailed it and caulked it in place. Put the chimney pipe back together and secured it.
IMG_2291.JPG
IMG_2294.JPG
IMG_2295.JPG

That afternoon the inspector came out and confirmed all my clearances.

A huge thanks to everyone on this site for the knowledge and info and advise for this install. It will be keeping us warm for many years to come
 
Sounds like you're ready for ignition.
 
Sounds like you're ready for ignition.

You bet! But its been so warm here in Central IL lately. 70* this past weekend.
 
Looks good!
 
Status
Not open for further replies.