Systemic dreaming...

  • Active since 1995, Hearth.com is THE place on the internet for free information and advice about wood stoves, pellet stoves and other energy saving equipment.

    We strive to provide opinions, articles, discussions and history related to Hearth Products and in a more general sense, energy issues.

    We promote the EFFICIENT, RESPONSIBLE, CLEAN and SAFE use of all fuels, whether renewable or fossil.
Status
Not open for further replies.

Gooserider

Mod Emeritus
Nov 20, 2006
6,737
Northeastern MA (near Lowell)
The mortgage on the GF's house goes away shortly, and we are thinking about trying to do a number of improvements on it, including siding, insulation upgrades, and so on. Probably bump out a couple of spaces to increase the amount of livable space as well. I have also been seriously thinking about trying to do a hydronic heating / DHW system, using infloor radiant driven by a combo of a solar water heating and a wood burner, along with about 1kgal storage.

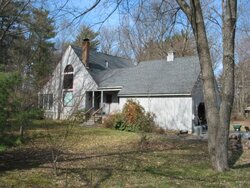
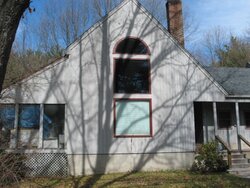
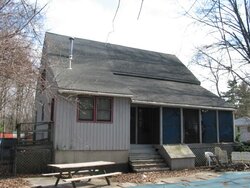
The house is a contemporary style, built circa 1980, frame construction, and (I think) 3.5" fiberglass insulation in the walls, rafter depth blown cellulose in the master bedroom ceiling (with plywood decking over the rafters for storage) and most of the other accessible ceilings. The living room has a cathedral ceiling (24' floor to peak!) with wood board panelling on the underside, and some amount (not sure how much) fiberglass between the panelling and the roof deck.

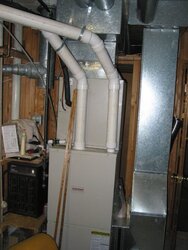
Current heating / cooling is a fairly new forced air HVAC system, blowing into the original ductwork. This works reasonably well, but not great. Hot water is tanked, with everything running on Natural Gas. In addition we have been heating the first and 2nd floors with a VC Encore wood stove - If I keep it fed, it will keep the HVAC off down to about 25* or so, and helps a lot below that, as long as we are willing to be comfortable at ~65*F I'm guessing it probably does about 30-35Kbtu/hr the way I run it. The stove doesn't do anything for the basement, which stays about 55* or so.

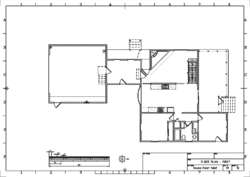
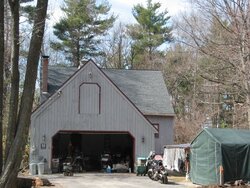
I have attached a floor plan of the 1st floor. The basement is about the same footprint, minus the laundry room, garage and porches. The 2nd floor is about 20' wide centered on the first floor except for the living room, and has the master suite.

We also have an approx 16kgal inground pool, currently not heated at all, and part of the plan would be to use the surplus solar power to heat the pool in the summer and shoulder seasons, plus the GF has expressed fantasies about hot tubs...

According to the Slant/Fin Hydronic explorer program, I have a current heat loss of 87,269 BTU/hr using an outside design temp of 0*F, indoor of 70*F and using a design hot water temp of 120*F By floors, I have
Basement 39,912
1st Floor 39,140
2nd Floor 8,740

Now for the questions...

1. If I design a system with the current heat loss figures, then improve the insulation on the house, will that cause me problems? I am assuming that it would just mean running the floor to a lower temperature, and getting longer times between burns - not a big deal...

2. We have an existing 6" double wall chimney, formerly used by the gas furnace, and DHW heater - could it be used with a wood boiler if I got rid of the water heater, or would I need to replace it with an HT103 chimney? If I did have to replace it, would the replacement have the same dimensions and clearance requirements as the current gas chimney?

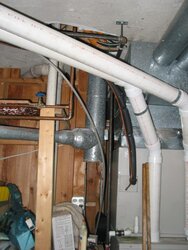
3. If I were to put a boiler where it could connect to the chimney above, I would have to work around the through the wall PVC venting for the existing HVAC furnace (which I want to leave in place as a backup, and to enable us to keep the lower gas billing rate for having gas as "primary heating") - how much can one move that venting around - i.e. right now it comes out of the furnace and almost immediately angles over to the wall, can I go up higher so it isn't pitched as steeply?

4. Most of the rooms in the house are fairly standard, and I would imagine that there would be no problem getting enough tubing into the floors to heat them, though I haven't tried to work out the math on that yet. However I'm worried about the living room - with the extreme high ceiling, it seems like a real challenge - I have calculated that it will have a 15,663 BTU/hr heat loss, for only 261 sq ft of floor area, or about 60 btu/sq ft. According to Fred Seaton's website, it isn't good to run a floor at over 85*F, which is only going to give about 30btu/sq.ft... Is this a problem? If so, how would you fix it? Or can I just not worry about heating the upper areas that much (the lower parts of the room are only about 6,000BTU/hr loss rate) It is also worth noting that I would still be having a wood stove in that room, so I could always just heat what I could with the radiant, and fire up the stove when it got really cold out.

5. Storage - The basement is full, with the only access being either down the stairs from the kitchen, or outside via a bulkhead stair, so I don't see any way to do pressurized storage inside, and I am NOT interested in outside storage for a number of reasons... However the room where the boiler would be is currently unfinished with concrete walls (I believe 8" thick). Like all of the basement, it is roughly 4' above grade and 4' below. The room is about 10 ft wide. Would it work to build a 4-5 foot high concrete block wall across the room (I am assuming with plenty of rebar to tie it into the walls and floor) and use it and the other three walls of the cellar to make a storage tank? (obviously with plenty of insulation and an EPDM liner...)

Gooserider
 

Attachments

  • floor-plan-1st.png
    floor-plan-1st.png
    13.9 KB · Views: 1,171
How would you access the floors to install the piping?

Perhaps Radiators would solve the problem, or a combination of UFH and Radiators? I would have to run at 60btu/sq ft for the whole of my property, and access would be difficult to say the least.
 
I would rework the heat loss numbers to your finished design specs. If you start at 87,269 BTU/hr loss then add insulation - your loss will go down. Also, keep in mind that at 0°F your stytem will run 24 hrs/day with a designed heat loss of 87kbtu/hr.
 
Durango said:
How would you access the floors to install the piping?

Perhaps Radiators would solve the problem, or a combination of UFH and Radiators? I would have to run at 60btu/sq ft for the whole of my property, and access would be difficult to say the least.

The basement is not a problem - I would presumably need to put down a layer of insulation foam, tubing and a secondary slab, but that's doable. What I would have to decide is whether or not to strip out the existing finished walls, and how to get up the indoor/outdoor carpet that's on most of the floor - not a big deal at this point.

More of a question is if I do take out the walls, what to do to insulate them back again - seems most of the stuff I've seen talks about basement walls that are below grade, or slabs on grade, but not much about houses like ours that are half above and half below grade. (BTW, the water table is at or just above the existing basement slab level part of the year - we have to run the sump pump pretty steadily in the spring, but as long as the pump runs, it stays dry...)

First floor is also not a huge problem - the ceiling in the basement is finished w/ sheetrock, but that wouldn't be a big problem to remove in order to do staple up radiant.

Second floor would be a bigger problem - it would take major demo to do underfloor, so presumably I'd have to do the above floor wooden spacer method - again, doable...

I don't think traditional radiators would fit the house style, and baseboards seem to me like a problem with needing hotter water than I think makes for an efficient system.

Gooserider
 
OverShot said:
I would rework the heat loss numbers to your finished design specs. If you start at 87,269 BTU/hr loss then add insulation - your loss will go down. Also, keep in mind that at 0°F your stytem will run 24 hrs/day with a designed heat loss of 87kbtu/hr.

Problem is, I don't really have a good handle yet on the finished design specs... There are a lot of different options on what to do for added insulation, and I'm not sure where the best cost effectiveness point is.

Gooserider
 
Guzzi,
You're talking about spending some large dollars and many hours of your and GF's time and effort ( Caution! The only thing as hard on a relationship as building or remodeling a house is living on a small boat). Have you thought about consulting with a radiant/solar design professional? I have no idea what they charge in Mass. these days but it would be really nice to feel confident you were working toward a system that was pretty close to the best for your situation. They know the codes, too.
I hired one to design my radiant floors and controls and distribution system for it a couple years ago and he saved me more money than his fee compared to what I thought I would need. He was very willing to work with a DIYer and accomodate some of my eccentric plans. He can't be the only one out there.
It was a real challenge to my pride to sub that out as I am trying to do everything myself ( I even logged out and sawed my own lumber for this 3000ft. project) without a bank involved.

Just a thought. Might see you in Bangor.
 
Boy, there is a lot here to talk about.
If you are considering re-siding, consider removing the old siding and installing a layer of 2"(or even more!) polyisocyanurate on the exterior before re-siding.
Vinyl or Hardiplank over that would keep maintenance to a minimum. This would be the time to replace windowsand doors, if you were considering it. They would then be installed in the proper position with the new foam. I would strap the foam to make it easier to hang the siding. Interior trim details are not as difficult as some might think when doing this.

Unless you were using the basement for living space, I would not add a new slab over the old one. I would suggest using spray foam to insulate the walls , especially the area that is above grade, to a couple feet below grade, since this is where all the major basement heat loss is. Then you can finish the basement if you want to and if you want heat, install some radiant panels.
Basements do not need to be heated, especially if they are insulated with foam and are mostly below grade.

I would, of course, lobby for a nice pre-made square tank that might fit into a basement corner ;^)

Some pictures might help do this online. I echo the suggestion about using a local energy auditor/designer to help guide you on site.

Tom
 
Well, since you want pictures...

The first shot is as you are coming down the street towards the house

Those three big windows stacked up are the living room - the bottom windows are 6' square.

On the left is the back screen porch that overlooks the swimming pool - I suspect it doesn't have much in the way of footers under it, I'd like to fix that and 3/4 season the space.

Sort of in the center there are some stairs going up to a narrow porch - that is a combination laundry room and hall going from the house to the garage - I'd like to move the steps over about 4 feet, and bump the laundry room wall out to the edge of the roof, and make the entry into the front door a bit more of an airlock.

The second shot is a closer view - you can just barely see where the front door is to the left of the stairs.

As you can see from both shots, I have a LOT of 12/12 pitch roof - feels to me like it is just crying out to have solar panels put on it... I don't see the payback on solar electric making sense yet, but solar hot water???

Gooserider
 

Attachments

  • street-view-1.JPG
    street-view-1.JPG
    80.2 KB · Views: 962
  • west-side-1.JPG
    west-side-1.JPG
    61.8 KB · Views: 981
Next we come down the driveway - two car garage, mostly full of stuff...

The galvie garbage cans under the electric meter are my ash dump in the winter. On the other side is the regular trash.

I have a portable garage to the right, and between it and the house you can see one corner of my big woodshed.

The hatch above the garage door gives access to one of the FIVE attic spaces in the house, namely the one over the garage and laundry rooms.

The garage door is in sad shape. I'd love to make the attic space useable, but not sure that is practical since the joists are only 2x6's so it would need a LOT of reinforcing.

Moving around to the back of the garage (on the opposite side of the laundry room) we have what used to be a porch, until it got "avalanched" by snow off the roof and collapsed... I dismantled it earlier this spring, and much of the porch is now making up raised beds in my garden patch - nothing like recycling... :coolsmile:

What I want to do is put an addition space in where the porch was, extending the basement so that I can put a "wood elevator" in so as to ease the present challenge of getting wood up to the first floor for the living room stove, and down to the basement to feed whatever I end up with for a boiler (and the basement stove)

Gooserider
 

Attachments

  • Driveway-view.JPG
    Driveway-view.JPG
    88.1 KB · Views: 972
  • old-porch-1.JPG
    old-porch-1.JPG
    48.4 KB · Views: 990
This is a view of the same area from a bit further back - in the foreground you can see some of the other leftover porch material. I was thinking of doing the basement addition / extension to the far side of that bulkhead. the first floor would extend the kitchen, and probably give us more of a south facing window than that bay window you see sticking out does (That bay window is a MAJOR problem area - desperately needs to be replaced by SOMETHING...)

The second shot shows most of the east side of the house... The GF's office is on the corner closest to the camera, my office is on the other corner where the door is (that door is a total waste as far as I'm concerned)

The window above the doghouse is the bathroom, the dog run itself is legacy from the previous owners, and hasn't been used since...

If you look just to the right of the dog run, you can see the intake and exhaust vents for the furnace and the outside central AC unit.
 

Attachments

  • old-porch-3.JPG
    old-porch-3.JPG
    72 KB · Views: 953
  • east-end-1.JPG
    east-end-1.JPG
    66.5 KB · Views: 969
Going around to the north side of the house, we find the pool area - you can see the edge of the pool cover in the foreground.

The box next to the stairs holds the pool plumbing

And yes, that porchlet on the left (the unused door to my office) IS falling apart.... (Unless code doesn't allow it, I'd like to get rid of that door and porch both...)

That's it for most of the outside...

The second shot goes down to the basement, and into the utility room. This is the existing HVAC system - return air on the right coming down, going back up through the furnace (with PVC intake and exhaust plumbing) and AC condensor.

Hanging down on the left is the old chimney, formerly used by the old furnace, now used only by the DHW heater. The brown box under it is a dehumidifier, which I've automated by running it's drain into the condensate pump for the furnace...

A second shot with more closeup of the old chimney,

And finally a shot of the water heater...

My thought is that if I were to get rid of the water heater (put it on the other side of the room or something) the boiler could go between the existing furnace and the wall. Only possible other obstruction is there are some drain pipes in that area, which I think would be a problem to move.

Thoughts? Other things you'd like photos of?
 

Attachments

  • north-side-1.JPG
    north-side-1.JPG
    68.5 KB · Views: 961
  • furnace-1.JPG
    furnace-1.JPG
    50.8 KB · Views: 987
  • furnace-2.JPG
    furnace-2.JPG
    54.2 KB · Views: 949
The pictures help. Thanks.
I agree with the idea of solar thermal over PV's they are much more cost effective. The combination of a gasifier with a solar system is a great fit.--If the budget allows!
A nice aspect of this concept is that the pool can act as a heat dump for excess solar in the spring and summer, if necessary.

One issue with the concept of adding a layer of foam over the exterior, is the idea that there is no overhang on the gable ends.
The roof would need to be extended, which would be a good time to add on metal roofing, if that was on the radar screen.
You can frame out over the extra wall thickness on the gables and shingle it in. We have done this, it is not a nightmare, but the shingles might not match up.

Since at least some of the windows need replacing anyway, the idea of bumping up the thermal envelope with foam is a simpler one, especially since you have T111 siding. This would also allow changes in window design if desired.

The area on posts can be insulated underneath with fiberglass in between the floor joists and then should be enclosed with 2" foam also on the bottom of the floor joists.
 
Tom in Maine said:
The pictures help. Thanks.
Glad to hear it... The house is pretty, but it is a nightmare to work on in many ways, far worse than a standard two story colonial or something like that... It also has a lot less square footage than it's footprint and height would suggest.

I agree with the idea of solar thermal over PV's they are much more cost effective. The combination of a gasifier with a solar system is a great fit.--If the budget allows!
A nice aspect of this concept is that the pool can act as a heat dump for excess solar in the spring and summer, if necessary.
True - indeed, that is one of the reasons I'm thinking solar hot water - I was going to heat the pool deliberately, not just use it for a heat dump :coolsmile: Right now it isn't heated at all, and so for most of the year I call it "refreshing" while the GF calls it something four lettered..... %-P The idea of warming the pool is one of the things I think will help sell the idea of solar.

One issue with the concept of adding a layer of foam over the exterior, is the idea that there is no overhang on the gable ends.
The roof would need to be extended, which would be a good time to add on metal roofing, if that was on the radar screen.
You can frame out over the extra wall thickness on the gables and shingle it in. We have done this, it is not a nightmare, but the shingles might not match up.
I hadn't been planning on re-roofing, as we had put on a second layer of shingles about 10-12 years ago, using 25 year rated shingles. However at least some of the people that I've talked to about solar are saying that I would need to do a peel and re-roof as the load on the deck w/ two layers of shingles plus panels would be excessive. I'm somewhat nervous about the idea of doing a metal roof though as it is scary enough trying to deal with that 12/12 slope with shingles. I'd hate to have to go up there to service panels with an even slicker metal roof (not to mention the "avalanche" concerns which again, are already pretty bad with the existing shingles)

Since at least some of the windows need replacing anyway, the idea of bumping up the thermal envelope with foam is a simpler one, especially since you have T111 siding. This would also allow changes in window design if desired.
I only WISH that siding was T-111, the house would be in a lot better shape if it were. It is actually a vertical "shiplap" siding, with boards that are dadoed on opposite sides, and overlapped. Not a bad idea if used horizontally, but the original builders that decided to use it vertically should have had their heads examined... Essentially we have a house tall vertical crack in the wall every 6" - can you say water entry points?

We have already had to make extensive repairs a few years back because of water getting behind the siding, and I hate to think about what we may find when we start stripping off the old siding - but the woodpeckers like our house - especially early in the AM :mad:

We will be replacing with some sort of vinyl - I don't like the looks (or the price) of Hardi-plank or some of the other wood substitutes, and am not about to put up more wood... What I am not so sure about is whether we should go with the wooden shake look stuff with foam under it, or the "Polarwall" style with foam built into the siding (with or without extra foam under it...)

The area on posts can be insulated underneath with fiberglass in between the floor joists and then should be enclosed with 2" foam also on the bottom of the floor joists.
Agreed, and essentially what we were planning to do with it. The big issue that I see though is that I'm pretty sure that the posts holding that porch up don't have the proper "below the frost-line" footings. I know there are some supports way under the porch that don't, and I've had to jack things up a time or two in order to get the porch door to close properly. The notion of trying to dig a big enough hole while crawled under there doesn't exactly thrill me, but I'd want it done right before I started trying to enclose the space and put windows and so forth in it.

Getting back to the boiler, any thoughts on how best to deal with that chimney? If you look back at the photos, you can see where it sticks up on the north side roof above my office (there is also a stink pipe almost in line with it a little lower on the roof) If you go way back to the floor plan, you can see where it comes through between the closet in my office and the bathroom. It does a similar passage through the closet in the master suite upstairs, then puts in a brief (about 6" worth) appearance in the uppermost attic, before going through the roof.

Would I need to replace it with an SS woodstove type chimney? And does that chimney have the same sort of outside dimensions and clearance to combustibles requirements? (it would be a real pain if the requirements were greater, as my network cabling goes up through the same chase, and BARELY has enough clearance to be "legal")

Gooserider
 
I get the impression that there is some minor movement on the posts. I assume they are sonotubes, which most people use. Sonotubes are usually not installed very well and then tend to move around. You might be able to insulate around the perimeter of the post with 2" Styrofoam, with the post coming up in the middle.
This might help keep the area around the post from freezing and lifting the post.
IF there is a large area of post above grade, this tends to suck more heat out of the ground, since it acts as a very effective radiator. This gets to be more of a problem.

I am not sure about the chimney. Are you running out of flues? If you need an extra flue, because you are keeping a woodstove, then an insulated metal chimney can be added. They still usually require 2" clearance to combustibles. As to sizing, that is a function of the boiler. Would not look as nice as that brick chimney.

No problem with vinyl. Hardiplank is a nice product, but it does take longer to install and will cost more. It's an option. Vinyl will shed water!
 
Looking at the pictures again, if the porch is closed in with a skirting wall, you can insulate the floor, lay plastic down on the ground under the porch and then close it in again, with some insulation around the posts (on the ground). And also insulate the outside perimeter wall, to help cut any losses from the sonotubes, which I have to guess are a bit above grade.
I would extend some insulation on the ground outside the perimeter wall, about 6-12" below grade, and cover it with soil. This should extend out about 4' and will help keep frost from getting under the posts.
 
Tom in Maine said:
I get the impression that there is some minor movement on the posts. I assume they are sonotubes, which most people use. Sonotubes are usually not installed very well and then tend to move around. You might be able to insulate around the perimeter of the post with 2" Styrofoam, with the post coming up in the middle.
This might help keep the area around the post from freezing and lifting the post.
IF there is a large area of post above grade, this tends to suck more heat out of the ground, since it acts as a very effective radiator. This gets to be more of a problem.

There are two sets of posts, more or less, the ones under the porch, and the ones around the outside edge. All are wooden, roughly 4x4's. The posts under the porch have no footings that I can find, the one on the corner near the door into the porch which seems to sag the most, I've shoved a patio block under, and then added some additional shims once or twice. The posts around the outside edge appear to be sitting on the concrete pool deck, which is more substantial, but I'm not sure just how thick it is, or how much of a footing there might be under it... (If I was to put in footings, I'd probably be using sonotubes...)

I am not sure about the chimney. Are you running out of flues? If you need an extra flue, because you are keeping a woodstove, then an insulated metal chimney can be added. They still usually require 2" clearance to combustibles. As to sizing, that is a function of the boiler. Would not look as nice as that brick chimney.

I'm not exactly running out of flues, but it's a question of alternatives... There are two flues in the brick chimney, one for the stove in the upstairs living room, and one in the finished basement main room - which everyone seems to say is not someplace I'd want to put a boiler. There are very few places where one could stick in a new flue without going through the middle of either the first or second floor living space, and I'm opposed to going up the outside wall both for aesthetic reasons, and because of the general evil nature of outside chimneys...

However there is that existing insulated gas chimney in the utility room which is basically unused. The only thing connecting to it at present is the gas hot water heater, which is nearing end-of-life based on it's install date, and which wouldn't be needed if going with a solar / boiler system. It's a 6" ID unit, with an existing chase, etc. Obviously it would be ideal if I could use the existing chimney, but it wouldn't be terribly difficult to replace it with a different unit if necessary, as long as I had about the same outside dimensions and clearance requirements. Looking at specs, at least some of the possible boiler candidates have 6" flue outlets, so it seems possible to use that flue if it can be made to work with the rest of the room's layout.

No problem with vinyl. Hardiplank is a nice product, but it does take longer to install and will cost more. It's an option. Vinyl will shed water!

That's my feeling as well - and IMHO the better grade vinyls look really nice as well.

Gooserider
 
Since these posts are not in the ground, you can fix them without having to crawl too much like a reptile underneath the porch.
The routine is to use the patio block, which is usually one square foot. Place one of the premade footers that they sell at Home Depot that
accept a 4x4 post on top of the paver. Place a 2' square of styrofoam under the paver, to help keep frost out from underneath it.

I would dig out a little bit, about 6" and get this whole affair on un-disturbed soil. Then cover the foam with some soil.

Should be fine. We do this a lot in Maine. People have built vacation houses on it. Of course, it will not stand up to a hurricane if a house is on it, but this
is great for a porch like yours.
 
That would be great if it's acceptable... I thought code these days required proper below the frostline footers - I know we had a guy up the street put a big deck on his house and he was doing the sonotube footing routine, so I'd thought it was required... Will have to check.

Gooserider
 
ARGGHH!!! I seem to have confirmed my fears that I've expressed earlier - I had gotten the impression that Mass. required an ASME kickback payement (err.. Stamp) on boilers, but I hadn't actually confirmed that...

However, I did just look at the code, and have found the following - (with non-relevant sections trimmed and bold added)

780 CMR: STATE BOARD OF BUILDING REGULATIONS AND STANDARDS THE MASSACHUSETTS STATE BUILDING CODE
780 CMR 6007 SOLID FUEL-BURNING APPLIANCES
6007.3.11. Every boiler, pressure vessel or pressure relief device must be stamped in accordance with the requirements of the ASME Boiler and Pressure Vessel Code. ASME stamping shall also be required for boilers, pressure vessels and pressure relief devices produced outside the United State of America. Where required by the ASME Boiler and Pressure Vessel Code, ASME stamping may be affixed directly to the appliance in lieu of on the data plate.

Correct me if I'm wrong, but that looks like most of the possible boilers are out of consideration based on the above?

Gooserider
 
Gooserider said:
ARGGHH!!! I seem to have confirmed my fears that I've expressed earlier - I had gotten the impression that Mass. required an ASME kickback payement (err.. Stamp) on boilers, but I hadn't actually confirmed that...

However, I did just look at the code, and have found the following - (with non-relevant sections trimmed and bold added)

780 CMR: STATE BOARD OF BUILDING REGULATIONS AND STANDARDS THE MASSACHUSETTS STATE BUILDING CODE
780 CMR 6007 SOLID FUEL-BURNING APPLIANCES
6007.3.11. Every boiler, pressure vessel or pressure relief device must be stamped in accordance with the requirements of the ASME Boiler and Pressure Vessel Code. ASME stamping shall also be required for boilers, pressure vessels and pressure relief devices produced outside the United State of America. Where required by the ASME Boiler and Pressure Vessel Code, ASME stamping may be affixed directly to the appliance in lieu of on the data plate.

Correct me if I'm wrong, but that looks like most of the possible boilers are out of consideration based on the above?

Gooserider

Most of the used propane tanks here in Michigan have the tags removed by the propane companies when they are put out of service so they cannot be used for propane. That would probably rule out those also if they were to check the tanks themselves.
 
I guess ASME stamps are required in Maine also. I spoke with someone in the Oil and Solid Fuel board a while ago.
Am not sure how much they enforce it. If you were selling them, it is an issue.
Becomes gray when you sell the house with a boiler and/or propane tank minus labels.
 
Well I have limited access in the basement, essentially just a precast bulkhead stair unit, or the inside staircase. This pretty much rules out any kind of pressurized storage for me as, quite aside from any labeling issues, there is no way I could get large tanks into my basement. As I mentioned earlier, I'm thinking in terms of building a block wall (w/ lots of rebar) across one end of the utility room to use it and the existing three poured concrete basement walls as the sides of an EPDM lined tank. The room is about 13' wide, so if I was to build the wall about 4-5' high, and about 4' out from the existing wall, I should end up with about 1,000 gallons or a bit more after allowing for lots of insulation, plumbing, etc.

Another question that comes to mind is zoning and loop coverage if doing infloor radiant. I see different answers from different people as to the maximum length of a radiant loop - Fred Seton and his Radiant Design site seems to say use 500' of 1/2" and a slightly larger pump, most everyone else seems to say 300'... Opinions on that?

As a ballpark, about how big an area of floor does that translate to?

What about zoning? From what I've been reading, it seems like it costs about $150-200 extra per zone for valves and plumbing, over what it would cost for just having a single manifold w/ lots of loops - is this about right?

I am thinking the zoning for our house should be something like the following...

1. 2nd floor - master bedroom and bath

2. 1st floor - living room (note extreme high ceiling, big windows, etc. Presumably much higher heat loss than rest of floor.

3. 1st floor - kitchen/dining, GF's office, and main bath, (and possibly addition & laundry room)

4. 1st floor - 3 / 4 season porch? (might not happen right away...)

5. 1st floor - My office (which would be directly above boiler / storage tank.... might want a LOT less heat...)

6. Garage - unit heater, intermittent use, probably a seperate glycol loop

7. Basement - main room, 1/2 bath, storage room (no radiant in boiler room itself!)

8. DHW

9. Swimming pool.

Does that seem about right? Or should I break up or consolidate some of them?

Gooserider
 
Just as an update on the ASME thing.

When I was up in Maine at the Boiler (and other cool stuff) Show, I met Piker from Econoburn, and he told me about the upcoming meeting of the Mass. Board of Boiler Rules, aka the "Boiler Committee" which is the body in MA that appears to have the most authority over making the rules about boilers and such - though it is a very confusing situation at present, there are seeming conflicts in the codes that make it difficult at best to figure out just what the rules are, and who is in charge of them.

I went to the meeting, which was relatively interesting as such things go - I would say that this was probably the biggest area of discussion at the meeting, with more time spend on the topic than just about everything else combined.

There were two people from BioHeat there, Chris Hoskin and Scott Nichols, along with another fellow that was wanting to get into the boiler making business, and felt the ASME requirement was running him out of the state, a couple of dealers, along with myself as a potential consumer... We all testified and pointed out the ways in which the current situation hurt our respective interests.

My testimony focused on the fact that there are about nine companies making gasification boilers that I'm aware of - and held up the thick stack of literature I'd picked up in ME. But because of the ASME requirement, there are only TWO (hold up much thinner stack) that I could deal with - and that it would cost me about $15-1700 extra to get an ASME version Econoburn, or $500 extra for a Wood Gun (Normally 2K, but they are having a sale)

Of the seven companies that didn't offer an ASME option, at least six were certified to meet the European EN 303-5 standard, plus others in many cases. (I couldn't find anything about certs on the ATTACK DP boilers)

BioHeat went into much greater detail about the three brands that they carry, as they have been dealing with the Boiler Committee folks for longer - as a part of the information requested at the previous meeting, they had gotten a report done that compared the requirements of the ASME code to those of EN 303-5. It is an impressive item, I've gotten a copy, and been told that it's OK to post it here, but need to find a way to so so - it is a PDF and I get an error message when trying to post it. I have managed to post it HERE on the Hearth Wiki (but for some reason it doesn't seem to be showing up in the Wiki TOC or search...)

It is worth reading if you have ever wondered about what kinds of testing a boiler gets...

Seems to me like the Boiler Committee is "stonewalling" on the issue a bit, but hopefully one of these days consumers in MA will have the freedom to choose the boiler they want, not just the ones the state feels like allowing...

Gooserider
 
Another update on the boiler problem in MA...

I got a note from the Board of Boilers secretary with a link to the minutes of the meeting. I sent the following in response...

Thank you for the link to the minutes. I would appreciate it if you could
keep me informed about any further meetings or discussions of the Board
concerning the issue of accepting wood gasification boilers that have been
certified in accordance with the E.U.'s EN-303-5 standard as an alternative
to ASME.

I would repeat my comments at the Board of Boiler meeting that as a homeowner
in MA, I am finding no benefit from the ASME requirement, as it does nothing
more than restrict my choices and increase my costs, without providing a
meaningful benefit.

Upon further review of the differences between ASME and non-ASME boilers, it
is even possible that an ASME stamped boiler would be of a LOWER quality than
a non-stamped boiler due to ASME construction requirements causing material /
design / build details to be changed in ways that lower the expected lifespan
of the boiler. I specifically refer to the ASME requirements that the boiler
stays be visible and exposed on the firebox interior, where they are exposed
to the corrosive effects of wood combustion byproducts.

In the Wood-Gun line of stainless steel boilers, they state that their normal
build process is to use steel stays, which they weld over with stainless weld
to protect them. Since ASME does not allow this, they use stainless stays
with the ends exposed. BioHeat, in their document comparing EN-303-5 to ASME
points out that one of the differences on at least some of the boilers which
they sell, is that the boiler is made with stays that do not penetrate the
firebox interior, again to protect the ends of the stays from the corrosive
effects of wood gas combustion.

I would find if very ironic to be forced to pay a large sum of money extra in
order to end up with a boiler that was technically inferior to, and not
provably safer than, the boilers available to consumers in the vast majority
of other states that do not retain this ASME stamp requirement.

ART
Moderator, Hearth.com

On Friday 05 June 2009 14:08:52 you wrote:
> Good day -
>
>
>
> Please follow the provided link to find the Board of Boiler meeting
> minutes for May 7, 2009.
>
>
>
> http://www.mass.gov/Eeops/docs/dps/inf/inf_eng_boiler_rules_minutes.pdf
>
>
>
> If you have any questions please don't hesitate to contact me.
>
>
>
> Thank you.
>
>
>
>
>
> Celeste Lam
> Assistant to Chief of Inspections - Mechanics
> Department of Public Safety
> Commonwealth of Massachusetts
> 1 Ashburton Place, Room 1301
> Boston MA 02108
> 617-727-3200 x 25224
 
Status
Not open for further replies.