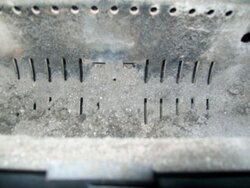
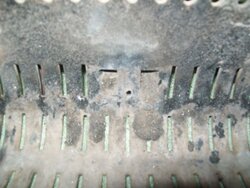
Got ambitous after dinner. Cleaned the stove. First picture is burn pot still in stove with agitator removed. You can see the mod. hole right in the middle still clean. The second is after I removed it, maybe a little clearer. Had a fair amount of buildup on the front side of the pot where there are no holes.
Simple fix, great results.
Simple fix, great results.