Tennman
Minister of Fire
Wow. Try to avoid cheap Chinese black iron fittings. About half of the cheap fittings I bought I ultimately had to replace because they were so porous I couldn't get them to seal. You're really blazing along.
Wow. Try to avoid cheap Chinese black iron fittings. About half of the cheap fittings I bought I ultimately had to replace because they were so porous I couldn't get them to seal. You're really blazing along.

I was stuck with chinese - it's all my supplier had. I picked one 1-1/4 street up at another place (not a plumbing place), that was also chinese - but it definitely looked of poorer quality than the other stuff I was getting, so I didn't even use it. So I think there are varying qualities of chinese fittings.
Use teflon tape AND pipe dope together, and use big wrenches & come right onto them. My ace in the hole turned out to be a bottle of boiler stop leak - if you get a big mess of fittings together & find a couple of small drips, it might be worthwhile to try the stop leak rather than take a whole bunch of stuff back apart to try to get re-sealed.
You may have to go to a plumbing supply house to get the naked fin tube. You can buy baseboard and then just try to sell the covers on craigslist to someone who has damaged theirs.....
Interesting! Back in the mid sixties I installed a heating system in an A-frame I had at Okemo mountain and I couldn't get baseboard all assembled. I had to purchase the fin tube and the housings separately. I have several feet of fin tube laying around. Where you at?
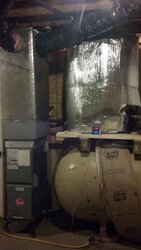
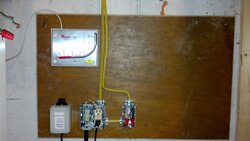
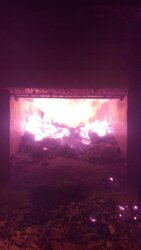
It will take a few small fires to dry your ceramics out anyway - so maybe by the time you get those dried out, you'll have the rest of the system ready for a full burn. Don't forget the pics! (Especially of the draft fan setup...). Dean likely also mentioned, you can tune the draft by changing up your turbs. I cut all 3 of mine in half with a chop saw. I've got 3 halves in the 3 longer tubes, and usually one half in the centre upper tube. With the (somewhat) milder weather the past couple of days, I pulled the top one out so right now I'm just running the three half turbs in the long tubes.
Last time I bought Slant Fin, I think I had a choice between buying it already assembled, or in separate pieces. That was a few years ago now.