-
Active since 1995, Hearth.com is THE place on the internet for free information and advice about wood stoves, pellet stoves and other energy saving equipment.
We strive to provide opinions, articles, discussions and history related to Hearth Products and in a more general sense, energy issues.
We promote the EFFICIENT, RESPONSIBLE, CLEAN and SAFE use of all fuels, whether renewable or fossil.
You are using an out of date browser. It may not display this or other websites correctly.
You should upgrade or use an alternative browser.
You should upgrade or use an alternative browser.
- Status
- Not open for further replies.
M
MasterMech
Guest
I was playing with my 2nd jug (off the donor saw) tonight and unfortunately, it's a goner. I left the photo super hi-res so you can see the pitting left-over after the acid clean-up. Bummer.
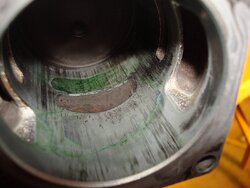
If you guys haven't figured it out by now, I'm no longer building one MS460 Magnum. Gonna be two saws coming out of this fiasco. One will be super nice/clean, and all OEM, the second will most likely be built using an aftermarket top-end.
Right now all I've got is a pretty good size pile-o-parts and some packages that start arriving tomorrow. Might have one running by this weekend but still would like to locate some prettier plastics for the nicer saw.
Freakingstang
Feeling the Heat
I wouldn't weld the magnesium... too many guys have tried and ruined their cases. JB would be your best bet...
I have a bunch of 046 parts if you need anything specific...I know I have a couple good topends. I do not like aftermarket topends on the bigger pro saws, they just don't last.
I have a bunch of 046 parts if you need anything specific...I know I have a couple good topends. I do not like aftermarket topends on the bigger pro saws, they just don't last.
M
MasterMech
Guest
I might be interested in one of those top-ends. Aftermarket top-ends are hit and miss, you get what you pay for....I wouldn't weld the magnesium... too many guys have tried and ruined their cases. JB would be your best bet...
I have a bunch of 046 parts if you need anything specific...I know I have a couple good topends. I do not like aftermarket topends on the bigger pro saws, they just don't last.
Parts have finished arriving, I am itching to assemble it. Just need about 4 more hours in a day, that's all.
M
MasterMech
Guest
Ok gang!
Back at it with this monster again!
The packages have been flowing, delivery drivers tipped, and serious work has begun again.
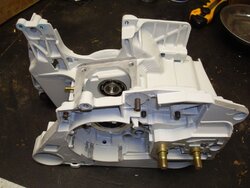
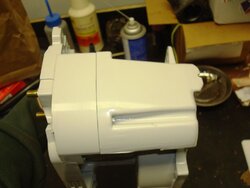
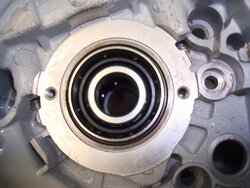
Hey, that crankcase sure is shiny, betcha it's new! I found one for a decent deal, came with new bearings, bar studs and heat shield foil as well. Unfortunately, the clutch side seal was not installed in the bearing yet so since I have already installed the one I had in the other bearing, I ordered a new one.
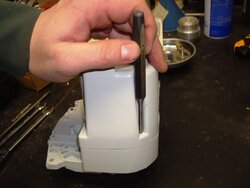
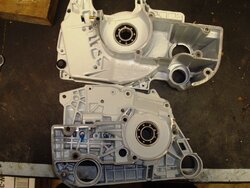
Hmm, wait a second, with no crankshaft installed, I'm going to have to drive the dowel pins out to get this thing apart.
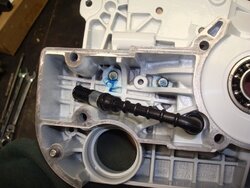
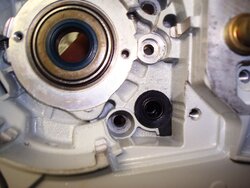
I just think it's waaay easier to install the oil pickup and line ahead of time while the halves are split.
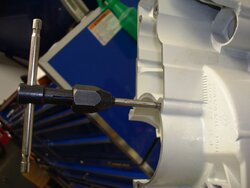
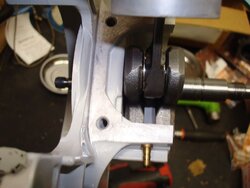
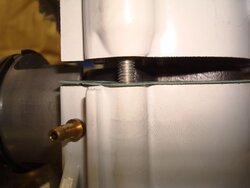
Had to tap the holes for the crankcase screws. They were not threaded 100% through and they need to be so my flywheel side puller/press will bolt up.
No problem getting that half together, last pic shows the gasket in place and a couple screws were installed loose just to hold it in place while I set the clutch side case on.
Back at it with this monster again!
The packages have been flowing, delivery drivers tipped, and serious work has begun again.


Hey, that crankcase sure is shiny, betcha it's new! I found one for a decent deal, came with new bearings, bar studs and heat shield foil as well. Unfortunately, the clutch side seal was not installed in the bearing yet so since I have already installed the one I had in the other bearing, I ordered a new one.


Hmm, wait a second, with no crankshaft installed, I'm going to have to drive the dowel pins out to get this thing apart.


I just think it's waaay easier to install the oil pickup and line ahead of time while the halves are split.


Had to tap the holes for the crankcase screws. They were not threaded 100% through and they need to be so my flywheel side puller/press will bolt up.
No problem getting that half together, last pic shows the gasket in place and a couple screws were installed loose just to hold it in place while I set the clutch side case on.
M
MasterMech
Guest
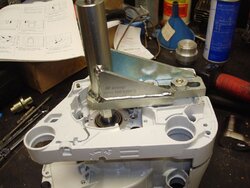
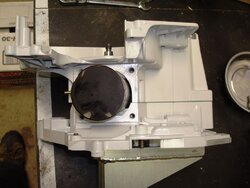
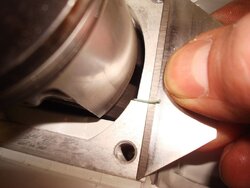
Got the clutch side case on there and now we have a 100% bottom end! Trimmed up the gasket with a razor blade.
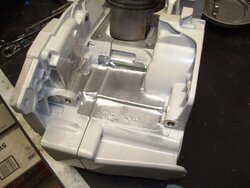
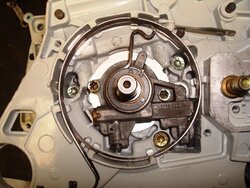
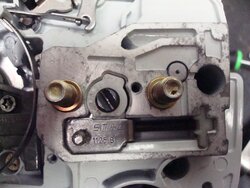
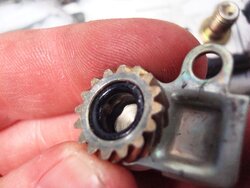
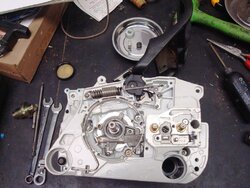
Got the heat foil laid down and the chain brake band in. Chain tensioner is in, always make sure that o-ring is in the back of the spur gear. When you put this thing together, the spur gear will try to jump back off the post since once assembled, it forms an air cylinder.
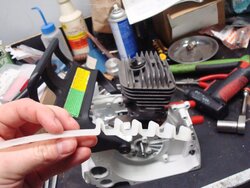
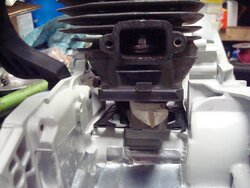
The cylinder is now on, I gave the piston a light coat of oil and used Stihl's piston ring band to hold the rings in place while I squished the cylinder on. Yup, those are my side-cuts subbing for a wooden assembly block. Worked pretty well!
M
MasterMech
Guest
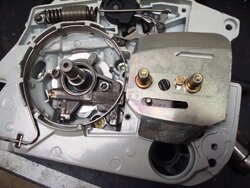
One shot with almost everything other than the clutch assembled, leaving that off until after I pressure test the engine.
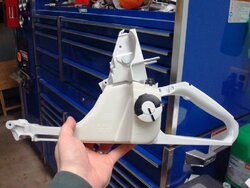
Oh man! More new stuff? $90 for a brandy new back handle/fuel tank assembly. Included a new, green, ethanol proof fuel line as a bonus. This is going to make a huge difference in how the saw looks overall later.
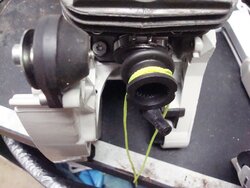
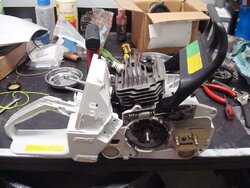
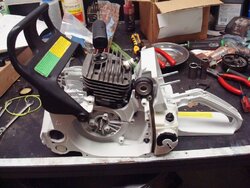
As you can see, the cylinder is bolted down now, the AV buffers installed, and the handle screwed in. This thing is starting to look like a saw now!
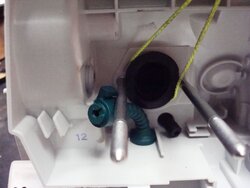
First two pics up there show how I pull the intake boot through the handle housing without poking at it with a screwdriver or some other method equally likely to damage it.
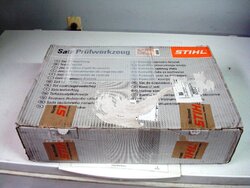
Up Next, pressure/vac testing the engine to ensure the seals, intake boot, impulse line, and decomp valve are all air tight.
M
MasterMech
Guest
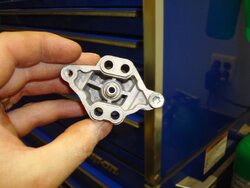
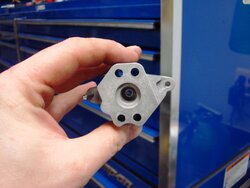
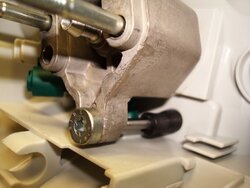
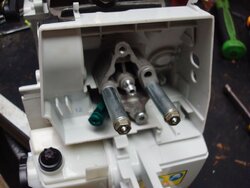
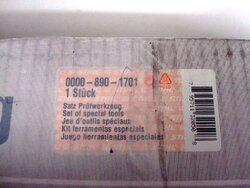
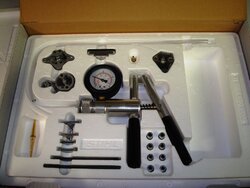
There are many shade tree ways to rig this up, basically you just want to seal off the intake, attach a pressure/vac pump, and block the exhaust. Make sure there is a spark plug in the cylinder and the decomp valve is closed. I use the Stihl tools because I have them. The intake blocks alone are real nice as they usually plug the impulse line and slide right on the factory studs.
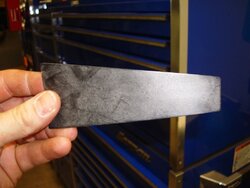
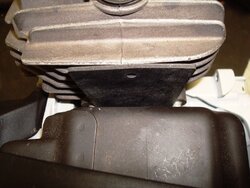
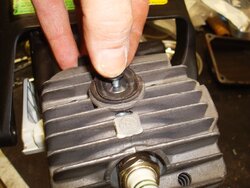
Heh, Stihl's exhaust blocking tool is real sophisticated.
 Just sandwich the rubber strip between the exhaust port and muffler. (No Gasket) It's tapered so it fits multiple saws.
NOTE: I don't kill the screws holding the muffler/strip in place either. Just snug, even pressure, usually seals up better than putting 200lb ft of effort on them.

I pulled up the decomp just to double-check that it is in fact closed.
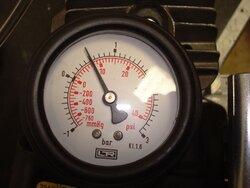
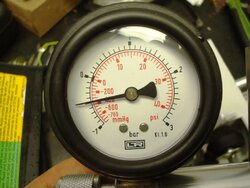
Success!! The engine passed it's tests under pressure and vacuum with flying colors. .5 bar in either direction for 20+ seconds. Less than .05 bar pressure difference over that time.
That's it for tonight I think. Might get to hear it run this weekend. Can't wait!

Questons? Fire away!
................................Oh man! More new stuff? $90 for a brandy new back handle/fuel tank assembly. Included a new, green, ethanol proof fuel line as a bonus. This is going to make a huge difference in how the saw looks overall later.
You must have found the same ebay vendor I did for mine, $88.95, with others selling for as high as $169! Coming along real nice, like the string idea on the carb boot, I used the pokey needle nose pliers routine, I'll remeber that one!
M
MasterMech
Guest
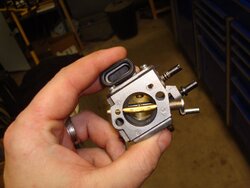
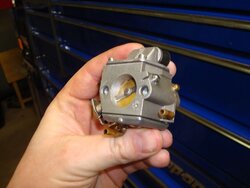
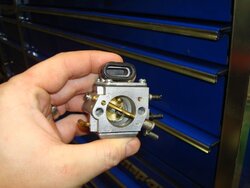
The carburetor is all cleaned up and ready to go. I'm going to run/try it as is and rebuild it later if necessary.
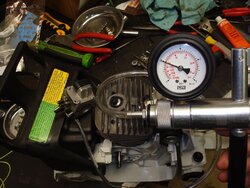
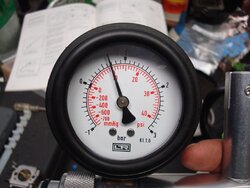
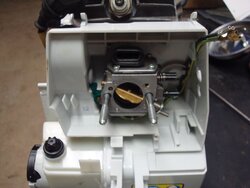
Pressure testing the carb to see if there's a problem right off the bat. And test fitting the carb. You can see in this shot I have the wiring harness back in the saw too.
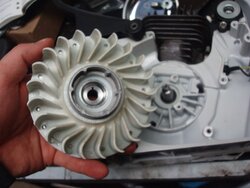
Cleaned up the flywheel/fan and throwing that in the soup too. I guess I didn't take any pics of the ignition system going back together. Oh well, pretty straight-forward that one is.
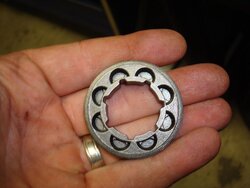
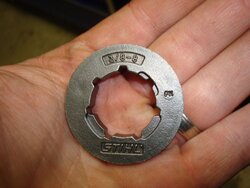
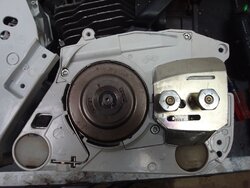
Got the clutch side of things wrapped up too. Oil Pump, Oil pump drive and the clutch assembly are all back in. Picked up some new covers to match the shiny-ness of the rest of it. That was another eBay score for $12.
Oh yeah, going 8 pin with the rim for now as I plan to start off with a 20" bar on it.
M
MasterMech
Guest
You must have found the same ebay vendor I did for mine, $88.95
There are a couple guys on eBay selling them for $90 or less right now. That's a screamin' deal for a new back-handle assembly for sure.
I was on the fence about it and missed out on the guy you bought from. Oh well, I figured, I can use the one I have, just not as minty as a new one would be obviously. Then he relisted a few days later and I took that as a sign.

NH_Wood
Minister of Fire
M
MasterMech
Guest
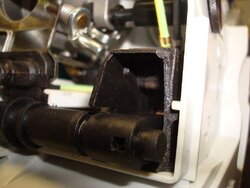
Ok, so here's what I get for getting in a hurry (geez, does this guy ever learn?
 ) and working in a freezing cold shop. The kill switch is still 100% functional so I'll order a new one and carry-on here.
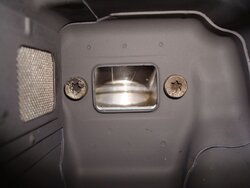
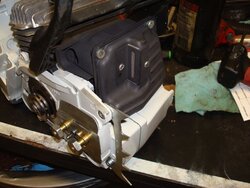
Man that thing looks sweet on there too. Gonna get to hear it roar soon if I can get my act together.....
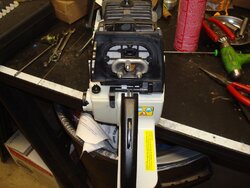
Got the back end buttoned up now. That's a new air filter plate on there. (I have 1 other one that's chipped but very serviceable) Got lucky and picked up a handful of new stuff from 1 seller for cheap. I can't believe the pricing some of this stuff goes for, new parts in the OEM bags with labels.
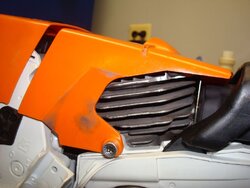
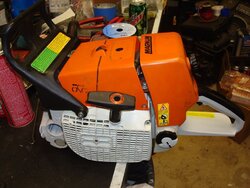
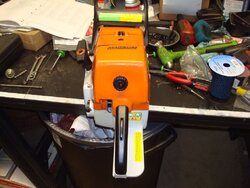
For now, I threw on my "ok" plastics and handle. That cylinder looks pretty good, hardly would know it was chipped before right?
 Are you wondering about the oil cap yet? Well it turns out the crankcase I bought is for an 046 (wasn't clearly stated as such....
  ) and while there is nothing wrong with using it, having a threaded oil cap and a flippy fuel cap will most likely bug the chit outta me. Yup, I have problems, I know.
  I have another starter coming for this saw but I couldn't resist stringing this one up and mounting it quick.
And the moment we've all been waiting for..... she's a runner! Saw fired up on the 5th yank and ran pretty good. A slight tweak to the L screw and she idled just fine. Not going to run it much until I get the oil cap for it. But it's alive and kicking! I'll get it buttoned up this week and perhaps get a video or two up when it's all together.
And yeah, that dual port sounds awesome!
M
MasterMech
Guest
I should've taken a picture of this thing in pieces. I do have fun building them from nearly nothing, just parts. There's enough different with this one that I'm not sure what serial # to transfer to it. Don't have the right size stamps anyways.Coming along nicely MM - looks like you are having fun (mostly!). Cheers!
Can't wait to get it in the wood. It's been awhile since I've played with a 70cc class machine.

S
ScotO
Guest
I love building them from scrap, too. Nothing teaches you better on how a machine operates than to tear it down and put 'er back together again......
Just don't end up with a whole box of PLO's (parts left over)......
Just don't end up with a whole box of PLO's (parts left over)......
........................I can't believe the pricing some of this stuff goes for, new parts in the OEM bags with labels!............................
Gee, now you're sounding just like me a few weeks ago in that "Papa Stihl" thread!

Glad to see your scoring some good internet deals to mix in with your "friendly local dealer" purchases!
M
MasterMech
Guest
Gee, now you're sounding just like me a few weeks ago in that "Papa Stihl" thread!
Glad to see your scoring some good internet deals to mix in with your "friendly local dealer" purchases!
The parts are being sold below dealer cost. The best I can figure out is that these guys bought out dealer inventory from places that went under. Or in the case of "new take-off" parts, maybe I'm better off not asking too many questions.....
 I sure hope someone isn't dumb enough to start parting out stolen saws on ebay.
With the exception of the covers for the chain brake mech, the rest of the parts I've got in it are N.O.S that were in their original packaging. And those covers I'm pretty sure came from a saw that looked like it was dropped or run over based on the other items the seller had for sale. A "slightly bent" but "new" wrap handle and a bunch of busted up plastics "that could be fixed".

M
mikefrommaine
Guest
Maybe the old production molds have ended up in the wrong hands. Check this out
http://www.ebay.com/itm/Fuel-tank-r...139?pt=LH_DefaultDomain_0&hash=item416e6da2f3
These ms361 tanks and covers have been selling for 40-60 delivered. Though the seller has gone to a buy it now auction to keep the price up. Not sure I would trust the integrity of the handle long term. But I've been tempted to order the rear filter box only as mine is cracked. But not sure of how well it would fit and or last.
M
MasterMech
Guest
Those are clearly labeled as non-OEM aftermarket parts. Nothing wrong with that. The items I have are genuine Stihl OEM parts with the part #'s and company logo molded/cast into the part. And yup, it all fits like a glove.Maybe the old production molds have ended up in the wrong hands. Check this out
http://www.ebay.com/itm/Fuel-tank-r...139?pt=LH_DefaultDomain_0&hash=item416e6da2f3
These ms361 tanks and covers have been selling for 40-60 delivered. Though the seller has gone to a buy it now auction to keep the price up. Not sure I would trust the integrity of the handle long term. But I've been tempted to order the rear filter box only as mine is cracked. But not sure of how well it would fit and or last.

M
mikefrommaine
Guest
What I've read in the case of the 361 parts is that it appears the old molds are being used. The part # in some pieces is still on the parts. Not sure about the logo. The way the Chinese are it wouldnt be hard to imagine them printing up some packaging and passing off aftermarket parts as oem.
They're already selling counterfeit huskys and stihl saws...
They're already selling counterfeit huskys and stihl saws...
M
MasterMech
Guest
What I've read in the case of the 361 parts is that it appears the old molds are being used.The part # in some pieces is still on the parts. Not sure about the logo.
If that is indeed the case then they're going to be contending with Papa Stihl very soon. My guess is he won't be gentle with the spanking either.

M
mikefrommaine
Guest
Unless buying from a dealer its buyer beware. Of course dealers could be using alibaba as asupplier and how would we know?
http://www.alibaba.com/product-gs/332222949/chain_saw_spare_parts.html
http://www.alibaba.com/product-gs/332222949/chain_saw_spare_parts.html
Maybe the old production molds have ended up in the wrong hands. Check this out
http://www.ebay.com/itm/Fuel-tank-r...139?pt=LH_DefaultDomain_0&hash=item416e6da2f3
....................................But I've been tempted to order the rear filter box only as mine is cracked. But not sure of how well it would fit and or last.
I bought a ZAMA 036/360 "Pro" compensating carb and aftermarket covers for my 036 from this same vendor super cheap and I'm very happy with them. The covers are obviously aftermarket as they are curved on the top, but they are very nice (I carefully "curved" a new 036 ID tag to match). The shipment from Hong Kong was cheap and trouble free and I had the items in just over 2 weeks.
M
MasterMech
Guest
Coming down the home stretch with this one now. Here we go one more time! 
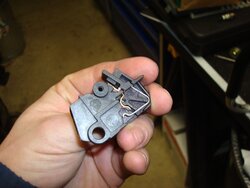
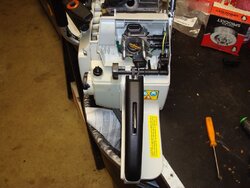
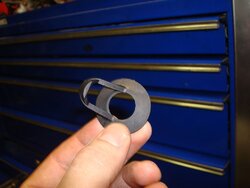
The ignition switch that I broke removing it from the other saw. And the plug boot skirt, which was originally torn (as many of them are.) Both were inexpensive items to replace.
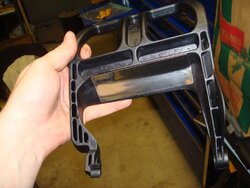
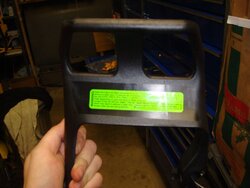
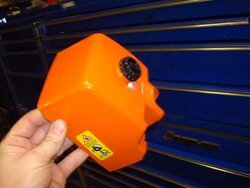
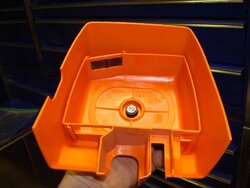
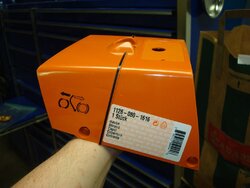
Really spiffing things up here now. The brake handle, engine top cover, and air filter cover are oh so shiny.
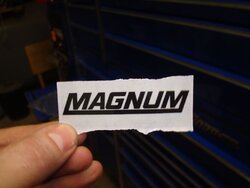
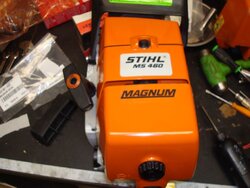
The all important "Magnum" decal.


The ignition switch that I broke removing it from the other saw.
 And the plug boot skirt, which was originally torn (as many of them are.) Both were inexpensive items to replace.


Really spiffing things up here now. The brake handle, engine top cover, and air filter cover are oh so shiny.


The all important "Magnum" decal.

I heard that just the sticker alone will make it run 15% faster.

- Status
- Not open for further replies.
Similar threads
- Replies
- 26
- Views
- 7K
- Replies
- 25
- Views
- 10K
- Replies
- 2
- Views
- 917
M
- Replies
- 58
- Views
- 9K
M

