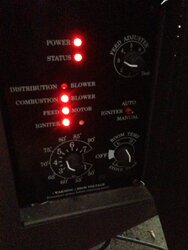
Hello
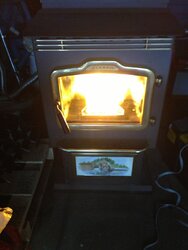
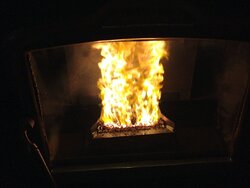
The auto ignition upgrade kits for the Harman P61 vary depending upon serial #. This one that I got for units below 6400 may have changed also. I did an upgrade with I believe the same kit and I had to notch the ash pan to slide it back in. The burn pot on both lower sides seemed to hang down more. The kit I am using today has what may be a better more sleek design. The old ash pan slid right in.
Has anyone else seen problems with sliding the ash pan back in?
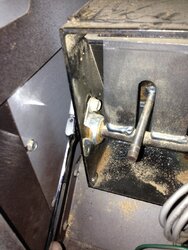
The really old serial # kits come with a new pusher arm for the slide plate.
Why is that needed?
What is also confusing here is?
The last kit I had came with the yellow igniter wire that pushed into the original circuit board connecter.
This kit comes with a whole new connector and wiring harness. A nice idea to put in all new connections but it does take more time. Is this also a new recent change to this old ignition upgrade update?
The instuctons still say just to add the yellow wire into the old connecter? ? ?
Has anyone seen this kit lately? Is there a service bulletin about the change?
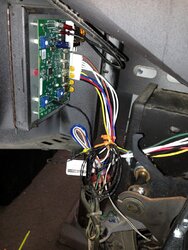
So now I have to pull a wire diagram and cut off all the wire ties and rewire the stove!
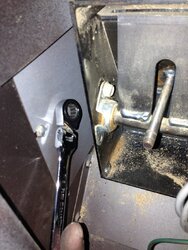
Finally I did buy a 7/16 ratchet box and open end wrench from Sears with a flexible ratchet end.
This is the best tool to remove the pusher arm since taking off the nut is so much easier than trying to remove the bolt! The instructions step 1 just say change the arm. Could t be a little more detailed?
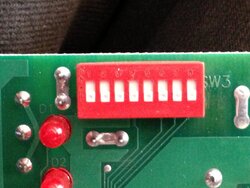
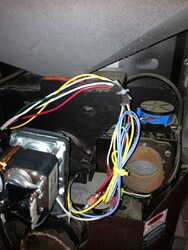
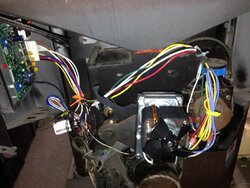
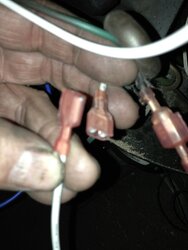
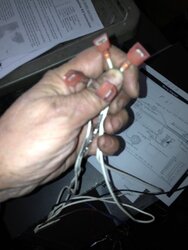
So now, the latest Bug-A-Boo is the new wiring harness has 4 white wires with 2 female and 2 male connectors on the ends. The old wiring harness has 4 white wires with 3 male and 1 female connectors on the ends! Always a problem! See pics. Cannot plug 2 female connectors together!
The auto ignition upgrade kits for the Harman P61 vary depending upon serial #. This one that I got for units below 6400 may have changed also. I did an upgrade with I believe the same kit and I had to notch the ash pan to slide it back in. The burn pot on both lower sides seemed to hang down more. The kit I am using today has what may be a better more sleek design. The old ash pan slid right in.
Has anyone else seen problems with sliding the ash pan back in?
The really old serial # kits come with a new pusher arm for the slide plate.
Why is that needed?
What is also confusing here is?
The last kit I had came with the yellow igniter wire that pushed into the original circuit board connecter.
This kit comes with a whole new connector and wiring harness. A nice idea to put in all new connections but it does take more time. Is this also a new recent change to this old ignition upgrade update?
The instuctons still say just to add the yellow wire into the old connecter? ? ?
Has anyone seen this kit lately? Is there a service bulletin about the change?
So now I have to pull a wire diagram and cut off all the wire ties and rewire the stove!
Finally I did buy a 7/16 ratchet box and open end wrench from Sears with a flexible ratchet end.
This is the best tool to remove the pusher arm since taking off the nut is so much easier than trying to remove the bolt! The instructions step 1 just say change the arm. Could t be a little more detailed?
So now, the latest Bug-A-Boo is the new wiring harness has 4 white wires with 2 female and 2 male connectors on the ends. The old wiring harness has 4 white wires with 3 male and 1 female connectors on the ends! Always a problem! See pics. Cannot plug 2 female connectors together!
")