
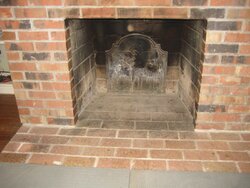
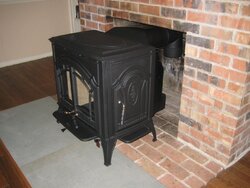
Thanks for all the great information on wood stoves! I'm posting some pictures of my install to return the favor. My application is a masonry fireplace with full clay liner. Had it cleaned and inspected before the install. Stove is a Quadrafire Cumberland Gap. I decided to use the rear vent feature so I could exhaust through the existing fireplace.

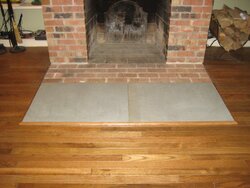
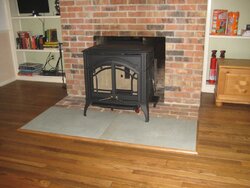
I extended the existing hearth by 24" to get the required clearances. My hearth extension is two pieces of flagstone floating on 1/2" Micore 300 mineral fiberboard. BTW I have a couple pieces of the Micore left if anyone near West Chester PA needs any.

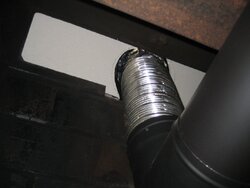
I got a stainless steel flexible chimney liner, insulation kit, and stove pipe from Chimney Liner Depot. I removed my fireplace damper plate and cut out a small section of the damper plate frame to let the liner pass through.


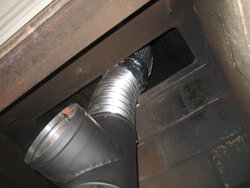
Connected the tee and the tee cap to the flexible liner.
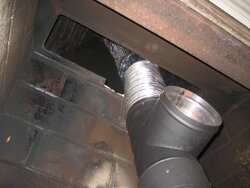
I used some of the leftover Micore 300 to block off the damper opening around the liner.

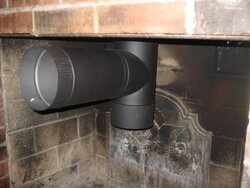
Then I added the snout and moved the stove into place.


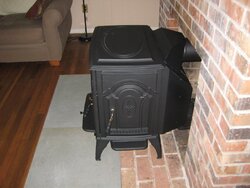
Moved the stove into its final position and made the connection to the stove pipe. Hope this helps someone!


I extended the existing hearth by 24" to get the required clearances. My hearth extension is two pieces of flagstone floating on 1/2" Micore 300 mineral fiberboard. BTW I have a couple pieces of the Micore left if anyone near West Chester PA needs any.
I got a stainless steel flexible chimney liner, insulation kit, and stove pipe from Chimney Liner Depot. I removed my fireplace damper plate and cut out a small section of the damper plate frame to let the liner pass through.
Connected the tee and the tee cap to the flexible liner.
I used some of the leftover Micore 300 to block off the damper opening around the liner.
Then I added the snout and moved the stove into place.
Moved the stove into its final position and made the connection to the stove pipe. Hope this helps someone!
Attachments
-
 IMG_3233.jpg208.8 KB · Views: 9,202
 -
 IMG_3229.jpg214.2 KB · Views: 2,976
 -
 IMG_3242.jpg149.6 KB · Views: 17,213
 -
 IMG_3243.jpg197.7 KB · Views: 20,969
 -
 IMG_3246.jpg196.7 KB · Views: 6,737
 -
 IMG_3248.jpg213.1 KB · Views: 30,810
 -
 IMG_3253.jpg126.2 KB · Views: 5,275
 -
 IMG_3257.jpg210 KB · Views: 10,878
 -
 IMG_3258.jpg182.4 KB · Views: 23,666
 -
 IMG_3259.jpg173.1 KB · Views: 16,876

