Late Season / Winter Solar Kilns

  • Active since 1995, Hearth.com is THE place on the internet for free information and advice about wood stoves, pellet stoves and other energy saving equipment.

    We strive to provide opinions, articles, discussions and history related to Hearth Products and in a more general sense, energy issues.

    We promote the EFFICIENT, RESPONSIBLE, CLEAN and SAFE use of all fuels, whether renewable or fossil.

Coalescent

Member
Jul 13, 2015
99
New Hampshire
Thanks to the great information provided here and on other firewood forums, I made an attempt at my own solar kilns based off @Woodsplitter67's excellent, @Poindexter-approved design. I will be running at least one into the winter.

Background

Last October I moved from my home in the Monadnock region of NH to north of Mount Kearsarge onto an 18 acre piece of land with about 16 acres very heavily wooded. Mostly 90' pine trees with a few hardwoods here and there. I left my 9 cords of hardwood cut and stacked with my old home as part of the sale, so I am starting fresh.

Solar Kilns

I have access to free pallets so I based my design off using those pallets and trying to adhere as closely as possible to @Woodsplitter67's design.

Each kiln holds 2.20 cords of wood, with 1.10 cords in each row.

I completed and fully wrapped my first kiln on August 7th. I completed and fully wrapped my second kiln on September 6th. The first kiln is behind the newer kiln. If my math is correct, I spaced the kilns far enough apart that the shadow of the second kiln shouldn't land on the first kiln even in winter.

IMG_7292.jpg


State of Wood

My wood is not ideal. I hope to have a better baseline next year, but this year I am just trying to get everything in shape to survive the coming winter and have some decent wood to burn. All of my splits are 16" splits. Thickness varies.

First Kiln

In my first kiln I have half hardwood (mostly red oak and birch, a little beech) and half softwood (eastern white pine, I believe).

Most of my red oak is from a tree I felled fresh and stacked it on the kiln for only a couple weeks before wrapping it. The birch trees are all freshly felled, as is the beech. Some of the red oak is from a huge dead tree out back that I hauled down the mountain. The upper half of the tree hadn't started to go punky yet so I bucked and split that.

The softwood in the first kiln is all from five huge pine trees that fell in a terrible storm last November that took out a huge number of trees in my town. I bucked and split that wood this summer.

Second Kiln

The second kiln is almost exclusively softwood that I felled and immediately stacked. It has been split and stacked from 1 month down to only days (as I filled it up before wrapping). I was a little short after the last pine tree so I finished it out with a handful of small birches that were damaged.


None of this wood was split and stacked over a month before cover it in the kiln, and some of it was less than that. Most of the wood is from freshly felled living trees and was very high MC--my moisture meter maxes out at 40% MC and all of this wood showed 39-40% when I first split and stacked it, but I did not re-test the wood (some of which was sitting there for a month or so) before wrapping it in plastic.

First Kiln 30 Day Performance

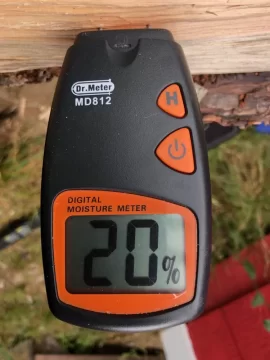
I pulled some splits out of my first kiln from the top row through the gable vents today. The pine looks like it is pretty much ready to burn, splits ranged from 20% to 25% MC.
pine.jpg
Pine

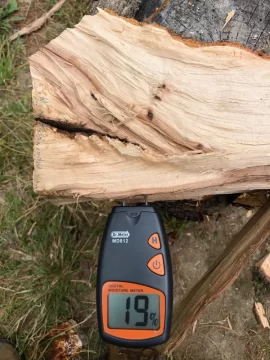
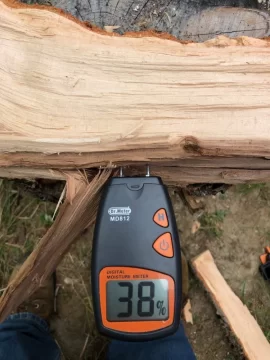
The red oak is interesting. The very center is still 38% MC, but it dropped to 24% MC only a couple inches over, and to 19% about 2" in from the end of the split (all tested on the fresh face of the cut). So it's definitely drying out but the very center is still showing high MC. This is after only about 30 days in the kiln.
red-oak-middle.jpg
Red Oak - Center

red-oak-near-end.jpg
Red Oak - 2" from End


Update:

A note on weather: My part of central NH enjoyed an especially cloudy and rainy Fall this year. We had precious few days of full sun; even the sunny days tended to be partly cloudy. I believe this slowed down kiln performance.

First Kiln 90 Day Performance

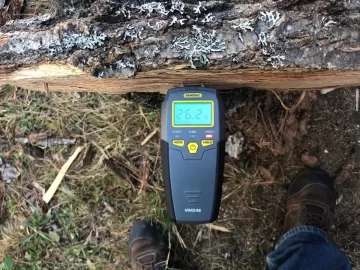
At 90 days, the red oak was still reading in the mid-20s when I removed and split several pieces to test MC. The birch, however, all tested in the low teens.
IMG_8285.jpg
Red Oak

IMG_8288.jpg
Birch

First Kiln 110 Day Performance and Second Kiln 80 Day Performance: Finished!

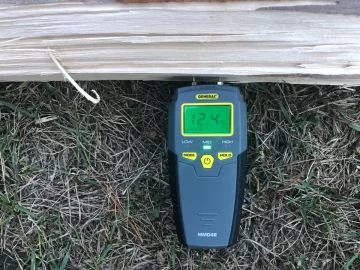
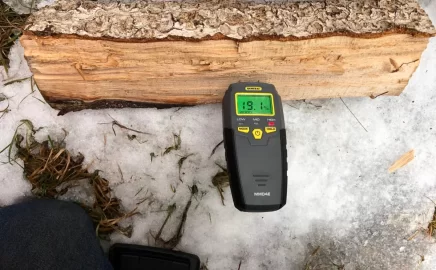
I am very happy to report that after 110 days in the kiln, even with a terribly cloudy season, both the freshly felled red oak and the storm-felled red oak are below 20% MC and ready to burn.

The red oak (first kiln) averaged 18.8% MC, but no test exceeded 20% MC.

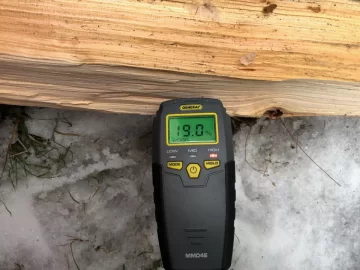
The pine (second, later kiln) was all below 20% MC.
IMG_8607.jpg
Red Oak (note: I took this split inside and warmed it up. This meter seems to read accurately in cold weather, as it actually tested lower (18.5% MC) after warming to 70dF)
IMG_8610.jpg
Pine (second kiln, 80 days)

Snow Performance

We finally had a decent snowstorm, dropped 3.5 to 4 inches the first night and about as much the second. The following photo was taken the morning after the first snow fall.

I am happy to report that my theory proved true--the steep pitch of my kilns combined with the rope corners on each side simply dropped all of the snow off the kilns. As you can see from the undisturbed snow in the image below, I took this shot before I walked down the hill to the kilns. They dropped the snow on their own.

IMG_8667.jpg


Note: all MC readings taken by performing a fresh split down the middle of a piece of firewood and taking the reading in the center of the fresh split, unless otherwise stated.
 
Last edited:
I like your post.. this is a great start for seeing how much the wood will season over the course of the winter in the Northeast. I like your set up. It seems as if you've have put a lot of thought into this
 
What temps are you seeing inside the kilns vs the outside air temp? Seeing any condensation on the inside of the plastic?
 
Great post. It will be interesting to see the end results. In case no one has told you, you are going to have a chimney fire with all that pine!!![emoji23][emoji23][emoji23]


Sent from my iPhone using Tapatalk
 
  • Like
Reactions: Coalescent
Cool. Thanks for tagging me, I love seeing these various builds.

Do you have any vertical dividers in the middles of the kilns? One reason I went to 8 foot modules is I am just not very good at stacking and having plentiful, closely spaced fixed verticals lets me continue to stack fast and sloppy without having to restack in the summer when the wood moves and the stack topples over.
 
  • Like
Reactions: Coalescent
Do you have any vertical dividers in the middles of the kilns?
I was thinking the same thing, only for snow load. Very nicely done OP, hoping you get excellent results
 
  • Like
Reactions: Coalescent
What temps are you seeing inside the kilns vs the outside air temp? Seeing any condensation on the inside of the plastic?

For most of the day, I am seeing a pretty consistent 50dF temperature gain. On especially sunny days it almost reaches 60dF. Unfortunately, I do not get many completely sunny days here... usually the best I can hope for is partly cloudy.

My best day so far was the one completely sunny day we've had since I finished my first kiln, temps outside were in the low 80s, and the kiln hit 139.3 (I was rooting for it to break 140, but it never did).

IMG_7018.jpg

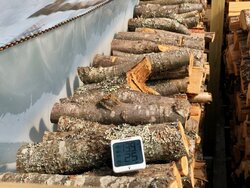
Highs here have been in the 70s and the kiln temps have been hovering between 123dF and 125dF most days when I check mid-afternoon.

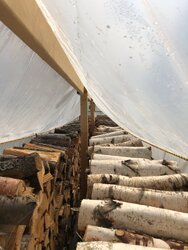
My first kiln had a lot of condensation at first. I intentionally spaced the plastic so it hung a couple inches away from the ends of the wood. I definitely saw condensation running down and dripping off the sides. Even took a video of one particularly impressive day. I think most moisture exits through the gable end vents, however.

My second kiln, which I just finished a couple days ago, had a lot of condensation for the first several days. It disappeared completely the other day when the wind kicked up. With the pallet space along the bottom and the gable end vents, even a mild breeze really pushes a lot of air through the kilns.

Maybe it's the angle, but I haven't seen droplets falling back on the wood. Condensed moisture runs to the edge and down the side, at least when I've been around to observe.
 
Do you have any vertical dividers in the middles of the kilns? One reason I went to 8 foot modules is I am just not very good at stacking and having plentiful, closely spaced fixed verticals lets me continue to stack fast and sloppy without having to restack in the summer when the wood moves and the stack topples over.

It didn't occur to me to add bracing to stack the wood against. I like that idea. Hopefully these kilns will survive the drying process... one way or the other, I'll find out if my stacks will fall over as they shrink. The stacks are braced against an upright pallet at each end of the kiln.


IMG_7369.jpg
Inside of Second Kiln

I do try to stack carefully... my kids form a line and bring me each split, and I set each piece myself. I (we) enjoy it. I tie string from one pallet to the other to make sure my stack isn't deforming near the middle where it's harder to gauge by eye. Also, my stacks aren't terribly tall. In the first kiln they're exactly 4 feet tall. I eyeballed the second kiln and wound up making them a tad higher, but not much.

I'm hoping the "snow load" situation will resolve itself because my corner bracing is heavy duty paracord rope. I figure when the snow starts to pile up, it will make the rope sag and dump it all on the ground. I have no idea if this will actually work or not. I am prepared to brush the "roof" off as necessary.

IMG_7254.jpg

Second Kiln before Wrapping
 
Even this late in the year, the second kiln seems to be chugging right along. Wrapped it on the 6th, so about 9 days ago, and the freshly felled birch is already cracking open nicely on the ends.

99AB4043-8C8D-45E5-8363-EFC561BEF78B.jpeg
 
  • Like
Reactions: Das Jugghead
I like the idea with the string, I'm going to have to start doing that. My stacks always end up bowing out no matter how careful I am. Unfortunately I'm also stacking on uneven ground using poles made from smaller trees and tops. I think about half of my stacks fell over with the shrinking wood. Cribbing the wood every four or five feet the full height of the stack also helps for some reason. I've heard some folks with stoves that take 24" splits that they never have settling issues. There's a five foot tall covered stack in front of my door that hasn't shifted or anything, but it's been seasoned for years now.
 
Still very happy with how this design is performing. Today the high was 62dF here, mostly sunny this afternoon. Kilns have been cruising between 117-120dF. Right at this moment it’s 55 degrees warmer in the kilns than ambient temps, I like it!
 
I like the idea with the string, I'm going to have to start doing that. My stacks always end up bowing out no matter how careful I am. Unfortunately I'm also stacking on uneven ground using poles made from smaller trees and tops. I think about half of my stacks fell over with the shrinking wood.

I will be wary of my stacks falling over, but not much I can do about it now. I didn’t realize stack stability would be a problem with stable end supports and the stacks being only 4ft high.

The only stacks I’ve personally had fall over on me were much higher and were stacked between two maple trees that swayed far more in high wind than I realized... and were on uneven ground to boot.

Then again, I’m only about five years into heating with wood (since loving wood heat as a teen, but my father took care of everything other than hauling the wood around, which was my job). I’m sure there will be many surprises in store for me...
 
  • Like
Reactions: SpaceBus
I will be wary of my stacks falling over, but not much I can do about it now. I didn’t realize stack stability would be a problem with stable end supports and the stacks being only 4ft high.

The only stacks I’ve personally had fall over on me were much higher and were stacked between two maple trees that swayed far more in high wind than I realized... and were on uneven ground to boot.

Then again, I’m only about five years into heating with wood (since loving wood heat as a teen, but my father took care of everything other than hauling the wood around, which was my job). I’m sure there will be many surprises in store for me...

We get a lot of wind here and I have mostly softwoods stacked, so that might be why mine fell over. I'm fairly new at this as well
 
  • Like
Reactions: Coalescent
Take a look at my stacks in the part duex thread. I stack in the opposite direction every once in a while and randomly through the row. This keeps the stack more stable and level. As all stacks they will start to shift, mine started to fall once. So next time i started to do this and my stacks really dont move
Your kiln sounds line its running well.. is there any condensation in it and how large are your vents
 
  • Like
Reactions: Coalescent
Did you put anything on the ground, under the pallets? Or are they sitting right on the grass?

I haven't tried this myself, but I think I would start by laying down some thick black plastic to stop moisture from rising up out of the ground into the pallets & wood. It would constantly be doing that. For better drying of the bottom layers of the stacks, and to help prevent or delay my pallets from rotting. Likely would also block up the pallets off the ground/plastic. But I have a strong personal distaste for rotting pallets and the nail filled mess that makes so could just be me. :)
 
  • Like
Reactions: Coalescent
Take a look at my stacks in the part duex thread. I stack in the opposite direction every once in a while and randomly through the row. This keeps the stack more stable and level. [...]
Your kiln sounds line its running well.. is there any condensation in it and how large are your vents

Thanks! I’ll take a look and try out this technique.

I believe my gable-end vents are each about 4”x5”, but I will check soon.

The first kiln hasn’t had any condensation at all for some time. The second kiln (started earlier this month) has had decreasing condensation. Today was warmer and sunny. Kilns were running around 128-130 degrees. First kiln had zero condensation. Second has condensation only on the north side, none on the sunny side.

I haven’t ever observed condensation actually dripping onto the wood. I’ve seen it run down the sides and out plenty of times. Tried to capture this in some photos, below.

Photos below at the end of this post...

Did you put anything on the ground, under the pallets? Or are they sitting right on the grass?
[...]
But I have a strong personal distaste for rotting pallets and the nail filled mess that makes so could just be me. :)

I tried to mimic @Woodsplitter67’s design as closely as possible, and I did not put anything under my kilns. My property has extremely sandy soil that drains very well, so I am hoping I will get away without it. When I unpack the kilns I will do a lot of moisture testing on the lower, mid, and upper areas to see how splits dried in different parts (and heights) of the kiln.

I get the pallets for free so I considered them a disposable part of the kiln. I can throw the leftovers on a brush pile and burn them when they go bad, but I haven’t actually done this yet. Perhaps I will share your distaste for it after actually trying it out. :)

Photos from Today
Note: Condensation photos are of kiln 2; temp photo from kiln 1

276A97E6-5156-4639-8653-13ED509EE2E1.jpeg

North Side Condensation - Near

08EE54C0-B6DB-4EB1-8AC9-E250A07820A0.jpeg

North Side Condensation - Far


3C730004-AA81-4B63-9AD5-B01ECBEE174A.jpeg

South (Sunny) Side - No Condensation, Near

E0E1085C-DF07-44A4-B4F7-E88D3FED20CD.jpeg

South (Sunny) Side - No Condensation, Far

FAC15E06-AF17-44FC-92E3-9884D1E33E16.jpeg

2:00pm (ish) Temps
 
A wet spring and early summer put me way behind in the firewood game this year so I am also trying the kiln dry method. In an effort to minimize handling I crisscross stack onto pallets right off the splitter (24" wood) then use tractor to transfer loaded pallets into the woodshed. This year I created a "landing" in an unused section of meadow that gets full sun all day and is open to the prevailing wind. I arranged pallets in a row, so I could wrap them in groups (16'x25' roll of plastic nicely covers 4 pallets stacked 4' high) and also stacked the pallets two high; older semi-tired ones directly on the ground with newer ones on top . Thought this would help minimize ground moisture transfer and make it a bit easier to retrieve them. I am dealing with hickory, sugar maple and a bit of beech most of which I cut, skidded out and blocked up last summer and fall. Splits on the first 4 pallets came off the splitter at 20%-26% in the first week of August and were wrapped on 8/10. On Sept 10 I pulled two out through the vents and they were at 14%.
 
Last edited:
  • Like
Reactions: Coalescent
A wet spring and early summer put me way behind in the firewood game this year so I am also trying the kiln dry method. In an effort to minimize handling I crisscross stack onto pallets right off the splitter (24" wood) then use tractor to transfer loaded pallets into the woodshed. This year I created a "landing" in an unused section of meadow that gets full sun all day and is open to the prevailing wind. I arranged pallets in a row, so I could wrap them in groups

This sounds fascinating, but I’m having a difficult time being sure I’m visualizing it correctly. Do you have and photos you can share? Thanks in advance!
 
  • Like
Reactions: jaoneill
This sounds fascinating, but I’m having a difficult time being sure I’m visualizing it correctly. Do you have and photos you can share? Thanks in advance!
Working my way back through the pile of blocks. I use the FEL with two sets of skidding tongs to hold the logs at a comfortable height for blocking them up leaving a long row of blocks that I can work through from one end, backing the tractor up every 5-6 feet.
Very little moisture on the inside of the plastic after the first week, drips that you might see here were on the outside; it had rained that morning. There were eight pallets covered when I took these pics, wood is 24", full pallets are a bit over 4' high giving me just short of a cord on 2 pallets.
IMG_0861.JPG
IMG_0862.JPG
 
  • Like
Reactions: Coalescent
I learned yesterday that the temperature of the wood split can have a dramatic effect on the results from my moisture meter. Yanking a hot piece of wood out of my kiln, splitting it and immediately testing it yielded moisture percentages higher (possibly considerably higher) than the actual moisture content.

For example, the red oak I tested at 38% that was likely about 120dF from the kiln at the time might have actually been closer to 28% according to the correction table linked below.

When I next perform my moisture tests, I will cool the wood down to room temperature before splitting and using the meter.

Sources:
Burn wise: Test Wood with a Moisture Meter
Wood Temperature Correction Table
 
  • Like
Reactions: jaoneill
I am here to publicly thank @Woodsplitter67 and to agree with what others have said: this design works, and it works well.

My wood has been in the first kiln 2 months. It’s raining cats and dogs today, but this weekend I removed about a face cord of pine from both the front and back (north and south) stacks inside the first kiln.

Data:

Removed roughly a face cord of eastern white pine.

All of this wood tested at 38% or higher MC when I split and stacked it in the kiln.

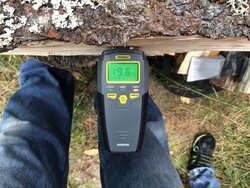
This weekend, not a single piece tested at 20% MC. Highest test was 19% and some change. Average of all pieces tested was 17.5%.

I’ve had a LOT of heavy clouds during this past two months. Only two days of total sunshine (no clouds at all).

I will remove all of the pine as soon as I get a dry day this week and test it more thoroughly, but I’m very pleased.

Looking forward to testing the freshly felled red oak, birch, and beech in another month.

65180E74-6DAE-4269-9D6B-92B7E4C522AD.jpeg

Frost has Arrived

E56EFC5D-39A9-4038-B363-126112AE05DA.jpeg
5E565C6D-F040-4ED2-A9B5-A2DB6B49BDE7.jpeg
5F6862EC-B660-4FFD-81E1-2C0F6D5DA4C8.jpeg
Highest MC tested was 19.6%
 
First pine fire, ever. Happy to report the house is still standing even after several of these unpredictable, dangerous experiments with burning pine...

8A1814F3-D554-4CEB-9E6B-76B4A0BC5C66.jpeg
8E7695F2-6CF0-40C8-A4B7-928075F7CDD2.jpeg
 
  • Like
Reactions: Rhodie and SpaceBus
I am here to publicly thank @Woodsplitter67 and to agree with what others have said: this design works, and it works well.

My wood has been in the first kiln 2 months. It’s raining cats and dogs today, but this weekend I removed about a face cord of pine from both the front and back (north and south) stacks inside the first kiln.

Data:

Removed roughly a face cord of eastern white pine.

All of this wood tested at 38% or higher MC when I split and stacked it in the kiln.

This weekend, not a single piece tested at 20% MC. Highest test was 19% and some change. Average of all pieces tested was 17.5%.

I’ve had a LOT of heavy clouds during this past two months. Only two days of total sunshine (no clouds at all).

I will remove all of the pine as soon as I get a dry day this week and test it more thoroughly, but I’m very pleased.

Looking forward to testing the freshly felled red oak, birch, and beech in another month.

View attachment 248786
Frost has Arrived

View attachment 248785
View attachment 248787
View attachment 248788
Highest MC tested was 19.6%

Thanks for the heads up. I am glad to see it working out for you. The object of this site is to help each other and pass along Knowledge from one wood burner to the next. We all can learn somthing and also pass somthing on to one another. Please keep posting.. om super intrested in kiln temps in December January and February. Pine will go pretty quick as well.as poplar and black cherry.. the oak will be a little slow over the winter...thanks for the props man...
 
I am here to publicly thank @Woodsplitter67 and to agree with what others have said: this design works, and it works well.

I want to echo Coalescent's thank you to Woodsplitter67. My "kilns" aren't as pretty as theirs but the principal is certainly sound. Hickory in my first set of 4 pallets, covered on 8/10 are now at 14%, beech in the same batch is @ 12%, as is the hard maple, they are ready to be moved into the woodshed. Pulled a couple of hickory splits out of the second set of 4 pallets, covered on 8/30, and they were @ 16% & 18% only 6-7 weeks in. Not to shabby considering they didn't have the advantage of the "summer" heat. I have 2 more batches covered this month, hope they get below 19%-20% before winter sets in. Blocked up another batch today. Including a few more pics of the work in progress over time: for reference, the top of the fenders on the smaller tractor are a bit over 5' high, hood on the sweet allis is over my head.
IMG_0893.JPG
IMG_0915.JPG
IMG_0895.JPG
IMG_0911.JPG
.
 
I want to echo Coalescent's thank you to Woodsplitter67. My "kilns" aren't as pretty as theirs but the principal is certainly sound. Hickory in my first set of 4 pallets, covered on 8/10 are now at 14%, beech in the same batch is @ 12%, as is the hard maple, they are ready to be moved into the woodshed. Pulled a couple of hickory splits out of the second set of 4 pallets, covered on 8/30, and they were @ 16% & 18% only 6-7 weeks in. Not to shabby considering they didn't have the advantage of the "summer" heat. I have 2 more batches covered this month, hope they get below 19%-20% before winter sets in. Blocked up another batch today. Including a few more pics of the work in progress over time: for reference, the top of the fenders on the smaller tractor are a bit over 5' high, hood on the sweet allis is over my head.View attachment 249746View attachment 249749View attachment 249747View attachment 249748.

Thanks fo posting. Im glad to see this working out for you. I like your stacks i would hope that you will keep posting your results. The seasoning will slow as we get closer to winter, but you will see results.. please post what they are..