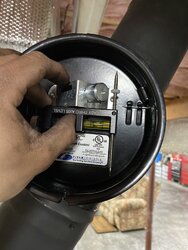
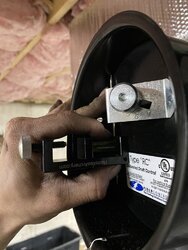
Make sure it's calibrated right. As in, if you disconnect it from the flu pipe does it go to zero?
it goes right back to 0
Make sure it's calibrated right. As in, if you disconnect it from the flu pipe does it go to zero?
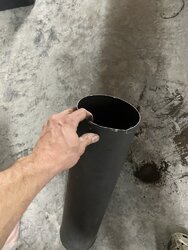
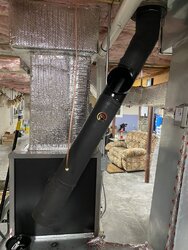
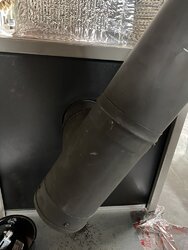
Perfect! Thank you!!After you install the baro housing the baro can be turned in the housing to make it level
So if you install the baro housing on the side of the angled pipe,then you can install the baro in the housing level.
On the angled side like the side where you made your hole for the gauge.

 www.supplyhouse.com
www.supplyhouse.com
www.supplyhouse.com
High draft makes it easy to overfire the furnace and can damage it...some signs of such would be fried paint on the front...I know you said that was your fault, but it would not have happened so fast if high draft wasn't in play.
Keep in mind there very well may still be other things will need to be addressed as far as getting the heat down to the baby's bedroom...but first things first...proper draft is basic wood furnace setup 101.
-0.06" is OK...but if you can get down to -0.04" and it still makes good heat for you, then that is even better.I will def take care of that my goal is .06
what other suggestion is next after this
The way you have it is right.Just to be sure too I’m suppose to be hooked up to the low side of the manometer?
We'll cross that bridge if we come to it...but it might involve changing those filters around, changing fan speeds, changing duct damper/register settings...etc...if the pressure is low and so is the temps what’s that solution?
The way you have it is right.
We'll cross that bridge if we come to it...but it might involve changing those filters around, changing fan speeds, changing duct damper/register settings...etc...
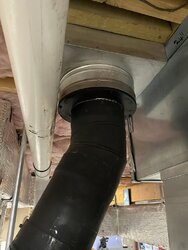
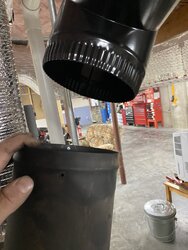
Looks good, but your BD NEEDS to be level both horizontally and vertically. Hard to tell from the photo, but the tee doesn't look like it is...???