Defiant II - Fireback Dislodged

  • Active since 1995, Hearth.com is THE place on the internet for free information and advice about wood stoves, pellet stoves and other energy saving equipment.

    We strive to provide opinions, articles, discussions and history related to Hearth Products and in a more general sense, energy issues.

    We promote the EFFICIENT, RESPONSIBLE, CLEAN and SAFE use of all fuels, whether renewable or fossil.

bsticks

Member
Mar 19, 2010
70
NW New Jersey
Hi All -

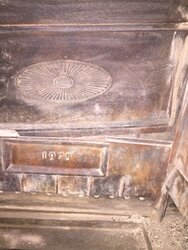
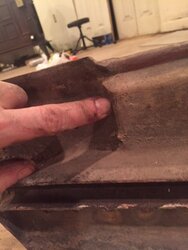
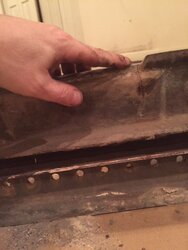
My Defiant II was on a pallet being moved to another location in my home. The pallet hit the ground abruptly and dislodged the upper fireback from the lower fireback and did not break or crack. As of right now, the upper fireback is wedged in pretty tight behind the lower fireback. I am assuming that I will need to break the stove down to get this back together. Does anyone have any other suggestions on fixing this?
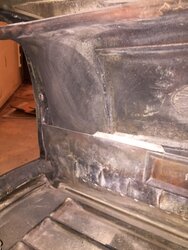
Upper FB-Left.jpg Upper FB-Right.JPG
 
Yup time to take it apart. I am a bit concerned that the lower fireback looks bowed in the right photo.
 
Yup time to take it apart. I am a bit concerned that the lower fireback looks bowed in the right photo.

Thank you for the reply. I believe that both pieces could be a bit warped. In a repair/replacement link this, do I need to replace the two piece baffle assembly? I understand it is suggested to make sure the parts fit as tightly as possible, but I am not sure if I need it. Any tips on where parts are available for this stove or what kit I made need? I have seen a few posted links on various threads but a few links appeared to be very old.

Thank you again for your reply.
 
I haven't bought any parts recently for the defiant so I cant help you on that.

I think I got away with just changing my top section after the initial conversion but my lower section was straight. There are a couple of Defiant pros on the forum but expect they are busy digging out form the snow but usually show up at some point

For what its worth I would be concerned that when the stove was dropped that some other casting may have gotten damaged, I suggest that you need to take it apart and look over everything carefully. I would guess if you were really lucky is that the stove needs to be resealed might not have any broken castings. I rebuilt mine on one very long Saturday, at least 2/3rd of the time is getting the refractory out of all the nooks and crevices. I used a right angle grinder with coarse wire brush for a lot of it with a sharpened screwdriver and a mallet to knock off the big stuff
 
From what I could see by sticking my head in there, everything appeared to be free of cracks or broken cast pieces. But the only real way to know is to break it down.

Appreciate the responses.
 
WAIT!!! Don't tear it apart, you don't need to. All the interior parts are removable in th eD II. Just take out the lower baffle and continue from there. Not that bad, actually!
 
Hey there!! Thank you for the tip, I will give it a try and see what comes of it. Although it was dropped on a pallet, I am still a bit concerned now that I may have some other situation that may have occurred that I just cannot see and did not think of until it was suggested a few posts back. I guess it couldn't hurt to start with an easier solution for starters and see what comes of it and make an assessment.

Thank you again.
 
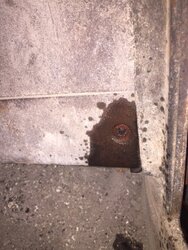
Holy cow, that lower baffle screw only wants to turn a little bit. I don't want to over torque it and snap it. I have it soaking now. I really do not want to use a drill on this if I do not have to.Baffle_Screw-Right.JPG
 
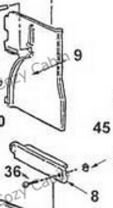
OK, I have figured it out, there was a cast iron bracket behind the bolt with a square nut holding it in. Defiant3, it worked just as you said it would. I was able to remove the lower/upper baffles, i took the damper out, then the upper fireback came right out with no issues. Peakbagger, the upper fireback is warped and suspect the lower is as well.

Thank you very much!!!
 
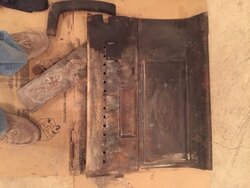
Upon further inspection when all the inside parts were removed showed these different situations. The upper/lower fireback was warped pretty good, I believe the lower fireback was warping due to a crack I point out in the picture. And the upper/lower baffles were warped and cracked as well, I didn't take a picture of those, but you can see them in the prior pictures. Appears to me that this stove was over fired more than a handful of times, would my assumption be correct?
Also, the link to Woodman Parts Plus was tremendous, they had everything I needed.
Lower_FB_Crack_Lef_Side_RearView.JPG Lower_FB_Crack_Right_Side_RearView.JPG Top_View_Upper_Lower_FB.JPG Upper_Lower_FB_Warp.JPG
 
I was able to dry fit all of the new pieces for my repair, upper/lower fireback along with upper/lower baffles with the stove still together. I was bummed out a little when all of the parts didn't line up square inside the stove. The upper fireback appears to not sit squarely on the lower fireback (right side) inside the stove, but when I dry fit the parts on the ground, they square up nicely. The upper baffle once fit, also does not line up square as I have 3/8" gap at the bottom and a snug fit at the top where the upper fireback seats to the upper baffle.

I think the drop from the pallet may have loosened up the right side of the stove and I believe the only way to get this right is to take it all apart. I was thinking about grinding some of the pieces to get them to fit, but I don't think would solve the problem.

Anyone have any thoughts on this or come across an issue where the new parts for an install didn't not align square within the stove?

Thanks,
bsticks
 
Wo, hold up. Remember it's just cast iron here. Though quality control seems quite good these days it may be necessary to do some grinding to get parts to fit properly. No way the exterior is out of whack, but the tabs on the upper and lower that engage each other along that seam often need work. After a dry fit you can often see bright spots where the pieces touch. Grind or file like crazy there and you'll see everything come into line.
 
My experience is that there will be some spaces between panels esp. the baffle and fireback. No tto worry, this allows for expansion and contraction. Very important to follow break in procedure in the manual when you're done. Also install sand or ashes in the bottom about 2" deep before firing!
 
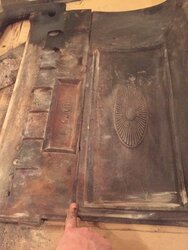
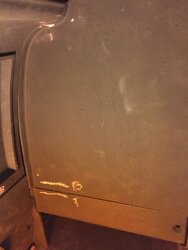
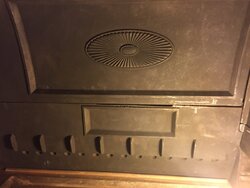
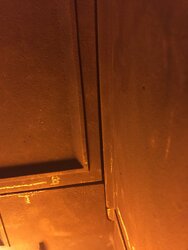
Here is how we are looking so far today. This looks much better than yesterday after taking the grinding tips provided. I think I can do just a little more, but wanted to post these for comments. I used chalk to mark my grind point sections. The upper baffle still has some movement in it where it seems it falls off the edge of the lower baffle. Here is everything all together, dry fit.
IMG_1869.JPG IMG_1868.JPG IMG_1867.JPG
 
Hi again, I picked up some high temperature (retort/furnance/refractory) cement that had a heat rating of 3,000 degrees Fahrenheit. The stuff is made by a company called "Utility" our of Westbury, NY. Has anyone ever used this? I tested it on a scrap piece of cast iron I had and it seems to hold together quite nicely. Wanted to ask before I jumped in with both feet and hands.

Thanks,
bsticks
 
the last time i had mine apart i used that product and it worked very well. i say do it

frank
 
Thank you Frank, I did use it and the stove rebuild and break-in was a complete success. I couldn't be happier with how it turned out.

Regards,
bsticks