Thanks for the help! Finally installed and fired tonight.

  • Active since 1995, Hearth.com is THE place on the internet for free information and advice about wood stoves, pellet stoves and other energy saving equipment.

    We strive to provide opinions, articles, discussions and history related to Hearth Products and in a more general sense, energy issues.

    We promote the EFFICIENT, RESPONSIBLE, CLEAN and SAFE use of all fuels, whether renewable or fossil.

Randallflagg

Member
Jan 1, 2017
40
NH
Just wanted to say thank you for those who helped in my first time pellet stove project. There is so much info here. Took about 11 months of planning, saving, and learning. I fired it tonight and I am pretty happy so far.

There is more to do, I want to paint the pipe eventually but for now I am happy with not using my electric heat. The room is nearly ready, just flooring/trim/ceiling paint.

And of course some obligatory photos.

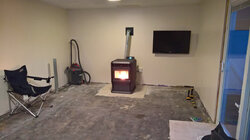
The room with my ComfortBilt HP-61
24125907688_1187574ad6_h.jpg

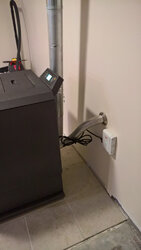
Fresh air/Surge Protector
37923749446_609cda8478_h.jpg

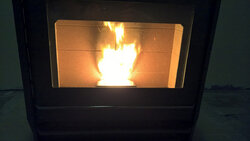
Set on 5 for ignition, whoa!
24125909208_09b9b5fa3f_h.jpg

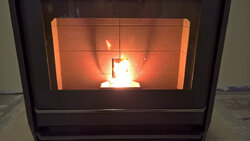
Turned it down to 1 and my house is in the 70's and it's 40 outside. It's been running a few hours and I might have to turn it off.
24125910618_903e5bfc77_h.jpg
24125902538_ff5da44d3e_h.jpg

For fun this is a seriously blurry listing photo of what I started with. I bought the house almost 3 years ago and this room has basically been storage since.
37947001522_767c2a22c3_z.jpg
 
Just wanted to say thank you for those who helped in my first time pellet stove project. There is so much info here. Took about 11 months of planning, saving, and learning. I fired it tonight and I am pretty happy so far.

There is more to do, I want to paint the pipe eventually but for now I am happy with not using my electric heat. The room is nearly ready, just flooring/trim/ceiling paint.

And of course some obligatory photos.

The room with my ComfortBilt HP-61
View attachment 201909

Fresh air/Surge Protector
View attachment 201910

Set on 5 for ignition, whoa!
View attachment 201911

Turned it down to 1 and my house is in the 70's and it's 40 outside. It's been running a few hours and I might have to turn it off.
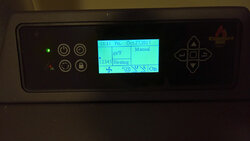
View attachment 201912
View attachment 201913

For fun this is a seriously blurry listing photo of what I started with. I bought the house almost 3 years ago and this room has basically been storage since.
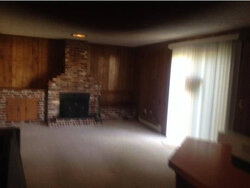
View attachment 201914
Congrats! Looks great!

I'm curious what you're using for fresh air intake and the trim piece you have on the wall. From advice I found here, I'm using some flex aluminum pipe, but I'm missing the nice trim piece.

Sent from my SM-G950U using Tapatalk
 
Congrats! Looks great!

I'm curious what you're using for fresh air intake and the trim piece you have on the wall. From advice I found here, I'm using some flex aluminum pipe, but I'm missing the nice trim piece.

Sent from my SM-G950U using Tapatalk

Kinda funny, I went to home depot to buy a 2" pipe escutcheon, while in that aisle I was looking around and found that ring. It's made to fit around a bathtub faucet and was with the repair parts. My pipe is a 2" flexible exhaust pipe from Jegs. I have it vented into the box around my chimney, and didn't want one of those kits that comes with cheap flimsy hose that would easily tear for $40-$50. In total it was about $35 for the pipe, ring, and 2 hose clamps (already had screen). At some point I will have to pull it out and paint but for now I am just going to finish the room.
 
Perfect, thanks! When I'm at Menards this weekend, I'll peek in the plumbing aisle for something like this.

Your install looks similar to mine, except my basement has egress window and is partially underground where the stove sits - yours looks like a walk out. Ours was gutted down to concrete like yours when we installed it too. Now it's all finished except for some finishing touches like the trim piece. I debated painting the pipe and have since decided against it.

Sent from my SM-G950U using Tapatalk

That's the odd part about my house. It's a ground level slab behind my garage. 1/2 flight down is basement, 1/2 flight up is kitchen/living and a 1/2 flight up from there is the bedrooms. It will be nice to have a usable room, I'm sure you are enjoying yours!