No info on new hearthstone change to rear flue

  • Active since 1995, Hearth.com is THE place on the internet for free information and advice about wood stoves, pellet stoves and other energy saving equipment.

    We strive to provide opinions, articles, discussions and history related to Hearth Products and in a more general sense, energy issues.

    We promote the EFFICIENT, RESPONSIBLE, CLEAN and SAFE use of all fuels, whether renewable or fossil.

jumperjack

Member
Jan 13, 2014
20
northeast
I have just purchased a new Hearthstone Castleton and going to install in a week or so but there is nothing in the owners manual for changing it from A top vent to rear vent. Looking at the stove seems pretty cut and dry in just removing bolts and switching it around but would like to make sure before I begin. Has anyone here switched one?
 
Sounds like a documentation error. This is from the Heritage manual. Hope it helps:
CONVERTING TO REAR VENT

In order to convert the Heritage from a top to rear or vice-versa, reach through the flue collar and remove the four ¼-20 hex head screws that mount the cover plate. Next, reach through the hole where the cover plate was and remove the four ¼-20 hex head screws that mount the flue collar. Exchange the two pieces and reattach the eight screws.
Thank you. That is the way I saw it but had no documentation.
 
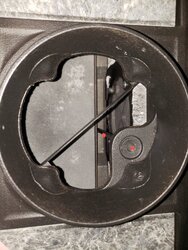
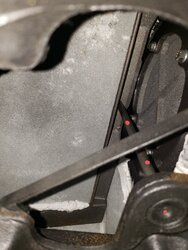
You lost me there. Not familiar enough with the stove and not sure what the purpose of this "rod" is. I don't see it showing on the parts diagram.
 
It’s pretty self explanatory once you get your hands on it. It will require an open end wrench, ratchet and socket, and lots of patience... it’s a poor design, but once you get it done it’s fine.
 
Not too different from their ashpan option on the heritage. For a year or more it simply didn’t fit, so we added a second gasket in order to make it seal up. Wouldn’t you know it, after a year the updated instructions said to add an additional gasket before installing it...
 
Not too different from their ashpan option on the heritage. For a year or more it simply didn’t fit, so we added a second gasket in order to make it seal up. Wouldn’t you know it, after a year the updated instructions said to add an additional gasket before installing it...
 

Attachments

  • 20181020_161740.jpg
    20181020_161740.jpg
    150.3 KB · Views: 160
  • 20181020_161801 - Copy.jpg
    20181020_161801 - Copy.jpg
    142.1 KB · Views: 132
It looks like the rod is independent of the flue exit.