markd5446
New Member
Just to be sure, they are the bolts that are positioned to the extreme left and right side of the stove, going up into the cover right?

Maybe I'm missing something, but it seems to me that taking the top off the stove requires moving the flue upwards which is what I would like to avoid. If I get the stove pipe off the vertical outlet, I can vacuum out the top of the stove through the outlet.
I'm going to have to look at removing the baffle from inside the stove. Even after looking at the diagrams, I've never understood how the whole thing went together. Cycloboxers pictures were a big step in the right direction. Maybe I'll be able to do it that way this summer.
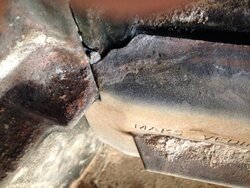
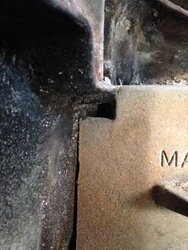
Thanks for the reply! I think it is cemented in there, but the cement itself could stand to be replaced, so my feeling is it's not hindering the extraction...but the other issue is it seems like toward the top of the burn plate on either side is a little lip or indentation that will only allow it to be lifted so far up, inhibiting your ability to pull it straight up and out. And the back is angled so you can't necessarily pull it forward. Hard to explain...I'm including some lousy pictures to try and illustrate what I mean.