Just go look at the thimble. Is it mounted over the vinyl siding with silicone gooping out around every edge?
Take note all you hackers !
!
How to: Install a wall thimble the right way on a home with vinyl siding
Step #1
Mount your interior thimble to the wall with a vent pipe inserted. Place the outer thimble into the opening and with a magnetic level on the vent raise the outer thimble to position and then mark the siding.

with the thimble removed....

Step #2
Cut the siding away. I use a Dremel Multi-max. Perfect for vinyl, especially when it is 5 degrees outside.


Step #3
Cut your J-Channel. The sides are the same length of the thimble and the top and bottom are the length of the thimble plus the width of each side of the J-channel

Make sure to notch out the sheating side of the top and bottom J-channel so the pieces will fit into the opening

Step #4
Install the J-Channel. Top and bottom first, then the sides.

I like to hide 1 screw under the center of the lower channels just to keep the opening from sagging.

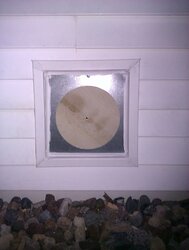
Step #5
Install the outer thimble. Again, insert the pipe through the opening. Use a level to center the pipe and secure the thimble with screws

Take note all you hackers
!How to: Install a wall thimble the right way on a home with vinyl siding
Step #1
Mount your interior thimble to the wall with a vent pipe inserted. Place the outer thimble into the opening and with a magnetic level on the vent raise the outer thimble to position and then mark the siding.
with the thimble removed....
Step #2
Cut the siding away. I use a Dremel Multi-max. Perfect for vinyl, especially when it is 5 degrees outside.
Step #3
Cut your J-Channel. The sides are the same length of the thimble and the top and bottom are the length of the thimble plus the width of each side of the J-channel
Make sure to notch out the sheating side of the top and bottom J-channel so the pieces will fit into the opening
Step #4
Install the J-Channel. Top and bottom first, then the sides.
I like to hide 1 screw under the center of the lower channels just to keep the opening from sagging.
Step #5
Install the outer thimble. Again, insert the pipe through the opening. Use a level to center the pipe and secure the thimble with screws