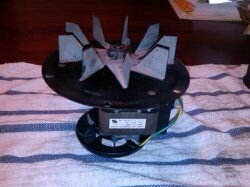
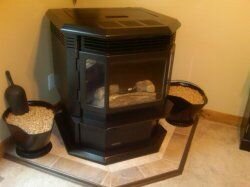
question on pulling combuston motor.

  • Active since 1995, Hearth.com is THE place on the internet for free information and advice about wood stoves, pellet stoves and other energy saving equipment.

    We strive to provide opinions, articles, discussions and history related to Hearth Products and in a more general sense, energy issues.

    We promote the EFFICIENT, RESPONSIBLE, CLEAN and SAFE use of all fuels, whether renewable or fossil.
Status
Not open for further replies.

St_Earl

Minister of Fire
Sep 9, 2011
1,337
millinocket, maine
what seems obvious to me, is that i would disconnect the cast duct/housing from the pipe at that stainless collar.
as opposed to separating it from the main motor assembly.

i feel kind of dumb even asking. it looks like that is clearly the way to proceed.

it looks to me like everything will drop out together when i disconnect the bolts from the motor mount plate.

sorry if this is just too obvious. but i wanted a little confirmation before i go forward.

002.jpg


003-1.jpg
 
There should be 6 small screws attached to the mounting plate (motor is mounted to this plate) and if you remove those 6 screws, the motor, plate, and vanes all come out so you can scrape and clean it.

I wouldn't touch the vent pipe or break that seal.

Unplug stove, then unplug 2 wires going to motor, then remove 6 small 1/4" screws (IIRC) and then remove and clean, motor/blower assembly. You will need a new 6" gasket. The old ones normally are ruined when the motor is removed.
 
frack. i think what has happened then is i ordered by part number from the manual, gaskets for the part where the assembly above the motor connects. where that cast piece that goes to the vent pipe is connected to the rest of stuff.

there is a nice round gasket with the smaller screws that will apparently drop just the motor out.

but the frickin' manual doesn't even show that one iirc. : /

sucks because i have 6 gaskets that apparently i will not need and 0 that i need right now.

thanks. and i'm glad i asked.
 
240-0812__82782_std.jpg
yeah. i'm looking at the exploded pic in the manual right now. they don't show the motor apart from those cast pieces at all.
therefore they only show the gasket for that whole cast assembly and not the round one for just the motor.
frustrating.

this also means the manual hasn't got a part number for that gasket. that sux.

and this is also the only gasket the place i bought from shows.
 
The gaskets are cheap and can be had from many sources. I wouod still remove it and clean it (6 screws) and then put back on stove when the new gasket arrives.

Removal from any other point is gonna make cleaning and re-sealing difficult. IMHO.

Cleaning is easiest when done as suggested. Once the motor/plate combo comes off. You can take a torx head driver and remove the combustion fins/vanes. Make sure not to bend them. They are delicate and can be bent easily.

Here is a poc of what it should look like when removed.

Here is my Spring Cleaning thread from last yr. https://www.hearth.com/talk/threads/spring-cleaning.68422/
Good luck.44488-9cb797642541e94f0871f768df37979e.jpg
 
Its a standard 6" round Combustion blower gasket.
I think my Quad part # is 812-4710 (I think)?

But any Stove shop should have one. Or buy a sheet of Lytherm and make your own?
 
yeah. i'll be calling the local shop for now. then writing the place i bought from to see about trading these back to them.

thanks again, dex :)
 
We are watching this thread,for sure, as we have only burned a few bags since we had ours installed.....this will be invaluable to us the first time we want to try what St Earl is going to do.......love this site and all the info available!
 
yep. we should have the same manual. you will see they only show/list the gasket for the main housing.

but that number dex gave is correct.
i will be picking up one or two gaskets tomorrow. and i will confirm what part number i get. :)
 
They probably only show that gasket because they sell the whole housing as a replacement, not just the motor/fan part of it. That's my guess.
 
Even my Manual doesn't show that gasket.... When you look in the back, its shows motor to housing # and Housing to Stove #.

The actual gasket shown is not the one he needs. But if you look close (in the Quad manual anyways) you will find it...
 
frack. i think what has happened then is i ordered by part number from the manual, gaskets for the part where the assembly above the motor connects. where that cast piece that goes to the vent pipe is connected to the rest of stuff.

there is a nice round gasket with the smaller screws that will apparently drop just the motor out.

but the frickin' manual doesn't even show that one iirc. : /

sucks because i have 6 gaskets that apparently i will not need and 0 that i need right now.

thanks. and i'm glad i asked.

Hello

I will never have the wrong gasket now since I buy the sheets and cut them myself! They the exact same material and soooooo much cheaper!

See > https://www.hearth.com/talk/threads...lytherm-gasket-from-sheet.86680/#post-1119199
 
We are watching this thread,for sure, as we have only burned a few bags since we had ours installed.....this will be invaluable to us the first time we want to try what St Earl is going to do.......love this site and all the info available!

1.jpg
2.jpg
3.jpg
4.jpg
5.jpg
6.jpg
7.jpg
8.jpg
 
  • Like
Reactions: Eatonpcat
the shot w/ the screwdriver and razor knife are just posed. i didn't include a shot of how i gently hold the fins still while scraping.
also i didn't get pics of scraping the blade faces. i used the yellow razor knife gently . (be careful not to nick the metal if you do it this way) and that green handled razor scraper was great for getting down and into the 90 degree bends.

like dex says though, howevere you do it, be careful not to bend the fins.
the one shot of the motor resting on the transformer is just how i set it so it wasn't resting on the little external flywheel.
after i gave a gentle scraping w/ the putty knife i thought. "well that wasn't bad at all" but that was just the top layer.
it's a scale and i found the razors worked well with gentle scraping. i worked outward on the tips so i wouldn't catch edges by "cutting" in.

i'm sure you will find your own best way.

ha! and i scored at the local stove shop. he makes his own gaskets and sold me 4 for $5.
now i'm set and can find and order my own sheet material for future gaskets.

that little greenhandled razor scraper was great for certain areas.

and the one shot with the yellow knife, i am angling the tip in so as not to cut the edge of the vane.
the working backward/up and out was on the tips of the main faces of the vanes. didn't get a shot of that.

but whatever works as your system. this is just how i did.
 
  • Like
Reactions: Eatonpcat
Very nice and detailed removal. That should help "The D's" out immensely.

It isnt as hard as some people think. There really is not a whole lot to a pellet stove. Some are more complex than others. But even they are not overly complicated.

Congratulations on the successful cleaning and cheap gaskets. Thats a good score! ;)
 
  • Like
Reactions: The Ds
thanks for the compliment smoke show. *blushes* LOL!

ok so as i've said, i'm not really willing to do the leafblower since my horizontal terminates 10 feet up outside.

the ps50 really is very smooth as far as nooks and crannies go.
just the slab sided firebox. and the exhaust channel.
i'm sure i'm way ahead of the majority of folks who don't even clean their stoves.
i feel that my stove will be well protected this off season.

but the lint trap brush from my linteater kit is a perfect fit for the exhaust duct.

0012-1.jpg

i just placed the shop vac hose right there and it did great sucking up the dust.
i hand brushed that inner shelf/rim where the motor goes and vacced it out.
i'll soak a rag with pam and get the rest.
i'll coat all those inner areas w/ pam before putting the motor back.

feels good.
 
I would clean the convection blower squirrel cages also. It only takes a few minutes and by removing the dust build up, you will increase its efficiency, life span, and output. Yours looks very easy to get to. Mine is a PITA to get to (corner install), but it only takes 2 screws to drop the whole blower/motor assembly. No gasket needed there.

Just remove motor/blower, then remove both squirrel cages off the ends, soak in water for a few minutes, then scrub lightly with your brush or rag of choice.

My auger is easy to get at through my hopper, so I even add 2 drops of 3-n-1 in it. (There is a little place where I can see gears on the auger motor/ this is where I apply the oil) I also oil hoth motors, by putting 3-n-1 around the sealed bearing and trying to get some under the seal (needle works well).
 
thanks. :)
 
My last tip....... When I am finally done with EVERYTHING! I wipe the entire exterior of the stove down with Pledge Furniture Polish.. Gives it a shine and also protects the steel. Very thick and sticks for the duration of Summer. 44503-6b9ffdf662fdbcaf06e8737de6194af1.jpg
 
very nice.^ i think we may even have some on hand

my last tip is about putting the motor back in.

the screw holes are keyed. so you can fit the gasket first.
even with just the gasket it requires a little finesse.
i would locate the two back screws first. then the others will be in reach as you locate the holes.
it's just a little harder to locate those back holes if you've put in the other screws first.
leave them unscrewed enough to have room to fit the motor plate, push up to compress the gasket, and rotate into the keyed slots.

snug the screws up and work around several times. gradually getting them all tight taking up the slack created as the gasket compresses.
till they are all completely tightened.

i also marked one terminal and it's corresponding lead with a sharpie before i removed the motor wires.
there are only two,. but i figured better safe than sorry.

0012-2.jpg
002-1.jpg
 
  • Like
Reactions: SmokeyTheBear
The wires on all of the motors have 2 leads. It doesn't matter where they go. The auger, combustion, and convection motors can be plugged in any way. Some stoves it may matter, but on Quads, Heatilators, and Englanders, I know it does not matter.

All good info and knowing the path of the exhaust and where the ash likes to build up and hide, is priceless info to a pellet burner. Lots of pellet burners out therr, where the owners do not know the complete air path, from OAK to Exhaust vent. Knowing where and why the air goes where it does is vitally important to having the proper maintenance done on the unit..
 
  • Like
Reactions: The Ds
Thanks again for the info...This thread will be open when we do the first cleaning of the blower motors.....Wondering if we need to do this thorough of a cleaning after 15-18 bags burned in our stove.........We are definitely planning on removing the baffles and cleaning behind them,and we got a linteater type brush for the drill......neighbors too close...imo... to do the leafblower thingy.......Maybe after a full season......:) Thanks again for the pics ,advice, and general help--with some humor thrown in........


Dave and Deb
 
  • Like
Reactions: DexterDay
Why the Bear gave St_Earl's above post a like.

One should not assume that because a motor has two wires going to it that it doesn't make a difference how they are connected. A case in point would be such a setup using DC instead of AC. Getting that wrong would result in incorrect rotation of a rotating portion of the stove and things no work to well if stove motors happen to run sdawkcab. It is a good way of stopping possible incorrect assembly and faulty operation.
 
  • Like
Reactions: Eatonpcat
Status
Not open for further replies.