reducing Alderlea T5 combustion air

  • Active since 1995, Hearth.com is THE place on the internet for free information and advice about wood stoves, pellet stoves and other energy saving equipment.

    We strive to provide opinions, articles, discussions and history related to Hearth Products and in a more general sense, energy issues.

    We promote the EFFICIENT, RESPONSIBLE, CLEAN and SAFE use of all fuels, whether renewable or fossil.
Status
Not open for further replies.

raybonz

Minister of Fire
Feb 5, 2008
6,208
Carver, MA.
I could swear this has been mentioned before but can't find it.. I would like to reduce the combustion air so I can reduce heat output further but maintain secondary burn. Has anyone tried this on the Alderlea stoves and how did it work out? I am looking to reduce heat output as burn times are plenty long and not an issue. Even when loaded with large oak and cherry and air all the way down I get lots of heat. I don't think it's a gasket issue as I get good fire control with the air lever.. Any ideas?

Ray
 
  • Like
Reactions: Oldhippie
I've had my T5 since the spring of 08. My current set up has approx. 13 ft of Excel pipe from the stove up. Dbl wall interior. I've found the stove to be a free breather & have played around with the air flow. Remove the ash pan & look inside of that cavity. Inside you will see the primary air control with a rod going back to the back of the stove to conrol the secondary air. You will notice that by moving the air control that the primary air hole does not get covered all of the way. The easiest thing to play with is this hole. You can use some foil tape to cover just a fraction of this hole that is left open. A little makes a big difference. There is more you can do, but this is the easiest, without modifying the stove, as I may or may not have done.!!! I'm averaging 10 hr burns. I had this discussion with another member a few yrs ago...I don't post often, so it'd be easy to find.
 
  • Like
Reactions: Oldhippie and ScotO
I've had my T5 since the spring of 08. My current set up has approx. 13 ft of Excel pipe from the stove up. Dbl wall interior. I've found the stove to be a free breather & have played around with the air flow. Remove the ash pan & look inside of that cavity. Inside you will see the primary air control with a rod going back to the back of the stove to conrol the secondary air. You will notice that by moving the air control that the primary air hole does not get covered all of the way. The easiest thing to play with is this hole. You can use some foil tape to cover just a fraction of this hole that is left open. A little makes a big difference. There is more you can do, but this is the easiest, without modifying the stove, as I may or may not have done.!!! I'm averaging 10 hr burns. I had this discussion with another member a few yrs ago...I don't post often, so it'd be easy to find.
Thanks for posting gasavage! I do get long burns just looking to reduce the heat output and still burn cleanly.. This stove can really crank some BTU's! I will look your posts up and yes you don't post much here..

Ray
 
Hey Ray, have you tried other wood species and/or amounts? Obviously you can also vary the fan speed...

I scored 100% black locust from my supplier the past few yrs, and use a lot less wood, and get the same burn times and heat output. I guess my point is you can muck around with the amount/split size/species of the loads.

I am hoping with hurricane sandy producing a lot of fuel, I can continue to request and have delivered all locust, it is really nice to burn, and leaves very fine ash, and no residual coals - unlike oak.

I may play with covering the EBT, but just to experiment..
Hello madison! Yes I have tried larger splits, different woods etc. I have some locust but not a lot. I do ask my woodguy for it every year and if he has any he sends it to me. I have lots of ash, red oak, some hickory, some cherry, hard maple etc. I guess I am trying to level out the heat a bit. If it is mild out I turn the blower off and rarely run the blower above minimum speed. It's amazing how much heat the T5 delivers and how long it burns! Lots of my currently burning wood is on the small side and I know this isn't helping matters so I try to burn smaller load during the day if I am home and burn the large stuff overnight.

Ray
 
I used to stack my wood with all the lunker splits on the bottom, and all the odd balls, scraps and small splits ended up on the top. Now I actually try to mix the smaller stuff in with the larger splits just so I have a mix when I shuttle it into the garage rack. Always learning and evolving...

Let us know, (pics) how any of your modifications work. I think begreen mentioned the other day that he modified his T6, but I missed if he actually posted any pictures. I'm sure he will catch this thread. -- Thanks in advance BG!
 
I will reiterate gasavage's point, a little air reduction goes a long way. Our T6 is reduced by maybe 1/8" more than factory setting. This is on a ~20ft almost straight up chimney. Now I can only close the air control all the way when there is an intense hot burn. Definitely can not close it all the way down with locust burning.

This year I have changed my burning habits to achieve better long burns in milder weather without overheating the house. I am burning mostly E/W except for startups. And I am turning down the air much sooner. I go mostly by the look of the fire and not temps, but for example with this morning's restart from coals I loaded two ToL splits N/S with the hot coals between and a couple shaggy scraps of doug fir on top of the coals. They were burning well after about 5 minutes. I added 2 more side splits and one on top center, still N/S. Let them catch fire while making a cup of tea. After 10 minutes I started turning the air down to 1/2 while the stove top was about 250 and the flue (probe) temp was 400F. Let it go for another 10 minutes, then closed it down to 1/4. Let the flames rebuild and closed it down to 1/8 with stove top and pipe around 350F. The fire caught up eventually and now is burning at 400F stovetop and 300F stove pipe.

Outside it's 42F and the living room is 72F. This was only a partial load of about 1/3 the firebox's capacity, so I will probably reload around 2pm. Had it been 5º colder I would have loaded another layer of splits to about 2/3ds capacity. That would last until around 5pm (from a 7:30 am startup). The reload would be E/W.
 
  • Like
Reactions: flhpi and raybonz
Well crap. Ray, I went looking for the specific info I was referring to & it isn' there. It must have been a pm that I don't have access to anymore. I do remember it was with one of the folks from MN.

I too use the flue probe temp as a guide for closing down the air. The stove is easier to control & you never go nuclear. It's nothing for me to shoot over 1400 on the probe if I don't keep an eye on it.

Burn update....loaded stove this morning at 5:15...300 stove top.. with cherry, locust, & hedge. Had 200 deg stove top..with a full bed of coals at 7:15 this evening.....loving this stove!
 
  • Like
Reactions: raybonz
Well crap. Ray, I went looking for the specific info I was referring to & it isn' there. It must have been a pm that I don't have access to anymore. I do remember it was with one of the folks from MN.

I too use the flue probe temp as a guide for closing down the air. The stove is easier to control & you never go nuclear. It's nothing for me to shoot over 1400 on the probe if I don't keep an eye on it.

Burn update....loaded stove this morning at 5:15...300 stove top.. with cherry, locust, & hedge. Had 200 deg stove top..with a full bed of coals at 7:15 this evening.....loving this stove!
Yes I looked everywhere that explains it.. BG did supply good info so I know where to look however you need to be a contortionist to access that large hole towards the front bottom of the stove! I will need to use a mirror so I can see how much of an air gap is left with the air lever full right. I do watch my stack temp and yes it can get away if your not paying attention (don't ask me how I know lol).. I appreciate your info along with BG and madison and anyone I may have missed..

Ray
 
Well crap. Ray, I went looking for the specific info I was referring to & it isn' there. It must have been a pm that I don't have access to anymore. I do remember it was with one of the folks from MN.

I too use the flue probe temp as a guide for closing down the air. The stove is easier to control & you never go nuclear. It's nothing for me to shoot over 1400 on the probe if I don't keep an eye on it.

Burn update....loaded stove this morning at 5:15...300 stove top.. with cherry, locust, & hedge. Had 200 deg stove top..with a full bed of coals at 7:15 this evening.....loving this stove!

Greg, you and I traded emails (Sept 2010) regarding the reduction of combustion air and a few other issues/questions I had; though I don't believe we discussed lowering the burn temps.

Ray, I would be happy to share some of Greg's more specific info on combustion air reduction if you're still looking for help with that.
Hi djl!
Right now it is cold here so the heat is just about right. If you can post what info you have that would be great. BG gave me info as well so I am just gathering information at this time. If I do reduce air I will probably slightly reduce the air intake in the front of the stove which I assume is primary air? How is the T5 working out for you? I find it is a very capable heater with really long and clean burns..

Thanks,
Ray


Here are some excerpts from his emails:

Does the stove respond to the changes to make to the air control? If you remove the ash pan & look up inside where the ash pan was you'll see the primary air control. The secondary air control is in the far back of the stove, controlled by the long rod extending from the primary. Make sure things look right & haven't fallen apart. I made a minor modification to the air control. The current EPA certified stoves made today are made so that the minimum air setting can't close off the air completely & create a smoke dragon. In some cases the factory "minimum" setting still allows a little too much air. In a nutshell I've closed off the primary hole a tad...a piece of foil tape works.

Primary air feeds the boost air manifold, below the door opening, and the glass air wash. Secondary air feeds the baffle. The PE brochure has a pic. The PE line up is different than most other mfrs, being that the secondary air is controllable...to an extent. If you look at your air control you'll see that the lever movement is like a valve over a round opening. A round rod is connected to the back side of the lever. This rod is connected to the secondary air "valve" slide gate. Movement of the lever controls both the primary & secondary air. Most other mfrs use, essentially, a fixed orifice.

If you feel that you would like to try an air control mod try using some foil tape, or even a flat magnet, to very slightly cover the primary air inlet. That's the one you can access from the front...you can't access the secondary. It won't take much to make a difference...at most 1/16". With the air control fully right you'll see that there's already not much of an opening. I played around for a while & ended up bending the air control stop tab when I was content with a minimum setting. This closed down both primary & secondary a little. You'll know when you close things off too far.
-----------------------------------------------------

The T5 is working great for us, we heat our house solely with it. Hearth forums have definitely helped me along the way, in particular the foil tape over the primary air opening trick. After taping over part of the primary opening, I now have the needed control to keep it from getting too hot. At the cruising stage, I usually burn with the air-control lever almost all the way closed and sometimes all the way closed.

I don't worry too much about burning at a lower temp. I'm able to regulate the heat in our small family room by moving air with a thru-wall fan and a fan blowing into or out of the crawl space. If I am burning slower/less-heat/less wood, I'm typically not getting secondary combustion...or at least it's not visible.

The picture shows the crawl space and a fire at start-up. The sideways baby gate keeps the kitten out of the crawls space and still allows airflow if needed.
IMG_1568.jpg
 
Here are some excerpts from his emails:

Does the stove respond to the changes to make to the air control? If you remove the ash pan & look up inside where the ash pan was you'll see the primary air control. The secondary air control is in the far back of the stove, controlled by the long rod extending from the primary. Make sure things look right & haven't fallen apart. I made a minor modification to the air control. The current EPA certified stoves made today are made so that the minimum air setting can't close off the air completely & create a smoke dragon. In some cases the factory "minimum" setting still allows a little too much air. In a nutshell I've closed off the primary hole a tad...a piece of foil tape works.

Primary air feeds the boost air manifold, below the door opening, and the glass air wash. Secondary air feeds the baffle. The PE brochure has a pic. The PE line up is different than most other mfrs, being that the secondary air is controllable...to an extent. If you look at your air control you'll see that the lever movement is like a valve over a round opening. A round rod is connected to the back side of the lever. This rod is connected to the secondary air "valve" slide gate. Movement of the lever controls both the primary & secondary air. Most other mfrs use, essentially, a fixed orifice.

If you feel that you would like to try an air control mod try using some foil tape, or even a flat magnet, to very slightly cover the primary air inlet. That's the one you can access from the front...you can't access the secondary. It won't take much to make a difference...at most 1/16". With the air control fully right you'll see that there's already not much of an opening. I played around for a while & ended up bending the air control stop tab when I was content with a minimum setting. This closed down both primary & secondary a little. You'll know when you close things off too far.
-----------------------------------------------------

The T5 is working great for us, we heat our house solely with it. Hearth forums have definitely helped me along the way, in particular the foil tape over the primary air opening trick. After taping over part of the primary opening, I now have the needed control to keep it from getting too hot. At the cruising stage, I usually burn with the air-control lever almost all the way closed and sometimes all the way closed.

I don't worry too much about burning at a lower temp. I'm able to regulate the heat in our small family room by moving air with a thru-wall fan and a fan blowing into or out of the crawl space. If I am burning slower/less-heat/less wood, I'm typically not getting secondary combustion...or at least it's not visible.

The picture shows the crawl space and a fire at start-up. The sideways baby gate keeps the kitten out of the crawls space and still allows airflow if needed.
View attachment 87207
Thanx DJL that's great info! BG basically said the same thing and you confirmed what I thought was primary air.. The T5 is quite a heater especially considering that it is a secondary burn stove! The baffle produces nice flame without the so-called gas burner look that the tubes seem to create. Not that there anything wrong with this! I still can't get over how long the T5 can burn on a full load and think I could go 12 hours because the coals are huge at 10+ hours.. Thanx for posting the info and Happy New Year!
The porcelain finish looks great on the T5 btw!
Ray
 
Will take pictures tomorrow and it works great.. But deletes the warranty... Which i dont care! as after spending 3 grand this thing has to work right for us :mad: ;)

Insurance Company might care though? ::-)

loon

Looking forward to seeing it. My insurance company seemed disinterested in our wood stove project. I'm sure that would change if there was a house fire.
 
  • Like
Reactions: raybonz
All it does is pinch off the draft by a 1/2in dj..But gives us some big time..

I have to pull the Ash Box out to show you. And a Mirror :p So it being New Years Eve. The pictures aint gonna happen till morning. 'hic' :)


loon
 
Here are some excerpts from his emails:

Does the stove respond to the changes to make to the air control? If you remove the ash pan & look up inside where the ash pan was you'll see the primary air control. The secondary air control is in the far back of the stove, controlled by the long rod extending from the primary. Make sure things look right & haven't fallen apart. I made a minor modification to the air control. The current EPA certified stoves made today are made so that the minimum air setting can't close off the air completely & create a smoke dragon. In some cases the factory "minimum" setting still allows a little too much air. In a nutshell I've closed off the primary hole a tad...a piece of foil tape works.

Primary air feeds the boost air manifold, below the door opening, and the glass air wash. Secondary air feeds the baffle. The PE brochure has a pic. The PE line up is different than most other mfrs, being that the secondary air is controllable...to an extent. If you look at your air control you'll see that the lever movement is like a valve over a round opening. A round rod is connected to the back side of the lever. This rod is connected to the secondary air "valve" slide gate. Movement of the lever controls both the primary & secondary air. Most other mfrs use, essentially, a fixed orifice.

If you feel that you would like to try an air control mod try using some foil tape, or even a flat magnet, to very slightly cover the primary air inlet. That's the one you can access from the front...you can't access the secondary. It won't take much to make a difference...at most 1/16". With the air control fully right you'll see that there's already not much of an opening. I played around for a while & ended up bending the air control stop tab when I was content with a minimum setting. This closed down both primary & secondary a little. You'll know when you close things off too far.
-----------------------------------------------------

The T5 is working great for us, we heat our house solely with it. Hearth forums have definitely helped me along the way, in particular the foil tape over the primary air opening trick. After taping over part of the primary opening, I now have the needed control to keep it from getting too hot. At the cruising stage, I usually burn with the air-control lever almost all the way closed and sometimes all the way closed.

I don't worry too much about burning at a lower temp. I'm able to regulate the heat in our small family room by moving air with a thru-wall fan and a fan blowing into or out of the crawl space. If I am burning slower/less-heat/less wood, I'm typically not getting secondary combustion...or at least it's not visible.

The picture shows the crawl space and a fire at start-up. The sideways baby gate keeps the kitten out of the crawls space and still allows airflow if needed.
View attachment 87207


Thanks DJL! I knew I had a pretty good conversation with someone. Apparently I deleted everything on my end. Now we have the info in the forums & will be easier to find. Happy to hear the stove is working well for you. It looks fantastic!
 
  • Like
Reactions: raybonz
Ok..The pic is upside down and through a mirror ==c 
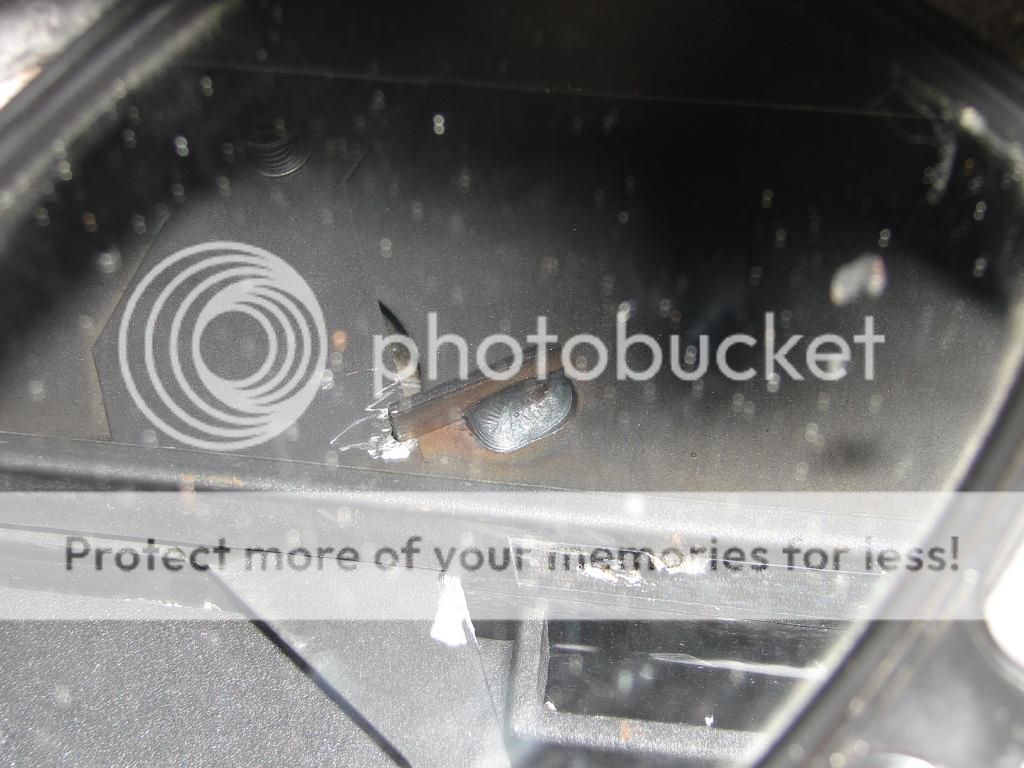
But in the first picture you can see the ground out part of the arm and the second is it closed.. I did it very slow as i didnt want to cut off the air totally,and there woulda been no going back :cool:

Picture2274_zpsb8e01486.jpg


Picture2267_zpsd2779cf3.jpg
 
Nice job on that Loon! That must have been tough to do unless you raised the stove..
 
Nice job on that Loon! That must have been tough to do unless you raised the stove..


Thanks ray..
I really didnt want to start messing with the new stove but i was coming home from work to a cool house o_O

I just used the mirror and the Dremmel but had to work backwards :p ;)
 
  • Like
Reactions: raybonz
So, allows the air control lever to move further to the right I see. That is a nice job, more durable than the aluminum foil tape I suspect. Though I just checked mine out after 3 years and it's in good shape so far. I tried to take a picture using the mirror and a flashlight, but failed to get a good one after three attempts. Note to self and others, don't get the top of your head too close to the front of a burning stove :ZZZ. I'll try again after the stove cools down ==c
 
  • Like
Reactions: loon and raybonz
So, allows the air control lever to move further to the right I see. That is a nice job, more durable than the aluminum foil tape I suspect. Though I just checked mine out after 3 years and it's in good shape so far. I tried to take a picture using the mirror and a flashlight, but failed to get a good one after three attempts. Note to self and others, don't get the top of your head too close to the front of a burning stove :ZZZ. I'll try again after the stove cools down ==c

'Note to self and others, don't get the top of your head too close to the front of a burning stove' !!! ;lol


Thanks dj.. The only problem i can see is maybe a little more creosote but the Baffle/Chimney is an easy cleanout ;)
 
'Note to self and others, don't get the top of your head too close to the front of a burning stove' !!! ;lol


Thanks dj.. The only problem i can see is maybe a little more creosote but the Baffle/Chimney is an easy cleanout ;)

I clean my chimney once a year (late summer) and have had very little creosote buildup. I always maintain a burning temp in the flue of at least 400 which probably helps to minimize creosote.

Pictures aren't very good, but if you look closely, you can see there is little to no opening when lever is all the way to right, which tells me I have some leaks elsewhere to maintain a decent fire with lever fully closed. I suspect the door gasket, which I'm going to post about shortly.

IMG_1584.jpgIMG_1584.jpgIMG_1585.jpg
 
  • Like
Reactions: raybonz
Status
Not open for further replies.