
A BIG thank you to all that have helped me with all my dumb questions related to my BIG E and the install. My wife (she is absolutely awesome, loves to do this kind of stuff) and I finished up the install yesterday and fired it up last night. It ran all night, despite me dreaming of starting the roof on fire, hahaha...
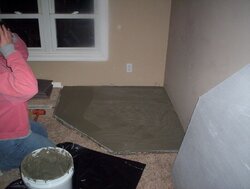
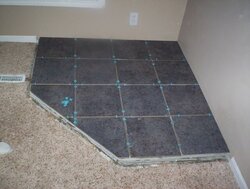
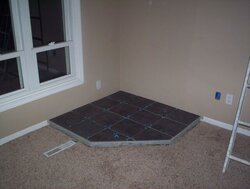
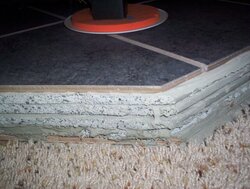
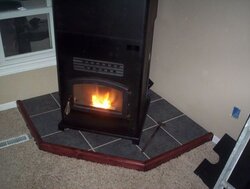
Anyway, here are some details. We built the hearth pad ourselves - cut the carpet and relocated the vent in the floor. Put down a piece of 1/2" plywood, and 4 layers of Durock on top of that set in place with thinset mortar. Total R value should be at least 1.4 (1.0 required by Breckwell). Added the tile and trimmed it with stained 2x4 Pine.
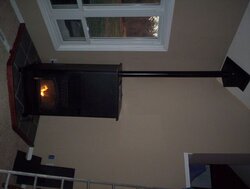
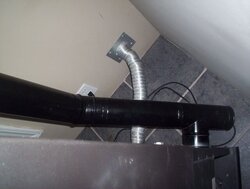
The vent is Simpson Duravent (we painted high temp black) set up with the cleanout T at a 45 deg angle, with 1-12" straight, a 45 deg elbow, and 2-60" straights to go up and out of the roof. I think I'll add another 24" to the top of the vent, just to get it MORE beyond the 12" minimum above the roofline required by Breckwell.
I also used a Simpson cold air kit, for 30 bucks it was well spent. Makes for a very clean installation.
Well, here's my pics, let me know what you think. Feel free to ask questions.
Thanks again!
Pat
Anyway, here are some details. We built the hearth pad ourselves - cut the carpet and relocated the vent in the floor. Put down a piece of 1/2" plywood, and 4 layers of Durock on top of that set in place with thinset mortar. Total R value should be at least 1.4 (1.0 required by Breckwell). Added the tile and trimmed it with stained 2x4 Pine.
The vent is Simpson Duravent (we painted high temp black) set up with the cleanout T at a 45 deg angle, with 1-12" straight, a 45 deg elbow, and 2-60" straights to go up and out of the roof. I think I'll add another 24" to the top of the vent, just to get it MORE beyond the 12" minimum above the roofline required by Breckwell.
I also used a Simpson cold air kit, for 30 bucks it was well spent. Makes for a very clean installation.
Well, here's my pics, let me know what you think. Feel free to ask questions.
Thanks again!
Pat
 !
!