How Do I Mount Duravent Cap to Clay Liner?

  • Active since 1995, Hearth.com is THE place on the internet for free information and advice about wood stoves, pellet stoves and other energy saving equipment.

    We strive to provide opinions, articles, discussions and history related to Hearth Products and in a more general sense, energy issues.

    We promote the EFFICIENT, RESPONSIBLE, CLEAN and SAFE use of all fuels, whether renewable or fossil.

cparts

Member
Aug 7, 2017
52
Southwest Virginia
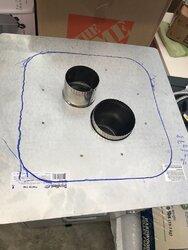
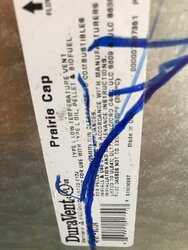
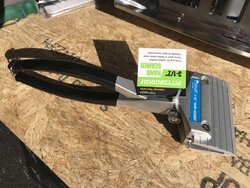
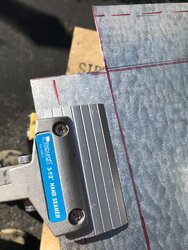
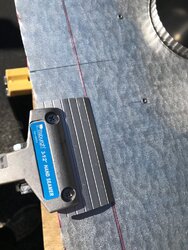
I'm at a loss and can't figure out how to mount the Duravent Prairie Termination Cap (at $250.00) to the (old and cracked) clay liner in my chimney. It has the OAK 3" hookup in the cap, so up and down the chimeny with a 4" and 3".

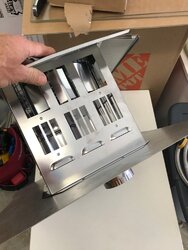
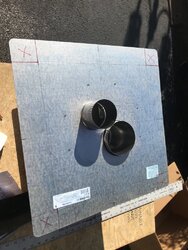
The cap has a flat piece of metal. I guess my options are:

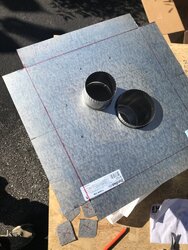
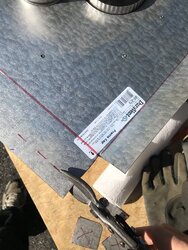
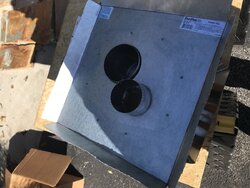
Bend the sheet metal, which looks nearly impossible the way the cap is put together. but then I still have to figure out how to attach it to the clay liner. The 1968 liner is heavily used and sooty. I suspect it, even if I could bend it, that any drilling to attach it would just fracture the liner. If you think bending is the only way, any ideas on what to use to bend it?

I' could technically glue it to the clay liner, but it is sooty. I'm concerned that high winds would rip it off after the glue fails or due to freezing/thawing/age/clay liner flaking off.

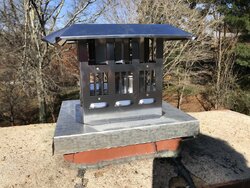
It is a high wind area (aren't all chimneys, really).

Anybody got any ideas?

Basically, if I could figure this out I could get my install done. In the meantime, stove and everything is in the garage waiting.

Thanks!
 

Attachments

  • IMG_2216.jpg
    IMG_2216.jpg
    107.2 KB · Views: 186
  • IMG_2218.jpg
    IMG_2218.jpg
    110.5 KB · Views: 189
  • IMG_2217.jpg
    IMG_2217.jpg
    100.1 KB · Views: 172
Disregard to blue lines you drew on the underside of the cap. Measure the flue tile & add 1/4 " in all directions. Lay out the underside again, centering on the sheet metal instead of the vent/cold air intake. Draw the lines all the way to the edge so that you have 4 small squares in the corners of the plate. Cut those 4 corners out with tin ships. Get yourself a "HAND SEAMER" with a deep enough throat & bend the sides DOWN between the corner cut outs. This will ensure that all 4 bends are equal in length...Wire brush the top of the flue tile to clean it as well as you can. Run your liner & intake tubing down the flue & leave about a foot sticking out of the top. Take some unfaced fiberglass insulation & stuff it down ALL around the tubing, creating a dead air space below it. Attach the top to the tubes using 1/4" drive zip screws. Run a bead of RTV silicone around the cleaned surface, & press the bottom of the plate down into the RTV & hold it in position until someone below can pull the tubing down to make sure the plate doesn't move. You should be good to go.
 
  • Like
Reactions: stovelark
Wow Bob, Thanks for that answer.

So, I'm hearing that it does not need to be attached to the clay liner with any screws.

When I bend the sides down am I bending them down to be 90 degrees (so point to the ground), so the sides "sleeve" the outside of the clay liner?

Jon
 
That’s how I read it. The cap can’t blow off with the flex duct attached anyway.
 
Wow Bob, Thanks for that answer.

So, I'm hearing that it does not need to be attached to the clay liner with any screws.

When I bend the sides down am I bending them down to be 90 degrees (so point to the ground), so the sides "sleeve" the outside of the clay liner?

Jon

Yep. We actually call the process "returning" the sides.
It gives the assembly a little more rigidity & also help to
prevent any rain from entering the flue.
 
Hopefully with pics this time
 

Attachments

  • EB96267E-35CA-4567-8568-F68758C2A839.jpeg
    EB96267E-35CA-4567-8568-F68758C2A839.jpeg
    156.1 KB · Views: 148
  • 0B4AFC71-D678-4AD7-AB64-98CB2F949545.jpeg
    0B4AFC71-D678-4AD7-AB64-98CB2F949545.jpeg
    235.1 KB · Views: 162
  • A68EAC77-D1FA-4424-BD0E-1870D5AB4388.jpeg
    A68EAC77-D1FA-4424-BD0E-1870D5AB4388.jpeg
    169 KB · Views: 153
  • F41A02BB-8673-4DBF-B589-73948FD0AA85.jpeg
    F41A02BB-8673-4DBF-B589-73948FD0AA85.jpeg
    153.1 KB · Views: 159
  • F53B5DEB-22EA-45E0-9E24-8843FA5492AA.jpeg
    F53B5DEB-22EA-45E0-9E24-8843FA5492AA.jpeg
    173.3 KB · Views: 150
  • 35DDADFC-A23D-4A07-91EF-3D6DB08A1123.jpeg
    35DDADFC-A23D-4A07-91EF-3D6DB08A1123.jpeg
    172.2 KB · Views: 172
  • 3A23A3A5-7243-488B-8E99-9ECB7E0BE0EC.jpeg
    3A23A3A5-7243-488B-8E99-9ECB7E0BE0EC.jpeg
    157.3 KB · Views: 181
  • 44D723D8-5A07-4F9D-B610-B3B624E54B76.jpeg
    44D723D8-5A07-4F9D-B610-B3B624E54B76.jpeg
    281.7 KB · Views: 195
Nice work, there's definitely a feeling of accomplishment tackling something like this and having it come out so good. Kudos!
 
Disregard to blue lines you drew on the underside of the cap. Measure the flue tile & add 1/4 " in all directions. Lay out the underside again, centering on the sheet metal instead of the vent/cold air intake. Draw the lines all the way to the edge so that you have 4 small squares in the corners of the plate. Cut those 4 corners out with tin ships. Get yourself a "HAND SEAMER" with a deep enough throat & bend the sides DOWN between the corner cut outs. This will ensure that all 4 bends are equal in length...Wire brush the top of the flue tile to clean it as well as you can. Run your liner & intake tubing down the flue & leave about a foot sticking out of the top. Take some unfaced fiberglass insulation & stuff it down ALL around the tubing, creating a dead air space below it. Attach the top to the tubes using 1/4" drive zip screws. Run a bead of RTV silicone around the cleaned surface, & press the bottom of the plate down into the RTV & hold it in position until someone below can pull the tubing down to make sure the plate doesn't move. You should be good to go.

For the record, I was unable to use zip screws and it was challenging to drill through that stainless cap while my partner was holding the cap and liner on the roof. I broke a couple of bits and realized it wasn't going to work, b/c I needed a solid surface to drill on.

I took both the 3 and 4 inch liner out, and carried it off the roof. Then I drilled and screwed the cap to the pipes on the ground, twined them together in multiple places so it was like one pipe, carried it back up there with three people, and fed it down the chimney like that (obviously cutting off the twined as it went in).
 
I made an account just to say thanks for posting these photos! I did a similar installation over the weekend and your example was a huge help.
Welcome to the forum! Now that you're here, you might as well grab a seat by the fire and stick around to chat!