
Well, after a year of lurking on this site and doing research, I have finally completed an insert installation. Here are the details:
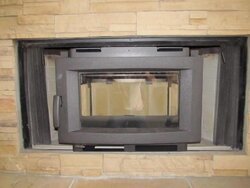
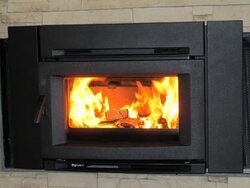
Insert: Regency CI1200
Liner: Magnaflex Insulflex stainless steel insulated flex liner – 6†ID
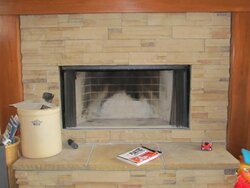
Original fireplace: MHSC BR42 prefab
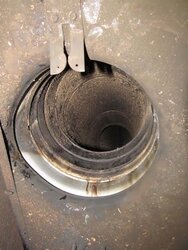
Original Chimney: Double wall prefab 8 “ ID inner tube
Damper Removal: sawzall (messy but easy)
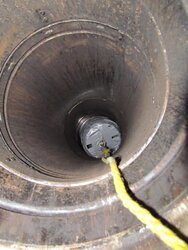
Liner Install: After attempting a bottom up unsuccessfully, I routed from top down. I had two successive bends to navigate which caused some difficulty in the last 48â€. I had to fashion a pulling fixture using my boat winch and some wood.
Adapter Connection: I used the offset adapter supplied with the stove an the adapter collar supllied with the magnaflex kit. I used furnace cement to seal the connections.
Blockoff Plate: I stuffed some insulation from the extra length of liner between the ss liner and existing chimney pipe at the damper opening. Then I made a blockoff plate from 26GA ss that I got from a local metal supply for $8. I secured this to the fireplace ceiling with sheet metal screws and sealed with furnace cement at the ceiling and at the pipe perimeter.
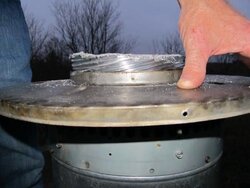
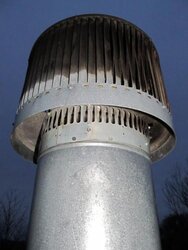
Chimney Top: Secured the liner with 3 sheet metal screws to the existing 8†chimney tube and cutoff the liner about an inch above the existing opening. Then, I replaced the existing rain cap (did not use the collar or rain cap supplied with the magnaflex kit).
Insert: This was the easiest part although needed help lifting into place.
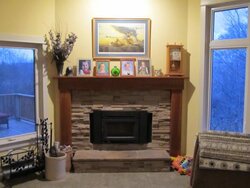
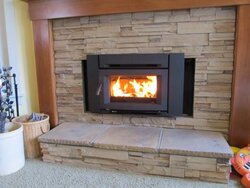
First fire went great. Modest heat due to size and no blower but way better than existing fireplace. I plan to experiment and create an add- on blower that will sit below the insert and on the hearth later. I was reluctant to show pics of the finished product just yet because of the openings in the stone on either side of the insert. But, my plan is to extend that stonework to fill the gaps. I am uncertain when that will actually get done though so I figured I share now. It’s functional! The people and animals are happy! It’s good to be an official member now even if it is just a little guy.
Link to pics:
https://picasaweb.google.com/jblood98/InsertInstall?authuser=0&feat=directlink
Insert: Regency CI1200
Liner: Magnaflex Insulflex stainless steel insulated flex liner – 6†ID
Original fireplace: MHSC BR42 prefab
Original Chimney: Double wall prefab 8 “ ID inner tube
Damper Removal: sawzall (messy but easy)
Liner Install: After attempting a bottom up unsuccessfully, I routed from top down. I had two successive bends to navigate which caused some difficulty in the last 48â€. I had to fashion a pulling fixture using my boat winch and some wood.
Adapter Connection: I used the offset adapter supplied with the stove an the adapter collar supllied with the magnaflex kit. I used furnace cement to seal the connections.
Blockoff Plate: I stuffed some insulation from the extra length of liner between the ss liner and existing chimney pipe at the damper opening. Then I made a blockoff plate from 26GA ss that I got from a local metal supply for $8. I secured this to the fireplace ceiling with sheet metal screws and sealed with furnace cement at the ceiling and at the pipe perimeter.
Chimney Top: Secured the liner with 3 sheet metal screws to the existing 8†chimney tube and cutoff the liner about an inch above the existing opening. Then, I replaced the existing rain cap (did not use the collar or rain cap supplied with the magnaflex kit).
Insert: This was the easiest part although needed help lifting into place.
First fire went great. Modest heat due to size and no blower but way better than existing fireplace. I plan to experiment and create an add- on blower that will sit below the insert and on the hearth later. I was reluctant to show pics of the finished product just yet because of the openings in the stone on either side of the insert. But, my plan is to extend that stonework to fill the gaps. I am uncertain when that will actually get done though so I figured I share now. It’s functional! The people and animals are happy! It’s good to be an official member now even if it is just a little guy.
Link to pics:
https://picasaweb.google.com/jblood98/InsertInstall?authuser=0&feat=directlink
")


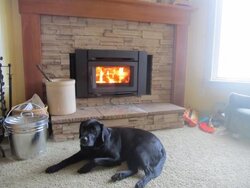
 The Lab approves.