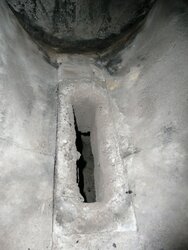
This is what the nozzle in the EKO looks like after a pre-season clean-out. A little more erosion than I would like to see.
This is going to be the 3rd season on it and 90% of the 10 cords of wood a season was oak.
Also I should note that during the heating season this thing runs almost nonstop (heating over 4000 sq. ft. in 4 different buildings)
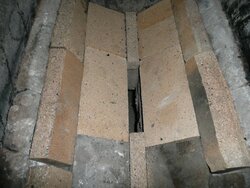
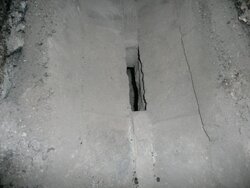
So to try to extend its life I cut some standard firebrick and formed a new nozzle opening in the upper chamber.
So far on the couple times I've burned it this way it works fine,maybe even a little better but with the width of the nozzle narrower (maybe closer now to what it was when new)coals don't seem to fall through as easily. Any way we'll run it this way for a while and see how it goes.
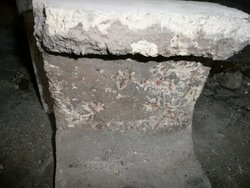
Also I shot a picture of one of the lower chamber blocks. They were replaced at the beginning of last season.Next time I will cast my own or try to make something out of standard firebrick that you can buy locally.
To you guys making your own boilers,Make the nozzle and refractories Easy To Replace!
This is going to be the 3rd season on it and 90% of the 10 cords of wood a season was oak.
Also I should note that during the heating season this thing runs almost nonstop (heating over 4000 sq. ft. in 4 different buildings)
So to try to extend its life I cut some standard firebrick and formed a new nozzle opening in the upper chamber.
So far on the couple times I've burned it this way it works fine,maybe even a little better but with the width of the nozzle narrower (maybe closer now to what it was when new)coals don't seem to fall through as easily. Any way we'll run it this way for a while and see how it goes.
Also I shot a picture of one of the lower chamber blocks. They were replaced at the beginning of last season.Next time I will cast my own or try to make something out of standard firebrick that you can buy locally.
To you guys making your own boilers,Make the nozzle and refractories Easy To Replace!