"Papa Bear" Restoration Advice for newbie

  • Active since 1995, Hearth.com is THE place on the internet for free information and advice about wood stoves, pellet stoves and other energy saving equipment.

    We strive to provide opinions, articles, discussions and history related to Hearth Products and in a more general sense, energy issues.

    We promote the EFFICIENT, RESPONSIBLE, CLEAN and SAFE use of all fuels, whether renewable or fossil.
Status
Not open for further replies.

Fisher newbie

New Member
Mar 7, 2016
6
Texas
Howdy,
I'm new to wood burning stoves, but have always wanted one. Two days ago I aquired a 1979 fisher Papa Bear at what I hope was a good deal ($100), in what seems to me to be in good shape (pictures below). It has two broken bricks and two whole ones that fell off the wall which I will fix shortly.

I have been browsing the forum for a few days trying to get to know what my interest in stoves was getting me in to and really appreciate the knowledge and community participation. I have gleamed plenty of information/ideas/how too from the multitude of posts.

What I am looking to start is a single thread which can put as many restoration tips in one thread as possible, anything you can think someone in my shoes might need to know or find useful. If this already exist I appologise. Please direct me to it? I know there are a lot of answers scattered around the forum and have found some, but thought everyone could benefit from a succinct restoration thread.

As for my Papa Bear VI;
I have already fixed the hinge pins (which were frozen and bent), unfroze the 5 fin vents, and fired it up for the first time in 21 years. I'm way too excited about this stove.
My plans for him (Papa Bear) is to instal a baffle (using Coaly's instructions), six feet of single wall pipe fixed to be free standing (attach to t-post?), refinish him, and use him outside (is this ok?) in our breakfast garden while I build an outdoor cooking area in which I'll use him (make cocoa, heat water etc...) I really want him to look brand new as I love the looks of the old guy, so here are some questions I could use help with, but please include anything you think will help a newbie.

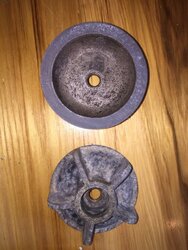
What's the best way to remove/restore the air vent knobs?
What's the best rust removal method for the outside, is bicarbonate blasting any better than wire brush?
What is the best/most durable paint for the exterior surfaces?
Where can I find those fancy bear feet? Other parts?
Anyone have any tips for cooking on top of him?
What should be the exact deminsions for the baffle plate?
Anything interesting you can tell about him from the serial plate?

I appreciate the help, and hope I'm not restarting another thread.

And now, without further hoopla meet Papa Bear:
image.jpg
He was made in Hesston Kansas in November 1979, number F715419
image.jpg image.jpg image.jpg
P.s. This is also the first forum I have ever joined so any constructive criticism is welcome.....image.jpg
 
Welcome to the Forum !

Your use outdoors is quite unique, so it should be cleaned down to bare metal and primed with Stove Bright Primer first. Sand or media blasting would be recommended in your case to get adhesion of the base primer coat. Priming is not necessary for indoor use. Stove Bright is favored over other paints for restoration since Forrest Paints in Oregon which is now Stove Bright was the first paint used and this manufacturer made the first color paint other than black for Fisher which started the entire stove color evolution. It is also the most durable and does smell worse than any other when applying and curing. It's more of an industrial coating and you can tell it's much more potent than other high temp paints. Just the over spray on your arms feels different than any other paints too. Literally makes the hairs stand on end stiff causing a sensation I don't get with other paints. Don't breathe the stuff at all and use a mask of some sort. Nasty stuff.

I would not suggest bear feet for outdoor use since the straight type are cast iron and subject to rust. The angled feet are a white metal or pot metal base plated with white brass and are subject to corrosion outside. They average $219 on eBay right now, which hovered around the $100 mark for years and lately have been selling between 200 and 299. Crazy for an outdoor stove.

Parts come up for sale on eBay from time to time, but they are very fixable and don't wear out if taken care of. Barr Castings in Oregon has the original 4 fin draft cap molds and offers 4 or 5 fin in any material you want them made in and are cheaper brand new than selling prices on eBay. The new style springs for door handles are available nickel or brass plated from Woodman's that match perfectly. The older stainless tight wound springs would be special made or found as a collector item and priced accordingly.

Baffle plate dimensions are more for chimney flue size. You won't get long duration efficient burns without an efficient chimney.

The upper cook top gets hotter than the lower for pan frying and cooking meals. The front is more suited for soups, stews, and simmering. For outdoor use I would have leaned towards a double door stove with screen for fire viewing as well. Nothing stopping you from making your own screen and putting a stove pipe damper in the first section of pipe to slow the fire with door open. You will need a damper in the pipe to slow the fire as well. You won't have a chimney that creates the correct low pressure area in stove to get the correct air flow through firebox for the correct burn so you will be running with damper closed much of the time. It's going to smoke more than being connected to a proper chimney and that type use is not recommended. internal firebox temps are not going to be high for a clean burn so a baffle plate would help raise those temps. 17 X 14 inch plate is common with a chimney, but your results will vary.

Thanks for all your pictures and UL tag. That is one of the earliest known.
I sized them to thumbnails that can be clicked on to view full size. This saves bandwidth on forums, but you did exceptionally good posting pics the first time.

I would suggest setting in a gazebo or under some sort of cover to protect from the weather !
The top will get pitted when water sets on it and a tarp doesn't allow air circulation to dry out.
 
Coaly,
Thank you for your reply, your knowledge is greatly appreciated and I will follow all your suggestions, even forgoing the snazzy bear feet. He will be uncovered until May then he'll go on my back porch until I finish my porch extension ( hopefully this summer) and cooking area. I believe I will bicarbonate blast it, there are several local companies and I want it to last another 35 years. I prefer to do things right the first time.
I believe I will use the t-pipe connection you suggested in a previous post to make cleaning easier, then the damper in the first upright. If I were to make the pipe chimney longer would it create the necessary draft, if so how long would be needed?
I plan on making a screen for fire viewing (and s'more making) Wood stoves are hard to come by here in Texas (it just doesn't get cold that often), and cooking is my primary usage goal ....so I got the first stove I could....but would snatch up a grandma or grandpa if I found one.
I was thinking about setting the back about an inch higher than the front to facilitate runoff of any rain, would that be acceptable?
 
Oops, that posted while I was working on it....
Would it be acceptable for me to post links to all the suggested retailers and manufacturers I've gleened from the forum so they're all in one thread/post? Or have I missed this being done already?
 
Extending the single wall pipe higher does not do the same thing as a chimney. Air cools single wall pipe rapidly. The difference between inside flue and outside flue temperature creates the draft necessary for combustion inside a box. The flue in a chimney is insulated to keep it hot enough to prevent smoke particles from sticking to the walls. The higher you go, the cooler it becomes very quickly with any breeze cooling it rapidly.
Papa Bear is the best choice for cooking since it has the largest cook top. Double door models have very little cook top space.
Raising the rear is a good idea but only slightly since just a little makes a big difference cooking.
You should have something like a stock pot or soup pan to cover the stack when done to prevent water inside pipe.

For boiling water or cooking fast in a kitchen, a wood or coal stove is made with removable cook top lids or eyes that you remove for direct contact with the fire. Cooking on your solid stove top is much slower. Using pans with copper clad bottom speeds heat transfer and cooks much faster. Griddles must have a flat bottom in full contact with top surface. Many are built with a rim around the edge to cover two gas or electric range top burners and do not work on a flat stove top. Get yourself some sandwich irons or hobo iron cookers if you don't have them. Amish call them Mountain Pie or Pudgy Pies.

mountain-pie-maker.jpg They work good for S'mores or steaming / browning fresh veggies in too.
 
  • Like
Reactions: Fisher newbie
Extending the single wall pipe higher does not do the same thing as a chimney. Air cools single wall pipe rapidly. The difference between inside flue and outside flue temperature creates the draft necessary for combustion inside a box. The flue in a chimney is insulated to keep it hot enough to prevent smoke particles from sticking to the walls. The higher you go, the cooler it becomes very quickly with any breeze cooling it rapidly.
Papa Bear is the best choice for cooking since it has the largest cook top. Double door models have very little cook top space.
Raising the rear is a good idea but only slightly since just a little makes a big difference cooking.
You should have something like a stock pot or soup pan to cover the stack when done to prevent water inside pipe.

For boiling water or cooking fast in a kitchen, a wood or coal stove is made with removable cook top lids or eyes that you remove for direct contact with the fire. Cooking on your solid stove top is much slower. Using pans with copper clad bottom speeds heat transfer and cooks much faster. Griddles must have a flat bottom in full contact with top surface. Many are built with a rim around the edge to cover two gas or electric range top burners and do not work on a flat stove top. Get yourself some sandwich irons or hobo iron cookers if you don't have them. Amish call them Mountain Pie or Pudgy Pies.

View attachment 176488 They work good for S'mores or steaming / browning fresh veggies in too.
Thank you!
I'm now looking for some double wall, I want it to work correctly. I plan on putting a roof type termination on the end too, that should prevent rain entering the pipe. Have you ever painted galvanized stove pipe before?
I'm thinking about honing/seasoning some 1/4" steel for a griddle area, do you think it'll get hot enough (pancakes etc,,,) if it's placed on the papa bear? With the small fire I built the other night it boiled water in a 2qt pan in about 10 min, figure I'll get an infrared thermometer for testing, probably instal pipe and chamber thermometers in the future....
I got a couple sandwich irons, learning with them in a fire pit, hadn't thought about using them in the oven, good idea. Ever heard of anyone cooking biscuits in a papa bear?
I've been working on him here and there as I get time, found a sandblaster for the body, and am setting up electrolysis for the door/parts.
Are the 5 fin knobs original? They appear to be and look like they were painted black maybe?
 
I've been working on my Papa Bear restoration a bit, figure maybe my learning will help others, or maybe others can teach me what I'm doing wrong.
My draft knobs are 5 fin and appear to be aluminum with a steel nut for a ware surface. The mounting nut and bolt where's were tack welded together! I guess to prevent backing off with adjustments? Is this factory?
image.jpg image.jpg
I had to grind away part of the bolts and the surface of nuts to remove them for restoration. Might still be reusable with a good tack weld?
image.jpg
Here the knobs after brushing and about 5 hours in a tumbler with walnut, maybe a more aggressive medium would work, anyone try this? We're they painted from the factory?
image.jpg
The hinge pins are completely out and ready for cleaning, could replace them, but want to try reusing them (?). I'm planning on using electrolysis to clean up the door and other parts, setting up the tank this weekend. Here are a couple before pictures of the door, really hoping electrolysis is successful, anyone got tips?
image.jpg image.jpg
That's where I'm at for now, I would love to see/learn from others pictures or experience!
 

Attachments

  • image.jpg
    image.jpg
    137 KB · Views: 320
  • image.jpg
    image.jpg
    137 KB · Views: 292
There is no galvanized stove pipe. Heating anything galvanized releases toxic fumes. Heat duct is commonly galvanized and doesn't get hot enough to be a danger. Painting galvanized steel requires special primer and when used for roof panels or roof accessories it should be cleaned well to remove oils and preferably allowed to "weather" before sealants or paint is applied.
Your draft caps are original. Wiping with lacquer thinner will remove paint and show if paint is removed from them. Cleaning with Scotch Bright is normally enough before painting. Wipe paint off edges with mineral spirits before heat cure and buff with Scotch Bright to highlight edges as shown below. Not all caps were done this way, but I think it looks the best. Later stoves with nickel plated doors had the edges polished as compared in picture below.

Alum. Brushed on L.  Polished on R..JPG Brushed aluminum on left, Polished on right. The best caps will have a steel threaded insert to prevent wear of soft aluminum threads. Keep the threads greased or coated with silver anti-seize to prevent thread wear as well as hinge pins.
I've seen many tack welded and normally don't remove them if the threads don't need wire wheeling. You can clean and grease them through the intake opening from inside door.

I wire wheel pins and door. The amount of paint, stove black (the worst) or rust determines the wire brush or method used. Yours is pretty much indestructible, but I caution against aggressive cleaning of polished brass and nickel doors.

Using the search feature at top right will find threads with draft cap details, cleaning and restoring tips.
 
  • Like
Reactions: Fisher newbie
Status
Not open for further replies.