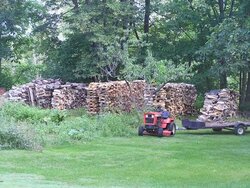
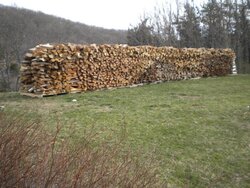
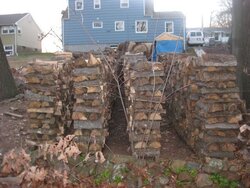
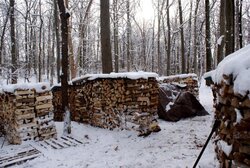
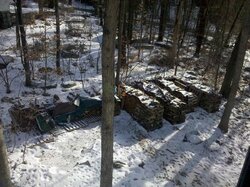
Stacking with no end posts aka= show me your stack!

  • Active since 1995, Hearth.com is THE place on the internet for free information and advice about wood stoves, pellet stoves and other energy saving equipment.

    We strive to provide opinions, articles, discussions and history related to Hearth Products and in a more general sense, energy issues.

    We promote the EFFICIENT, RESPONSIBLE, CLEAN and SAFE use of all fuels, whether renewable or fossil.
Status
Not open for further replies.
LLigetfa said:
I sometimes use squared off splits for the end cribbing but most often use half rounds. Don't use quarters!
LLigetfa, Nice stacks and nice wood shed! I wish I could cut uniform, smallish, straight stuff like that, but I have to cut wherever I can and often it is not in mature timber where trees grow straight and tall without any limbs, like the stuff I see in your pics. So my splits are seldom that straight and uniform. Oh well, its all BTUs I guess. I just love neat stacks and it is tougher to get them with the kind of wood I usually have to cut.
 
He gets log form so they are a little more uniform I think. With scrounging I get some really knarley stuff sometimes. Once in a while I get some great stuff but it helps to have straight stuff definitely! Here is some of my messes... Obviously the lighter colors were later and better wood for stacking...
 

Attachments

  • 9-1-10.jpg
    9-1-10.jpg
    79.4 KB · Views: 716
mywaynow said:
The stack closest is the only stack that I used the wood end post to support the ends.

I go 10' high with your no post leaned in method and have never had the ends fail. It is stacked on asphalt and concrete though, I wonder how much ground heave contributes to toppling.
 
LLigetfa said:
I sometimes use squared off splits for the end cribbing but most often use half rounds. Don't use quarters!

It took me about 2/3 of the end stack to figure out how nicely half rounds worked. Trying to get splits that are the same hieght and straight is tough. It is much easier to gauge half rounds for similar size too.
 
I stack that way and hate it. This year when I start stacking I have to figure out an easier way. :lol: I try to use squares or rectangles and have my best luck using those. When I'm stacking I just toss the best looking pieces into a separate pile and use those for the ends. As others have said if you stack from the middle out it doesn't put too much pressure on the ends.

Spring 2010

P3140036.jpg
 
SolarAndWood said:
mywaynow said:
The stack closest is the only stack that I used the wood end post to support the ends.

I go 10' high with your no post leaned in method and have never had the ends fail. It is stacked on asphalt and concrete though, I wonder how much ground heave contributes to toppling.

Ground heave can and does have a big effect on the wood stacks. One more reason why I limit the height of the stacks. I hate re-stacking.


rdust, those are some great looking piles of wood.
 
mywaynow said:
My pics and description are not clear, based on the comments. The stack closest is the only stack that I used the wood end post to support the ends. The other 6 stacks have the metal post, which I don't want to use if possible. Frozen ground and overall appearance has me trying this other method. The only other support on the new stack is the stone I rolled up to the downhill side of the stack. There is no stack that uses both methods of end support. The stck is on galvanized pipe and treated lumber to elevate it. The pitch is 1/15 at worst so I figured it may help steady the stack if sliding was an issue.

OH - I see now. Well the one with the stone looks nicely cribbed and stable to me.

You said downhill side of the stack and pitch 1/15, maybe this is an issue. All of my stacks are on level ground. If the ground is not level, maybe this could cause the stack to pressure the downhill side and it may need a brace rather then a cribbed end?

I wouldn't get concerned about appearance using posts..... looks fine and works.

My stacks are on level ground, on pallets - 2 rows of 16 inch splits with uglies and shorts inbetween. Ends are cribbed and I stack it high. Never had one fall and it seasons just fine this way. My side yard gets full sun and lots of wind on the hill.
 

Attachments

  • woodhouse_011.jpg
    woodhouse_011.jpg
    123.2 KB · Views: 605
I am in NJ too. Can you get a truck right up to your stacks? If so, what is your address?? :-/
 
basswidow said:
mywaynow said:
My pics and description are not clear, based on the comments. The stack closest is the only stack that I used the wood end post to support the ends. The other 6 stacks have the metal post, which I don't want to use if possible. Frozen ground and overall appearance has me trying this other method. The only other support on the new stack is the stone I rolled up to the downhill side of the stack. There is no stack that uses both methods of end support. The stck is on galvanized pipe and treated lumber to elevate it. The pitch is 1/15 at worst so I figured it may help steady the stack if sliding was an issue.

OH - I see now. Well the one with the stone looks nicely cribbed and stable to me.

You said downhill side of the stack and pitch 1/15, maybe this is an issue. All of my stacks are on level ground. If the ground is not level, maybe this could cause the stack to pressure the downhill side and it may need a brace rather then a cribbed end?

I wouldn't get concerned about appearance using posts..... looks fine and works.

My stacks are on level ground, on pallets - 2 rows of 16 inch splits with uglies and shorts inbetween. Ends are cribbed and I stack it high. Never had one fall and it seasons just fine this way. My side yard gets full sun and lots of wind on the hill.
my ground is definately not level. i stack goin up hill all the time. havent had a problem yet. hard to see in this pic but it goes up about the middle of the stack
 

Attachments

  • 4.jpg
    4.jpg
    62.9 KB · Views: 592
Here's mine

57912_1315655986434_1681757389_606787_7311949_n.jpg


57912_1315656066436_1681757389_606788_4181126_n.jpg


33647_1335939533510_1681757389_645263_5744964_n.jpg


Billy
 
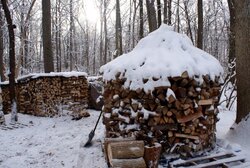
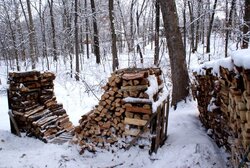
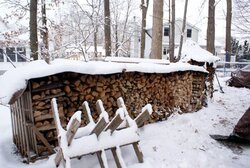
This morning we had some fresh snow, real peaceful looking so I grabbed the camara and took a couple shots of my Stacks to show a few different things...

The first gives a view of the cross stacked ends with no bracing. Stacked on pallets (40" wide, 4' long) I do 2 rows and fill the middle with shorties and uglies. If I have a long row, at times I will cross stack in the middle...usually because thats about the cut off point for the wood I'm stacking at the time.

The second photo shows a Holz Hausen .... a different approach to stacking

The third picture is a work in progress but here I am using an old pallet braced on the end of the rows. I through together a couple of these last year with the idea that it would provide a real stable end to the stacks (mostly cause I was bored and wanted to build something). They do help but with a good cross stack really are not needed.

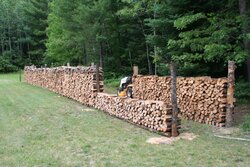
The last picture shows a few things... another stack with a pallet braced end... stack covered with metal which came from an above the ground pool that a friend and I took down - works real nice to cover my pallet wide stacks .... and it also shows my saw buck that I banged together with scrap lumber a couple years ago.
 

Attachments

  • DSC04261w.jpg
    DSC04261w.jpg
    76.1 KB · Views: 542
  • DSC04262w.jpg
    DSC04262w.jpg
    68.9 KB · Views: 524
  • DSC04268w.jpg
    DSC04268w.jpg
    79.9 KB · Views: 517
  • DSC04271w.jpg
    DSC04271w.jpg
    63.2 KB · Views: 526
Got Wood said:
The third picture is a work in progress...
I tend not to build the ends first as filling in between them could put pressure against them. If you stack as much of the middle first so that it stands on its own, the cribbed ends don't see as much force.

I tend to set aside crib candidates when I'm stacking the middle as I never have enough select crib pieces at the start to do them first.
 
LLigetfa said:
Got Wood said:
The third picture is a work in progress...
I tend not to build the ends first as filling in between them could put pressure against them. If you stack as much of the middle first so that it stands on its own, the cribbed ends don't see as much force.

I tend to set aside crib candidates when I'm stacking the middle as I never have enough select crib pieces at the start to do them first.

I agree, usually I do as you do. In this case, the left side is being used now and the right side is new splits that will sit there for a few years before meeting the fire. With the pallet bracing I'm not concerned about the stack tipping over.
 
I stick posts in the ground, oak, popple, pine, whatever, then stack between. They last several years.
No need for the cross stacking at the ends. Works for me. YMMV
 

Attachments

  • IMG_3298resize.jpeg
    IMG_3298resize.jpeg
    103.2 KB · Views: 612
PapaDave said:
I stick posts in the ground

I want to see the picture of you on a 10 ft step ladder driving those posts in with a big ole sledge
 
SolarAndWood said:
PapaDave said:
I stick posts in the ground

I want to see the picture of you on a 10 ft step ladder driving those posts in with a big ole sledge
My farmer neighbor has an 3PT attachment that drives fenceposts but in the case of PD, there are clues that he used an auger.
 
SolarAndWood said:
PapaDave said:
I stick posts in the ground

I want to see the picture of you on a 10 ft step ladder driving those posts in with a big ole sledge

That'd be a hoot! It's much easier to use a post hole digger (manual labor kind) though, so that's what i did.
I can have a hole dug in less than 5 minutes.
 
Ok, here's my first 4'+ stack. A touch bit over half a cord there. I haven't had any formal training on stacking (such as that received from The University of Experience). What I did was build a short crib at the ends and then pile wood in the middle...when the pile started nearing the height of the short crib I'd add a couple more layers to the crib and then continue piling in the middle. As the crib got higher I gradually "leaned" it into the stack. Anyhow, it hasn't fallen...but it hasn't been 24 hours yet, either! :lol:

http://i111.photobucket.com/albums/n153/intheswamp00/FW010611CTurner_20110108_7647Medium.jpg
 
PapaDave said:
I stick posts in the ground, oak, popple, pine, whatever, then stack between. They last several years.
No need for the cross stacking at the ends. Works for me. YMMV
That is a pretty good idea. It doesn't look out of place either, like steel fence posts. I look at and admire my stacks all year and hate dismantling them to burn, so I like them to look good too and the log/post ends I think I could get used to. Sure would be easier than stacking ends. Thanks PapaDave.
 
Here are my stacks, its all free standing, nothing fancy, i find it takes way longer to stack this way though. Havent had any fall over yet, only stacked 4 feet high.
 

Attachments

  • IMG_20110109_110157.jpg
    IMG_20110109_110157.jpg
    235.7 KB · Views: 505
man oh man just when I think I have my shi- together then I look at these pics and realize I dont have enough stacked or cut and sure aint as pretty LOL
 
I am mostly embarrased to show my stacks in comparison to these.
 
mayhem said:
Make your ends two split lengths thick, not just one and you'll be fine.

Excellent tip.
 
jcjohnston said:
man oh man just when I think I have my shi- together then I look at these pics and realize I dont have enough stacked or cut and sure aint as pretty LOL

Depends on your needs. How much do you burn?
Doesn't have to pretty, as long as you get it c/s/s. I prefer function over form, especially for expendables. Mine are only somewhat straight because I HATE redoing things, and don't want them falling over.
Couple years ago, my stacks were 6' tall, but I've since reduced that to 5' (because they were leaning precariously to the south), and added another section lengthwise to make up for it.
 
Status
Not open for further replies.