Thoughts on first overnight burn in newly installed Princess insert

  • Active since 1995, Hearth.com is THE place on the internet for free information and advice about wood stoves, pellet stoves and other energy saving equipment.

    We strive to provide opinions, articles, discussions and history related to Hearth Products and in a more general sense, energy issues.

    We promote the EFFICIENT, RESPONSIBLE, CLEAN and SAFE use of all fuels, whether renewable or fossil.

Wildbilljp

Member
Nov 30, 2018
68
Ky
OK, you can kick this over to the big BK performance thread if needed. I just thought that people still trying to make a decision on which insert to spend their money on and whether to do a DIY install might find my experience helpful.
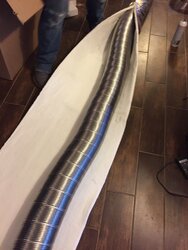
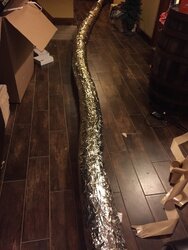
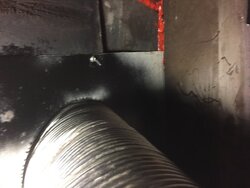
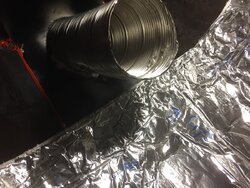
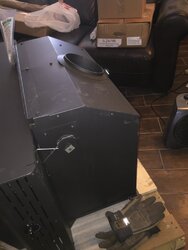
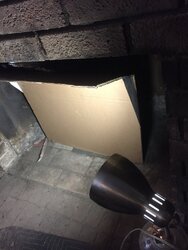
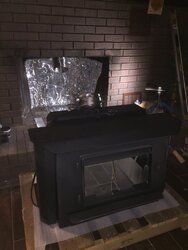
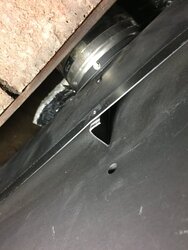
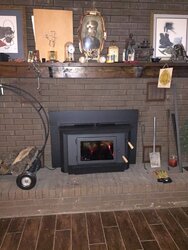
Install PI29 Princess insert: So, did the install myself, NOT EASY, scale of 1-10 I,d give it a 10 +--- tough, dirty job. Hours for install = 20 not counting the cleanup still ongoing--My son helped me 15 of those 20 hours.

First overnight fire 2/2/19 - 6:00 PM - Instruction manual in hand we started with a good pile, enough to fill 3 gallon bucket of kindlin'. Followed the manual exactly, you do the reading as I'm not repeating the steps here.
After getting good bed of coals, loaded 3 oak, 2 biobricks and started the first burn at 6:00.

Smell - was pretty bad, had a slight headache for a little bit wife came home and opened doors and the smell outside was worse than inside. I think it was the spray adhesive used on the liner insulation. After about three hours smell was not too bad inside house so yea, be ready for that.

11:30 PM - Banked in about 1/3 load for overnight - 3 oak, 2 larger ash, 2 bio-bricks. Stayed up until 2:30 AM just watching and slowly adjusting the thermometer down. Ended up on 2 notches above low - fan set the same.
Went to bed - Got up next morning at 9:30 and cat still active with half the wood still to be burned - door glass just slightly darkened on edges .
Turned the thermostat up one notch and fire responded immediately from glow to slight flames
11:25 AM same day - cat still active - Princess still cranking out heat and I anticipate having to add fuel around 1-2 PM this afternoon.
Yep, to say I'm satisfied is understatement.
 
Nice, how long is your liner?
 
  • Like
Reactions: Wildbilljp
35 man hours is a lot for an insert install. Just to avoid scaring people off, the functional parts of the install are dead simple (drop a liner down the chimney, push the insert in, hook 'em up).

The devil is of course in the details. You have to clean the flue. Dropping the liner might be a 10 minute thing or a nightmare, depending on clearances and obstructions (having 2 guys is a huge asset). You need a way to move the stove across the floor, and protection for the hearth when you scoot the insert in. You need to do some assembly on the insert. You may need to drop an outlet for the blower. You need to fabricate a blockoff plate and maybe fireplace insulation. You need to level the insert.

And then getting the surround to fit neatly- possibly with a vertical heat shield jammed behind it- can be its own highly annoying project.

Don't be intimidated by all that though- you may need to do it yourself.

I paid around $1000 labor for a crew from my fireplace store to come in and do a pro install, because my wife insisted on it.

I had to pull it all out and redo it myself after I did some reading. What a waste!

As for my pro install crew and fireplace shop, they know that insulated liners 'cause problems' and are not needed, because they never use them and that works fine. They know that blockoff plates are not needed because they never install them and that works fine. And why ever would you insulate a fireplace?? So a crew that installs stoves all day long may know very little about wood burning.

I know there are some good ones out there- pro installers who really get it because they heat with wood and are wood geeks themselves- because we have them here on the forum. Don't read this as "all pros are bad", because they're not- but find out which kind you are getting and exactly what the scope of the work is before you pay.
 
  • Like
Reactions: Wildbilljp
Not 35 hours, guess the way I said it was wrong. I said 20 hours for the install. To clarify - OF the 20 hours I had my son helping 15 of those hours.
Didn't mean to scare people away from a DIY install. Just stating my experience. Thank you.....
 
  • Like
Reactions: Tar12
Glad to hear you had success. Definitely well earned. Cheers!
 
  • Like
Reactions: Wildbilljp
My question is where are the pictures? :)
 
  • Like
Reactions: Wildbilljp
My question is where are the pictures? :)
OK, here is what I managed to get. Did not try to take pics while on roof due to safety concerns not to mention fingertips throbbing.
You know, stopping to take pics is hard when you're filthy dirty and trying to get things done.
 

Attachments

  • 1wraping blanket.JPG
    1wraping blanket.JPG
    103.4 KB · Views: 218
  • 2liner with insulation.JPG
    2liner with insulation.JPG
    120.4 KB · Views: 228
  • 3Building Block off plate.JPG
    3Building Block off plate.JPG
    108 KB · Views: 213
  • 4second view of block off plate.JPG
    4second view of block off plate.JPG
    218.8 KB · Views: 215
  • 30 degree angle on back of insert.JPG
    30 degree angle on back of insert.JPG
    73.8 KB · Views: 230
  • mock-up of insert height and angle.JPG
    mock-up of insert height and angle.JPG
    99.1 KB · Views: 225
  • 5Ready to lift and connect.JPG
    5Ready to lift and connect.JPG
    84.5 KB · Views: 223
  • 6liner connection.JPG
    6liner connection.JPG
    109.3 KB · Views: 235
  • Done.JPG
    Done.JPG
    139.7 KB · Views: 221
Very nice! You are really going to enjoy this for years to come!
 
  • Like
Reactions: Wildbilljp
Did you wrap the liner in SS mesh after it was insulated, Or SS wire?
 
  • Like
Reactions: Wildbilljp
  • Like
Reactions: webby3650
Looks beautiful. That little insert is a great heater. You can use it all spring and all fall too- no shoulder season heating bills or open windows because the house is too hot.
I have found this "little insert" is like a new hobby... I can't quit bragging about it and look forward to seeing how it effects my next electric bill.
 
I have found this "little insert" is like a new hobby... I can't quit bragging about it and look forward to seeing how it effects my next electric bill.

Mine kept the house at 70 a couple days ago when it was 5 degrees, and today when it was 55. It's a great choice for all-year heat.

FYI, that little chunk of stovetop in front of the convection deck is big enough to hold a TEGfan!

Also, the top ledge of the convection deck runs between 100°-300° when the stove is cranking and the fan is running. You can use your IR thermometer to identify the spot that is the perfect spot to keep your tea/coffee/hot chocolate at your preferred temp!
 
  • Like
Reactions: Wildbilljp