Pellet Vent parts not twist locking/getting stuck

  • Active since 1995, Hearth.com is THE place on the internet for free information and advice about wood stoves, pellet stoves and other energy saving equipment.

    We strive to provide opinions, articles, discussions and history related to Hearth Products and in a more general sense, energy issues.

    We promote the EFFICIENT, RESPONSIBLE, CLEAN and SAFE use of all fuels, whether renewable or fossil.

TeamCav

New Member
Jan 19, 2023
6
NY
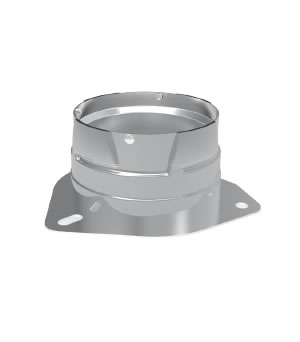
Hello. I'm currently working on a new pellet stove installation in my home. I was test fitting some parts from Duravent's Pellet Vent line (not pro, the normal less expensive type with rope gaskets). Some of the parts slip nicely onto the others and twist lock smoothly. Some don't. They slip on much harder and I cant get them to twist reasonable force. Should the parts twist easy or are they supposed to be so tight they need strap wrench? Just seems like that kind of force might damage the pipe. For details, I'm running 4" double wall pellet vent into a masonry chimney that I'm relining. I noticed the adjustable 12" sections and appliance adapter T (3" to 4") have male ends that seem to be causing the problems. If I hook the 90° elbow to male end of the non-adjustable 12" and 24" sections, it's a smooth connection with an effortless twist. If I take the same 90° elbow, the same 12" non adjustable and try to put it on the male ends of my two adjustable 12" sections, they need to be pushed hard and the connecting female ends cant be twisted on. Putting the elbow and straight non-adjustable sections on the cleanout T seem to yield the same kind of stuck results as the adjustable sections. Either I'm doing this wrong or the big box duravent brand has tolerance quality issues. I've been putting this project together for months and its taken a long time to source the materials due to supply shortages and balooning material costs. Sending the pipes back to switch product lines would stink pretty bad right now. I do know all about the Duravent Pro line and all the pros. I just don't know how they feel when working with it compared to this big box Duravent line I'm using. I can't find a real answer on this and Duratech tech support is not as fast as this forum! People are busy and I understand that. Could anyone help with advice? Thanks in advance.
 
Best advice would be take that pipe back and get the Pellet vent Pro. You will be chasing leaks. It is worth the extra money. If you stick with the cheaper stuff be sure to fill the cavity with silicone before assembling pipe. then put it together. If you dont it will leak guaranteed. Then be sure tpo have it set up to be able to clean without disassembly, because once seled to gether it will not come apart.
 
  • Like
Reactions: gfreek
Best advice would be take that pipe back and get the Pellet vent Pro. You will be chasing leaks. It is worth the extra money. If you stick with the cheaper stuff be sure to fill the cavity with silicone before assembling pipe. then put it together. If you dont it will leak guaranteed. Then be sure tpo have it set up to be able to clean without disassembly, because once seled to gether it will not come apart.
Thank you. I slept on it, and your response helped. It's just not worth the hazard installing a system that everyone keeps saying will leak without so much doctoring. Returning it all and then probably buying the pro line.
 
  • Like
Reactions: gfreek
Thank you. I slept on it, and your response helped. It's just not worth the hazard installing a system that everyone keeps saying will leak without so much doctoring. Returning it all and then probably buying the pro line.
I have the pro that runs through my ceiling and roof and have been very happy with it. I think you're making the right choice.
 
  • Like
Reactions: TeamCav
Thank you. I slept on it, and your response helped. It's just not worth the hazard installing a system that everyone keeps saying will leak without so much doctoring. Returning it all and then probably buying the pro line.
You will not regret that decision. What brand of stove are you installing? Depending on your hook up on the tail piece of the stove, you will need to fill the gap on the appliance adapter if your stainless inner liner slips over the tail piece of the stove. Basically filling the gap between the stainless and galvanized jacket. If you have a Harman the stainless goes inside the tail piece and the outer galvanized goes over the tail piece making a sandwich. Gap gets silicone and seals nicely.
 
You will not regret that decision. What brand of stove are you installing? Depending on your hook up on the tail piece of the stove, you will need to fill the gap on the appliance adapter if your stainless inner liner slips over the tail piece of the stove. Basically filling the gap between the stainless and galvanized jacket. If you have a Harman the stainless goes inside the tail piece and the outer galvanized goes over the tail piece making a sandwich. Gap gets silicone and seals nicely.


This also works very well if you have a Harman. They offer a long version as well.
 

This also works very well if you have a Harman. They offer a long version as well.
Man that is sweet! Didnt knew such a thing existed
 
  • Like
Reactions: Shank
I was pretty excited when I came across it in my searches. It bolted right up and works great.
That is awesome. I just took a screen shot of this and sent it to the guy that owns the stove shop I work for. With that adapter you have a sealed vent system with zero silicone required. Harman tail piece is not known to leak, but this adapter just makes it that much easier and cleaner of a set up.
 
  • Like
Reactions: Shank
You will not regret that decision. What brand of stove are you installing? Depending on your hook up on the tail piece of the stove, you will need to fill the gap on the appliance adapter if your stainless inner liner slips over the tail piece of the stove. Basically filling the gap between the stainless and galvanized jacket. If you have a Harman the stainless goes inside the tail piece and the outer galvanized goes over the tail piece making a sandwich. Gap gets silicone and seals nicely.

You will not regret that decision. What brand of stove are you installing? Depending on your hook up on the tail piece of the stove, you will need to fill the gap on the appliance adapter if your stainless inner liner slips over the tail piece of the stove. Basically filling the gap between the stainless and galvanized jacket. If you have a Harman the stainless goes inside the tail piece and the outer galvanized goes over the tail piece making a sandwich. Gap gets silicone and seals nicely.
I have a comfortbilt HP22N with the 80 lb. hopper. The appliance adapter slips tight over the take off. I think Comfortbilt was the company that suggested a screw on take off in addition to silicone. Duravent did not. I'll probably put one on though after I buy better parts. I also saw someone using high temp silicone tape on the clean out in a thread from this forum. I think I'm sticking with the plan to put the duravent coupler after the chimney liner's clean out "T" and then putting a straight double wall piece to that coming out of the wall through a thimble. Its all solid concrete masonry and about a 13" depth to the chimney cavity from the basement wall which is concrete. I need to clean up the mortar you see in the photo. I know duravent sells this fancier wall thimble than the basic pass through one I purchased from them (not pictured). But it looks like in order to use that one, I would have to cut off some extra chimney liner and connect an exact measurement of that from the liner's clean out T to the wall thimble. I'm not sure if that's optimal. Reinstalling a newer double gang outlet and its on an isolated breaker now. Need to tear out all the old phone wires next to it. The stove is 15" away from the wall.

20230123_123936.jpg
 
  • Like
Reactions: rickwai