Chimney liner install pricing

  • Active since 1995, Hearth.com is THE place on the internet for free information and advice about wood stoves, pellet stoves and other energy saving equipment.

    We strive to provide opinions, articles, discussions and history related to Hearth Products and in a more general sense, energy issues.

    We promote the EFFICIENT, RESPONSIBLE, CLEAN and SAFE use of all fuels, whether renewable or fossil.
Status
Not open for further replies.
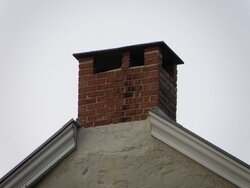
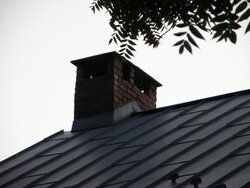
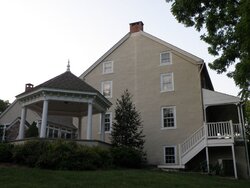
Got some photos of the inside of the fireplace and the flue tonight, as well as the outside. Not the ones from the inspector (should get them later in the week), but just some I snapped myself while I'm waiting for the inspector's report.

Exterior views. Height from ground to top of chimney is over 45 feet.
P6200033.JPG P6200038.JPG P6200049.JPG

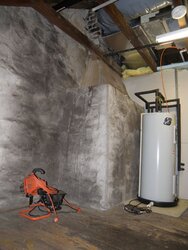
My best attempt to photograph what's happening in the attic. The stack first steps from approximately 8' x 6' to 6' x 4', and then eventually tapers up to the brick stack of 5' x 3'. This is where all of the wood is supposedly inside the flue:
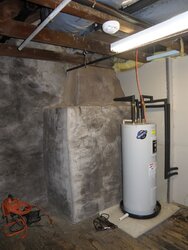
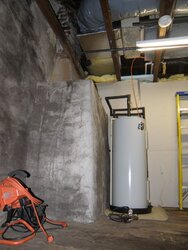
P6200003.JPG P6200008.JPG P6200012.JPG

The exterior of the fireplace, after removing the old gas insert. Opening has been framed and tiled in for the gas insert, but will be 56" wide x 62" high after removing the new work.
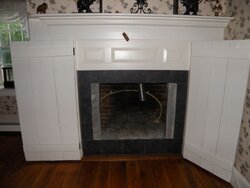
P6200080.JPG

Brick (old firebrick?) visible inside is not original, but some later addition, and only extends up inside the firebox to a height of about 72". Here's a view looking up from the fireplace opening. Sheet metal stud in top of photo is part of the surround for the gas insert, as with the 4" aluminum liner, both coming out soon.
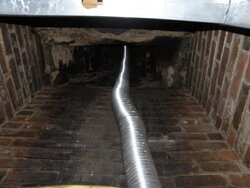
P6200084.JPG

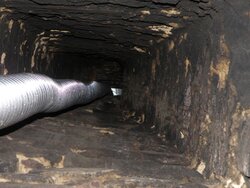
Looking up inside the chimney, can see not exactly a straight shot, which is nothing unusual for old chimneys. What the photo doesn't show is that there appear to be several small caverns off either side of the chimney as you go up. Some are probably thimbles at the second floor level, but others appear to be much larger than thimbles, and not at the right height for any particular floor.
P6200061.JPG

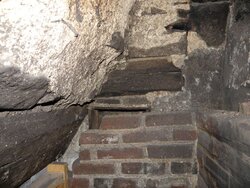
A very interesting shot standing up inside the fireplace (actually standing on top of a cinder block inside the fireplace), facing the left interior wall of the fireplace. The newer 2x4's in the extreme lower left are part of the surround from the gas insert, and the heavy wood lintel hewn at 45° can be seen above that on the lower left. You can see where the brick liner stops right at my eye level, 72" off the floor. More interesting is the 12" square wood box inset into the wall of the fireplace, peaking out just above the top course of firebrick, as well as the heavy wood timber just above that, supporting the stonework above. There's no shortage of wood inside these old fireplaces.
P6200067.JPG

More in another post... above the photo quota.
 
Thanks. I'll suggest this as an option to the installer. Why go small when your tall? Seems to me draft potential is a function of height, so going smaller might cut draft volume a little, but increase flue velocity a whole lot. Then again, maybe that's the goal...

Thanks!
 
Stove manufacturers typically specify a certain diameter flue for a particular stove. They also state that increasing the flue size beyond that diameter will reduce draft, not increase it. I would infer that reducing flue size beyond that diameter will begin to choke off air supply to the stove, even though it may produce a great draft.
 
The suggestion is based on the experience that folks have had dealing with too strong draft in very tall flues. Dropping down a little in size is effective.

Reading the stove installation requirements, one will see that many mfgs. state the chimney should be less than XX ft tall for this reason. A common cutoff point is 33ft.
 
!! Wow Look at that chinmey!! No wonder house fires were a common place back then!!! Why wood, why not cut stone or metal? Yea i would at least have a Pro consult even if i chose to do the liner install myself.
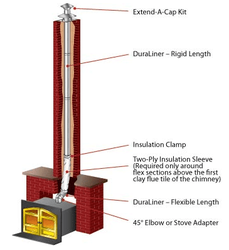
I still think there has to be an insulated liner rated to go through that stuff.
 
Doesn't have to be. They make it in rigid and flex, oval too. It's a nice, complete system.
 
The suggestion is based on the experience that folks have had dealing with too strong draft in very tall flues. Dropping down a little in size is effective.

Reading the stove installation requirements, one will see that many mfgs. state the chimney should be less than XX ft tall for this reason. A common cutoff point is 33ft.

Good to know. My chimney is 45' off the ground, but the height up from the stove is likely under 30 feet, since the stove itself is about 10' off the outside ground. I'll know the exact length when I finally pull that 4" liner out (seen in the photos), but my eyeball tells me roughly 26 feet of liner will be needed. That may put me back into 6"?
 
Yes, for sure if it's 26ft instead of 40ft, stick with 6". Sounds like the mention of a 40ft flue was a red herring.
 
Spoke with Megan in tech support at Duraliner, and they do not make any zero-clearance liners for use with wood. They do have liners rated for zero clearance with other fuels, but when used with wood there are minimum clearances. What they do have, though, is a pour-in liner product called Thermix. Basic process is to install a Ventinox flexible liner system, and then pour Thermix around it. They can go as thin as 1" around the liner to combustables in a setup like mine.
 
Follow-up...

The inspector came up with a plan. He now states the area where the wood timbers are placed inside the chimney (2.5 stories above the firebox, so hard to see), has a cross section close to 12" x 12". He had previously stated 9" x 9", but I always believed that number was low. Here's his plan:

1. Remove cap and crown from chimney.
2. Install 8" liner from top of firebox to top of chimney (approx. 25 feet).
3. Pour Duravent Thermix around 8" liner, while keeping it centered as best as possible between wood components.
4. Install insulated 6" liner inside 8" liner.

The chimney does make a bit of a jog in the area of the wood timbers, so I am a little concerned about anyone's ability to keep things centered away from the wood timbers in that area. Worst case would be having the 8" flue up against the wood in the area where the chimney jogs, and then have the 6" tube pressed up tight against that, compressing the insulation in the area of the jog. I guess we won't be able to really see how big a concern that is until we get the old cap off and can really get a good look down from the top. My 40' ladder falls almost 10' short of making the chimney top, so it's too high to get to without multiple ladders or scaffolding.

Any words of wisdom? Thinking this wood stove is going to be more expensive than the oil it's aimed at replacing, but there's more to having a stove than pure economics.
 
From Duraliner site:

Clearances for Duraflex:
0” clearance for gas, oil, and pellet
applications. 1” clearance to masonry for
wood-burning applications. Insulation is
required for 0” clearance to masonry for
wood-burning.
 
Did you ever call the supaflu guys in your area? Watch the video on their website you will see they are able to put spacers in the balloon to keep clearances in check the whole way down before pouring the mix. If it was me I would feel safer going that route, not to mention it would probably help seal the wood so it would last longer.

Link to video: http://www.supaflu.com/photo_video/photo_video.htm
 
No. I think it's time to do it, though. The more I think about this guy's solution, the more problems I have with it.

Thanks!

edit: Just contacted them. Waiting on a reply.
 
I had my chimney rebuilt last Summer and went the Supaflu route. After they busted out the 7x10" ID tiles it left a huge gap of about 12x16" between the brick. Instead of using a 6" bladder and pouring supaflue around that big gap they used a 10" bladder and poured a mix of concrete, supaflue and chunks of each as fillers (much cheaper than all supaflu). After a couple days they removed the 10" and inserted a 6" bladder and poured pure supaflue around it. They use metal springs wrapped around the bladder to keep it centered in the chimney and when they pull out the bladder the springs stay put. I think it really strengthened my chimney structure and draft is great.
 
Just got the price quote for the liner inside a liner proposal outlined above. $9000

Ouch!
 
Wow, that's pricey! I had the whole top 1/3 of my chimney rebuilt and a 20' supaflue poured for $4000.
 
If I could get the top of my chimney rebuild at a reasonable cost, I'd do it, and get that damn wood out of there. Unfortunately, the two ROM estimates I received for that were both over $20,000.
 
At those prices id have to say id look at other options with a class A chimney and an external run of the chimney.
 
No reply from Supaflu. I'll have to call them today.

Not sure a class A would be that much easier. I have to get thru 2 feet of stone to get to the outside, no matter where I put that. Also, with the exception of this one wall, the rest of the house is surrounded by a large porch, which would complicate the class A a bit.
I think a jack hammer from both sides running a pipe through it and grouting around it on each side would be way cheaper, but i really dont know, just my thoughts?
 
Status
Not open for further replies.